Rev. 06/03
D
ip S
w
itc
h
Se
tu
p &
W
ar
ra
nt
y
Tr
Warranty
Dickson warrants that the products it sells will be free from defects in material and workmanship under
normal use and service for a period of twelve months after delivery. In the event of a claim under this
warranty, the product or part must be returned to the factory for repair or replacement (shipping pre-paid)
with a Return Authorization Number (see Return Information above). It will be repaired at Dickson’s option
without charge. This warranty DOES NOT cover routine calibration, pen, chart and battery replacement. The
foregoing warranty and remedy are exclusive and in lieu of all other warranties either expressed or implied.
Dickson shall not be liable for consequential or incidental damages resulting from failure or malfunction of
its products. Dickson makes no warranty for products not manufactured by it or for any products modified by
buyer, or subject to misuse or neglect.
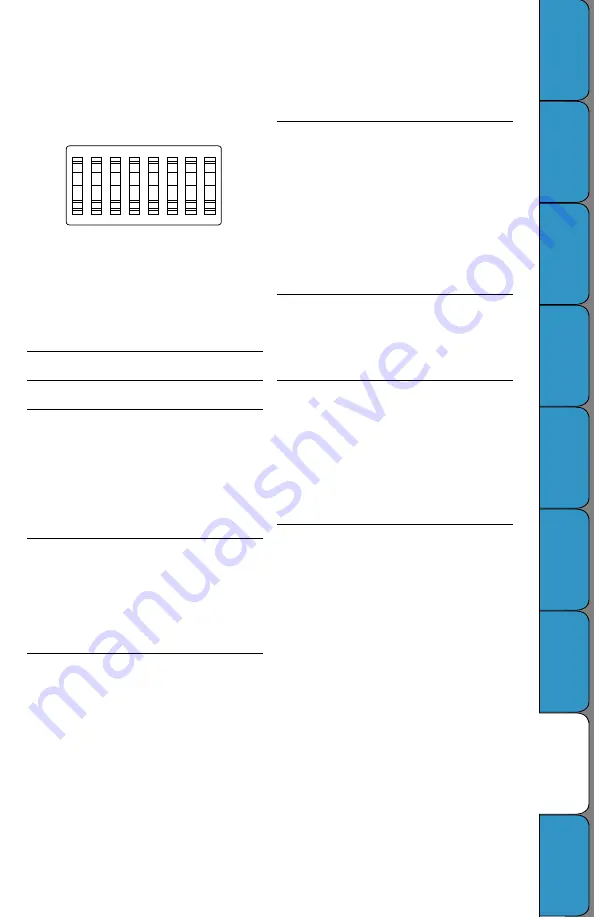
Dip Switch Setup
To set-up the THDx for your specific application, you
might need to change some of the Dip Switches.
Every time you change a dip switch setting, you must
push the up arrow key on the keypad to activate the
new dip switch settings.
Recording Time
The THDx has four different recording time options:
1 day, 7 day, 14 day and 31 day. Dip Switch #1 and
#2 control the recording time.
7 day
#1 off
#2 off
1 day
#1 off
#2 on
14 day
#1 on
#2 off
31 day
#1 on
#2 on
NOTE: Remember to install correct chart to match
corresponding switch setting.
°F/C
You can record in °F or °C with the THDx by using
dip switch #3.
°F
#3 off
°C
#3 on
Temperature Range
The THDx will record in two temperature ranges.
Dip switch #4 allows you to select the temperature
range.
Wide Range
-20 to +120°F (-20 to +50°C) #4 off
Narrow Range
+40 to +110°F (+5 to +40°C) #4 on
RH/Dew Point
Dip switch #5 allows you to select whether RH or
dew point is recorded by the blue pen. (The red pen
always records temperature.)
RH
#5 off
Dew Point
#5 on
NOTE: When the blue pen is recording dew point,
the reading indicates the temperature at which dew
will form, so you should use the temperature scale
on the chart to read dew point.
Display
The THDx has a dual display that shows both
temperature and humidity (or temperature and dew
point if dip switch #5 is on). With dip switch #6 you
can control the position of the variables displayed.
Temperature on top
#6 off
Temperature on bottom
#6 on
Display On/Off
Dip switch #7 will allow you to turn the display on
and off.
Display On
#7 off
Display Off
#7 on
Keypad Lock
For security purposes it is possible to lock the key
pad with the use of dip switch #8. You may want
to lock the keypad to prevent unauthorized persons
from using the keypad to set alarms or change the
calibration. (For more information on use of the
keypad see “Keypad Operations” on pg. 5.)
Keypad Unlocked
#8 off
Keypad Locked
#8 on
1 2 3 4 5 6 7 8
Off
Figure 5


