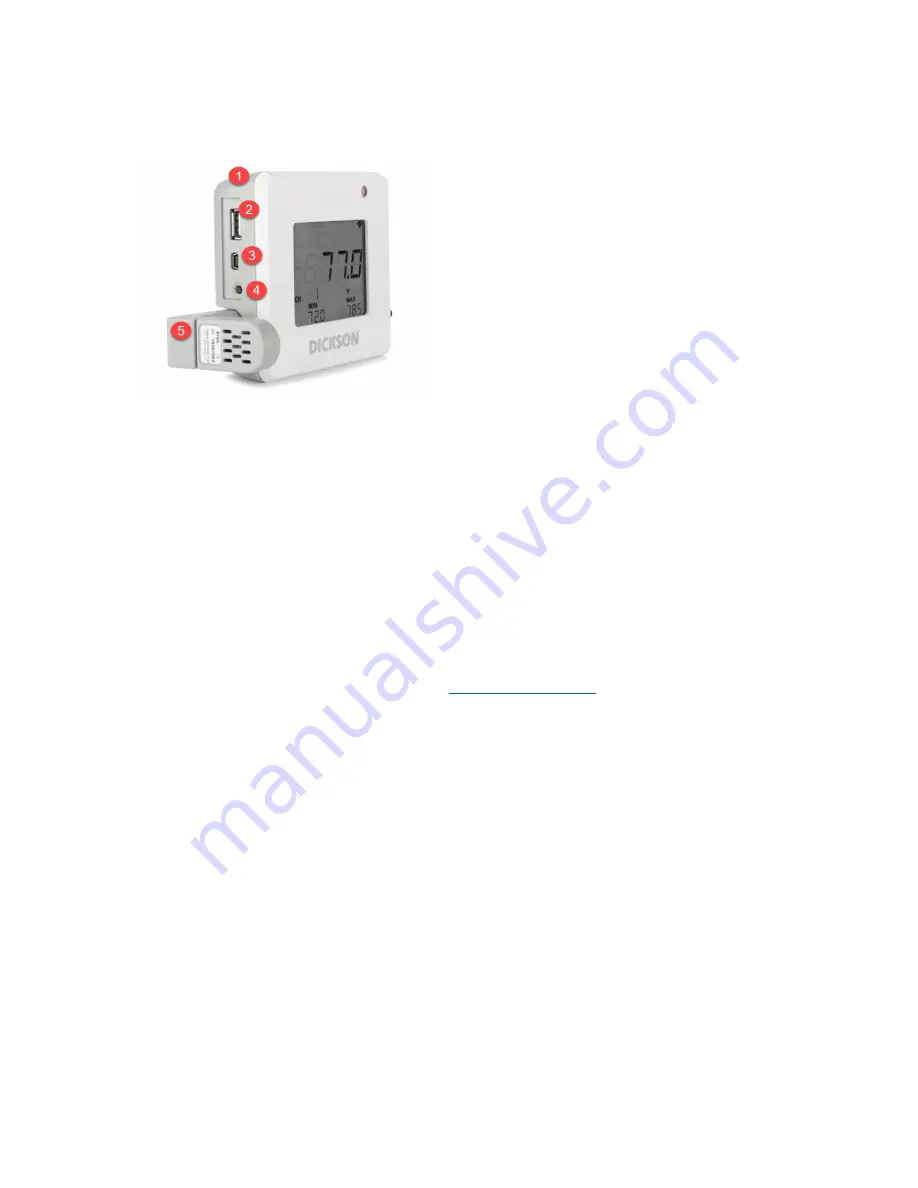
1) Power button
2) USB port (for connecting USB thumb drive to
download data)
3) Mini-USB port (for connecting logger to
computer)
4) Reset button (reset min/max displayed)
5) Replaceable sensor
Getting Started
1.
Plug sensor into slot, pressing firmly until it clicks.
2.
Connect power adapter to logger and plug device into standard 110v power outlet
a.
An adapter for use with different voltages is sold separately.
3.
Press and hold power button for 3 seconds until it powers on, then release. LED will flash green, then
white. “Error 202” will appear at top. Logger sensor readings will display, rotating through the
measurements if more than one environmental condition is being measured.
a.
The Error message is letting you know the Logger is not connected to your network. To connect
to the network and link to DicksonOne, please follow instructions below.
Connect to Your Network - WiFi
1.
Type the following address in your address bar
dicksonone.com/widget
to access the WiFi Configuration
Widget.
a.
Click the Mac OS or Windows button as needed.
b.
A folder may launch; if it does not, click on “Open”. Next, click “Extract all”; finally “Extract”.
2.
After extracting files, double-click the DicksonOne Network Connection Widget. Hit “Run”.
Note: the
widget requires Java to be installed. If you do not currently have Java installed, the widget will prompt you
to download it
3.
Connect the small end of the USB cable to the mini-USB port on the DWE. Locate an open USB port on the
computer and plug the larger end of the USB cable into the port
4.
If you followed steps 1-3 above under “Getting Started”, the widget will recognize your logger after
clicking “Next”.
5.
Be sure to click on the “Switch to WiFi” button. Logger will reboot and Widget will repopulate with Device
Information.
6.
Click “Next” to scan for Wireless networks.
a.
Double-click the network name your device will be connecting to and enter the wireless
password in the ‘Key’ field. Click “Next”
b.
The “Network Settings” page will display, defaulting to “Automatic”. Click “Finish”
7.
A “Success!” confirmation screen will appear after saving network settings.
a.
A 6-digit code will appear on the logger screen. Save this (it links the logger to your DicksonOne


