


Alarm Version FDT003 / BD3000
OVERVIEW
This instruction book is set-up to mirror the logic of the digital module. The features DUAL
TIME, ALARM, CHRONOGRAPH and TIMER are described in the order they appear as in the
module. Therefore almost all setting instructions fall under the OPTIONS section. Each mode
of operation is covered in detail below; however, there are a number of unique innovations
that need to be explained first.
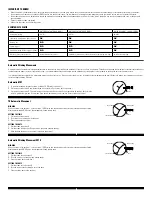
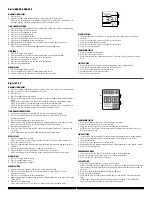
LIGHT-UP EL
The EL (light-up) button is (C). Pressing it once will activate the light-up function of the
display making the display face visible in low-light situations for 3 seconds. Press and hold the EL button for 2 seconds and the AUTO EL function
is turned on, marked by the Auto EL icon. This function enables the EL to be activated with the pressing of any function buttons. To turn this
function off, press and hold the EL button again for 2 seconds.
DUAL TIME
Set two different time zones and move easily between the two by pressing button (A) while in Time mode, alarms switch over accordingly. Under
T2 setting, no 12/24 hour mode adjustment.
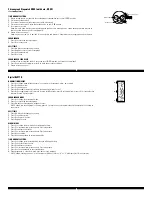
D
E
C
A
B
AUTO EL
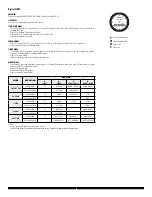
OPTIONS
COUNTDOWN
TIMER
CHRONO
TIME 1,2
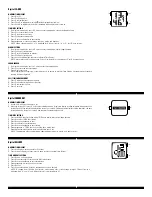
Mode Icon Legend
Hourly chime on
ALARM
mode icon/on
ALARM
Week,1,2
Digital FDT003 / BD3000
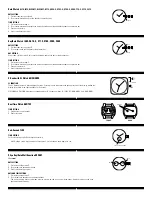
ALARM
Alarm-week
is a daily reminder Monday through Sunday.
Alarms 1 and 2
may be used for one time or as repeat reminders:
One Time Reminder:
To use as a one-time reminder, simply set all the data fields for the specific time, date, & month.
Repeat Daily Reminder:
To use the repeat reminder for the same time every day, simply fill in the time field only, leaving the date, and month field empty (--). The reminder
will repeat at the same time every day.
Repeat Date Reminder:
To use the repeat reminder for the same calendar date every month, simply fill in the date and time fields only, leaving the month field empty (--).
The reminder will repeat on the same calendar date & time every month.
Alarms are automatically turned on after setting. To interrupt any alarm while sounding, press any button.
Alarms on/off:
The Alarm mode can be accessed by repeatedly pressing (B) till the Alarm icon is activated.
1. To confirm an alarms settings press (A) to advance through them.
2. To turn an alarm “on/off,” press (D) while that alarm is displayed, the word “on” will appear.
3. Press (D) again to turn the alarm “off,” and (--) will appear.
CHRONOGRAPH
The smallest measure of time it can measure is 1/100th of a second and the largest is 9 hours, 59 minutes, 59 seconds, and 99 1/100th of a
second. The chrono will keep on timing after this measurement, however the hour counter will reset to “0.” The Chrono mode can be accessed by
repeatedly pressing (B) till the Chrono icon is activated.
START/STOP TIMING
1. To begin timing press (D), the chronograph will begin timing.
2. To stop timing press (D), while the chronograph is stopped you may resume timing by pressing (D) or reset to “0:00:00:00” by pressing (E).
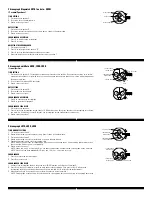
TIMER
This module has a countdown mode with 3 preset times: 3 minutes, 5 minutes, and 10. In addition to the preset timers, there is one FREE space
for the user to set and store a custom timer setting. The timer will measure in increments of 1 second. Set the countdown timer anywhere
between 5 seconds and 9 hours 59 minutes and 59 seconds. Upon reaching “0” the countdown timer will reset and begin counting down again
automatically, keeping track of the number of times it does so with the repeat counter (up to 99 times). Any timer set will continue to countdown
repeatedly for 14-15 hours before stopping and resetting itself.
1. To begin timing press (D), the timer will begin timing.
2. To stop timing press (D), while the timer is stopped you may resume timing by pressing (D) or reset the timer to its start value by pressing (E).
OPTIONS MODE
This module has an additional mode within which all the module settings can be adjusted not unlike a television or VCR. The OPTIONS mode can be
accessed by repeatedly pressing (B) till the Options icon is activated.
1. While in Options mode press (D) to scroll up through the menu and (E) to scroll down through the menu.
2. Press (A) to select the highlighted menu item. This process is repeated throughout the Options menu selections. If at anytime you desire to
return to a previous menu press (B). By pressing and holding (B) for 3 seconds you will exit the Options mode and go directly to TIME mode.
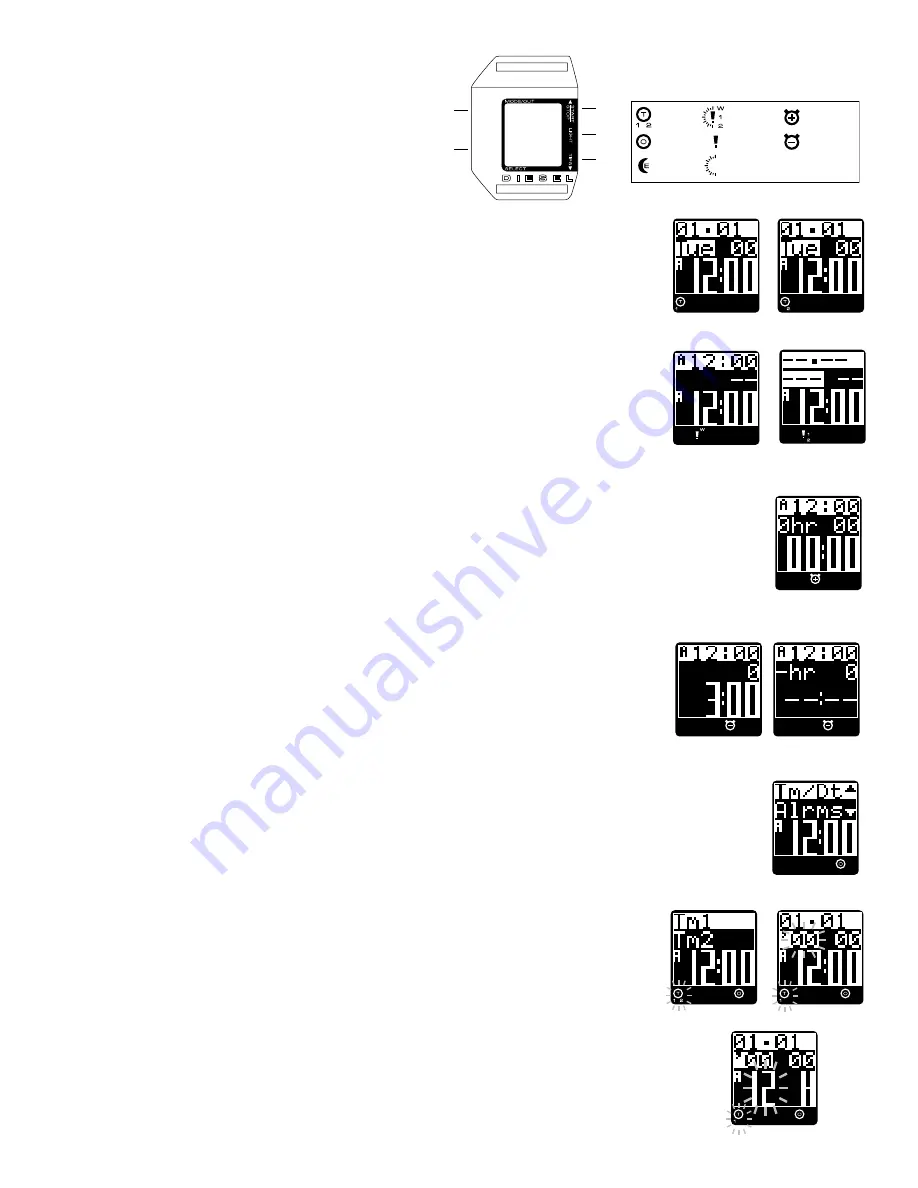
SETTING TIME/DATE
1. Press (B) till Options icon is activated. Press either (D) or (E) till “Tm/Dt” is highlighted, press (A) to select. The Time 1, 2 icons will begin to
flash.
(see Fig. 1)
2. Press (D) or (E) to highlight either Time 1 or 2, “Tm1 or Tm2” and press (A) to select. Either the Time 1, 2 icon will begin to flash depending
on your selection.
3. The Time default view will display with the SECONDS flashing while setting “T1” and begin with minutes flashing while setting “T2”. To reset
the seconds to “00” press (D). Press (A) to select and advance to the MINUTE setting.
4. Pressing (D) will “+” the minute while pressing (E) will “–” the minute. Press (A) to select and advance to the HOUR setting.
5. Pressing (D) will “+” the hour while pressing (E) will “–” the hour. Press (A) to select and advance to the MONTH setting.
6. Pressing (D) will “+” the month while pressing (E) will “–” the month. Press (A) to select and advance to the DATE setting.
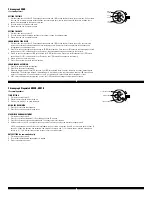
7. Pressing (D) will “+” the date while pressing (E) will “–” the date. Press (A) to select and advance to the YEAR setting.
(see Fig. 2)
8. Pressing (D) will “+” the year while pressing (E) will “–” the year. Press (A) to select and advance to the 12/24 HOUR setting.
9. Press (D) or (E) to highlight either 12 or 24 hour mode, “12H or 24H” and press (A) to select.
(see Fig. 3)
At this point blinking seconds will
appear again on the display and you may go through and change any of the settings again or press (B) to EXIT and return to the “Tm1, Tm2”
menu. Pressing (B) again will take you back to the Options menu.
REMEMBER if you press and hold (B) at anytime during the above operation, any settings you have made will be saved and you will go
back to TIME mode.
~ continued on next page ~
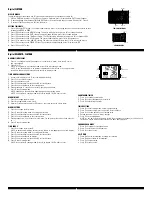
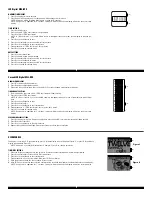
Time 1 display
Time 2 display
Chronograph display
Alarm Weekday display
Alarms 1,2 display
Alarm Weekday display
Alarms 1,2 display
3:00 Timer display
FREE Timer display
Options display
Figure 1
Figure 2
Figure 3


