
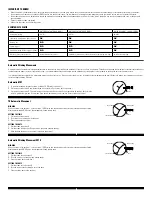

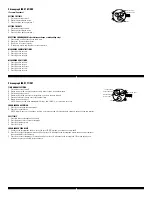


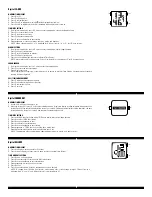

Three Eye Multifunction VX3J
(1 crown)
DATE SETTING
1. Pull crown out to position 2.
2. Turn clockwise to advance the date hand.
3. Push crown back to position 1.
DAY AND TIME SETTING
1. Pull crown out to position 3.
2. Turn clockwise to advance hour and minute hands.
The hand showing days of the week will also move with the hour and minute hands. Keep turning until you have
reached the desired day.
24-HOUR SUB-DIAL SETTING
The 24-hour hand moves correspondingly with the hour and minute hands. When setting the time be sure to check that the
24-hour hand is set properly.
(1) (2) (3)
DATE
24-HOUR
DAY
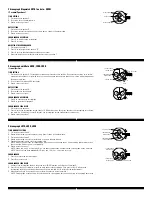
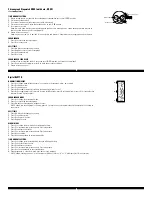
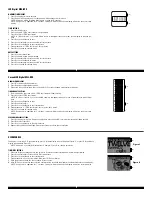
Multifunction 6P27
TIME AND WEEKDAY SETTING
1. Pull crown out to position 3, stopping the second hand at 12 o’clock.
2. Turn crown clockwise to set weekday (hour, minute, and 24-hour hands will also move).
NOTE: Do not set the day by turning the crown counter-clockwise, or the date may not change correctly.
3. Turn hour and minute hands clockwise to set the time. To ensure the time is set accurately, first turn the minute-hand 5
minutes ahead of the correct time, then turn back (counter-clockwise) to the correct time.
4. Return crown to position 1.
NOTE: Make sure you have correctly set AM/PM time by checking the 24-hour hand.
DATE SETTING
1. Pull crown out to position 2.
2. Turn crown counter-clockwise to set date.
NOTE: Do not set the date between 9:00 p.m. and 12:30 a.m. or the date may not change correctly.
(1) (2) (3)
DATE
DAY
24-HOUR HAND
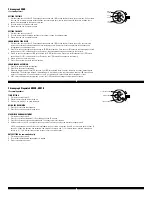
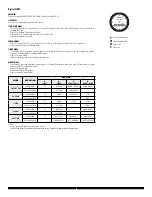
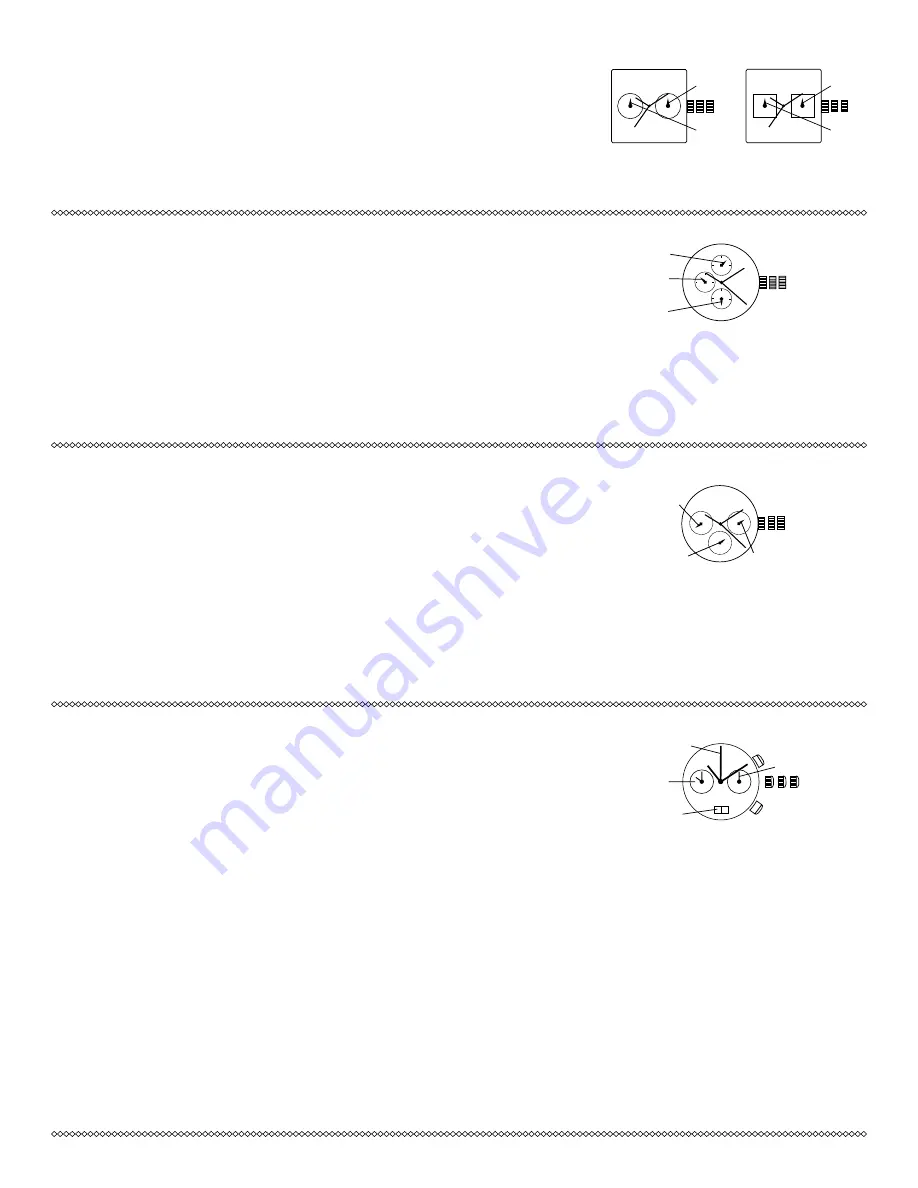
Chronograph 5020B
(1 crown/2 pushers)
DATE AND TIME SETTING
1. Pull crown out to position 2.
2. Turn counter-clockwise and set the date for the previous day.
3. Pull crown out to position 3. All chronograph hands will return to zero position. Do not return the crown to its normal
position while the hand is returning to zero, or else the position the hand is in when this is done will be recognized as the
new zero position.
4. Turn crown clockwise until correct date is displayed in date window.
5. Turn crown to set the time.
6. Return crown to position 1.
CHRONOGRAPH OPERATION
1. Push A to start/stop the chronograph.
2. Push B to reset the chronograph.
SPLIT TIME MEASUREMENT
1. Press B while the chronograph is running; timing will continue in background.
2. Press B again to start the next interval; the three chronograph hands will advance to the ongoing measured time.
3. Press A to stop chronograph.
4. Press B to reset.
CHRONOGRAPH ZERO RESET
1. Pull crown out to position 3.
2. Press and hold A and B simultaneously for 2 seconds until chronograph second hand rotates around the dial.
3. Press A to reset the chronograph second hand to 12:00 (zero) position. Each press advances the chronograph second hand
one mark. If A is held down for over 2 seconds, the chronograph second hand advances continuously.
4. Press B to set and advance to the chronograph minute and hour hands.
5. Repeat step 3 to reset chronograph minute and hour hands.
6. Return crown to position 1 when chronograph hands are reset to zero.
(B)
(A)
(1) (2) (3)
DATE
CHRONOGRAPH SECOND HAND
CHRONOGRAPH HOUR
AND MINUTE HANDS
SECOND HAND
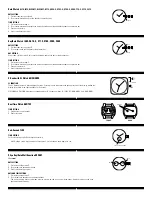
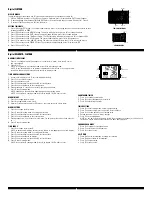
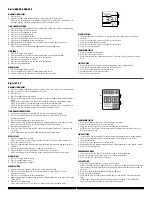
Two Eye Multifunction 6P25, 6P75
DATE SETTING
1. Pull crown out to position 2.
2. Turn counter-clockwise to select date.
DAY AND TIME SETTING
1. To set time, pull crown out to position 3.
2. Turn clockwise to set hour and minute hands. The hand showing days of the week will also move with the hour and minute
hands. Keep turning until you have reached the desired day.
3. Push crown back to position 1.
(1)(2) (3)
DAY
DATE
(1)(2) (3)
DAY
DATE


