

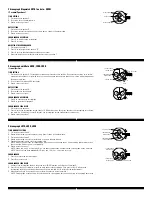


Chronograph Stopwatch VD55B, VD57B
(1 crown/2 pushers)
TIME SETTING
1. Pull crown out to position 3.
2. Set time by turning the crown clockwise.
3. Push back to position 1 to start the watch.
USING THE STOPWATCH
1. Press A to start/stop the stopwatch.
2. Press B to control the split time and reset.
STOPWATCH HAND ADJUSTMENT
1. Pull crown out to position 3.
2. Press A to reset the stopwatch 1/10 second hand to the “0” position.
3. Press B to reset the second and minute hands. The hands only move clockwise.
4. With each press of A or B, the hands move one position. They move quickly if the buttons are kept pressed.
NOTE: If the stopwatch hands function improperly, pull out crown and press A and B at the same time for over 2
seconds. When the buttons are released, the stopwatch second and 1/10 second hands will spin around and
return to “0.” This will indicate that the internal circuit has been reset.
DATE SETTING (on some models only)
1. Pull crown out to position 2.
2. Turn clockwise until desired date appears in window.
3. Push crown back to position 1.
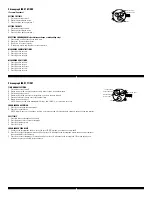
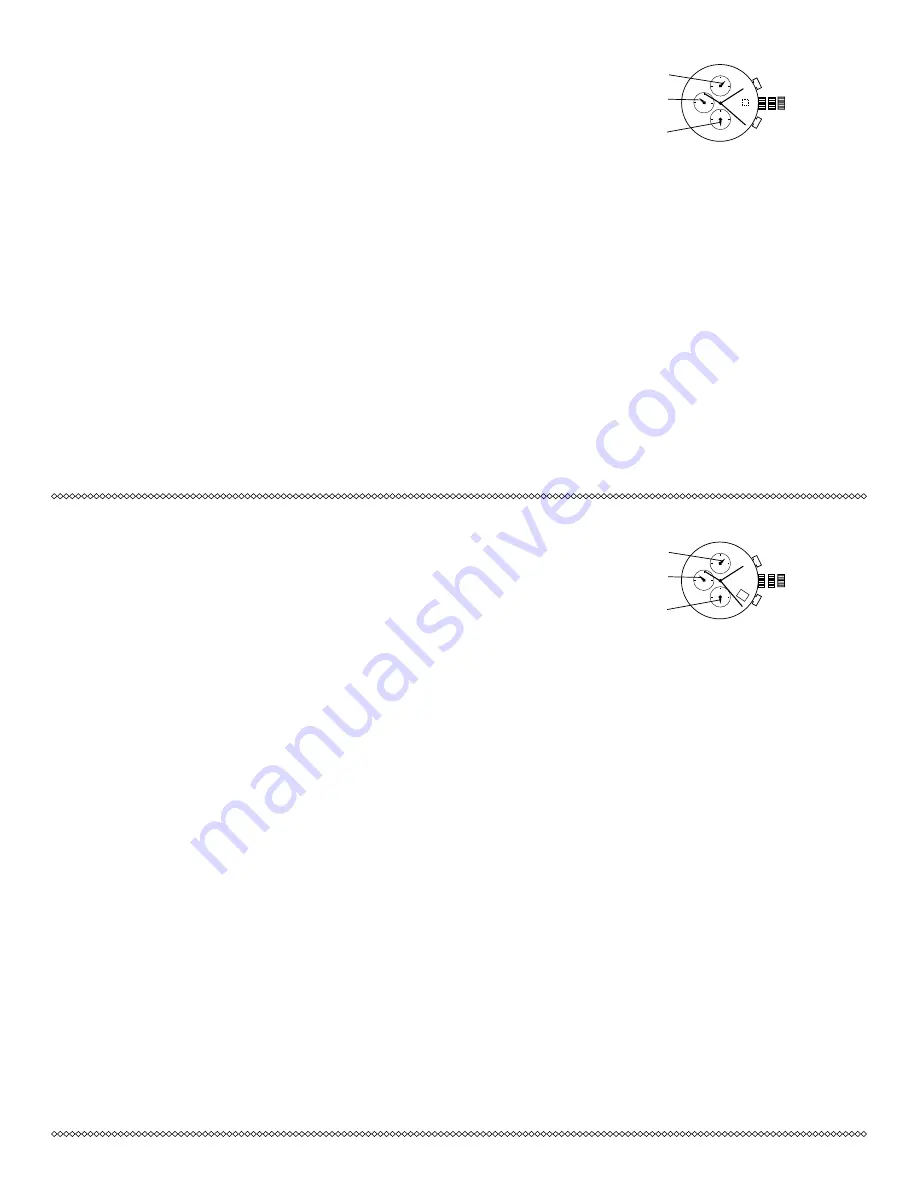
(A)
(1) (2) (3)
(B)
MINUTE HAND
1/10 SECOND HAND
SECOND HAND
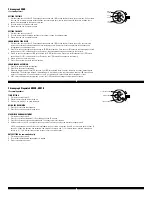
Chronograph OS60
(1 crown/2 pushers)
SETTING THE TIME
1. Pull the crown out to position 3. Chronograph second hand and 1/20 second hand will return to zero position. Do not return
the crown to its normal position while the hands are returning to zero, or else the position the hands are at when this is
done will be recognized as the new zero position.
2. Turn the crown to set the desired time.
3. Return the crown to its normal position.
SETTING THE DATE
1. Pull the crown out to position 2.
2. Turn the crown counter clockwise until the correct date is shown in the date window.
3. Return the crown to its normal position.
CHRONOGRAPH ZERO RESET
1. Pull the crown out to position 3. Chronograph second hand and 1/20 second hand will return to zero. Do not return the
crown to its normal position while the hands are returning to zero. Doing so will cause the position of the hands to be
recognized as the new zero position.
2. Push (A) to set the chronograph second hand to 12:00 (zero) position. Each press of (A) advances the chronograph second
hand one mark. If (A) is held down for over 2 seconds, the chronograph second hand advances continuously.
3. Push B to set the chronograph 1/20 second hand to 12:00 (zero) position. Each press of (B) advances the 1/20 second
hand one mark. If (B) is held down for over 2 seconds, the 1/20 second hand advances continuously.
4. Return crown to its normal position.
5. Press (B) to reset all hands to the zero position.
CHRONOGRAPH OPERATION
1. Push (A) to start/stop the chronograph.
2. Push (B) to reset the chronograph.
3. When the measured time is over 30 seconds, the 1/20-second hand stops; however, the watch continues measuring the
elapsed time. The exact time elapsed is indicated when A is pressed to stop the chronograph, and the 1/20-second hand
moves to the actual time. The hand returns to the “0” position when B is pressed and the chronograph is reset.
4. If (B) is pressed again after chronograph is reset, the 1/20-second hand changes to measure each second.
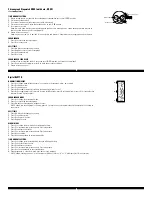
(A)
(1) (2) (3)
(B)
MINUTE
HAND
1/20
SECOND HAND
HOUR
HAND


