
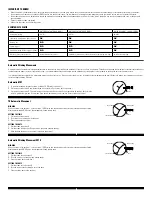

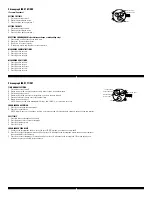


Ana-Digi FL052I
NORMAL TIME DISPLAY
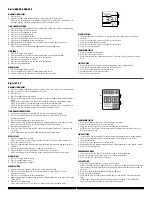
1. Press A to change mode. Mode sequence is: normal time, world time, alarm, chronograph,
memory recall, timer.
2. Press B for EL.
3. Press C to toggle chime on/off.
4. Press D to toggle DST on/off for the selected city.
5. In any mode or setting, if no pusher is operated for 60 seconds, setting will be returned to
normal time display.
TIME AND CALENDAR SETTING
1. Press and hold B for 2 seconds to enter setting mode. 12/24-hour time will begin flashing.
2. Press C to select 12/24-hour time.
3. Press A to set and advance to seconds.
4. Press C to reset seconds to zero.
5. Press A to set and advance to minute.
6. Press C to increase the digit; press D to decrease the digit.
7. Press A to set and advance to next setting value.
8. Setting sequence is: 12/24-hour format, seconds, minute, hour, year, month, date, and city.
9. Press B to exit setting mode.
NOTE: Weekday will automatically update upon exiting setting mode.
WORLD TIME MODE
1. Press A to change to world time mode.
2. Press C to select city.
3. Press D for DST on/off for the selected city.
Words
City
Hour
Difference
Words
City
Hour
Difference
MDY
HNL
ANC
LAX
DEN
CHI
NYC
CCS
RIO
-2H
-1H
LON
Midway
Honolulu
Anchorage
Los Angeles
Denver
Chicago
New York
Caracas
Rio de Janeiro
-2H
-1H
London
-11 hours
-10 hours
-9 hours
-8 hours
-7 hours
-6 hours
-5 hours
-4 hours
-3 hours
-2 hours
-1 hour
0 hours
PAR
CAI
MOW
DXB
KHI
DAC
BKK
HKG
TYO
SYD
NOU
AKL
Paris
Cairo
Moscow
Dubai
Karachi
Dacca
Bangkok
Hong Kong
Tokyo
Sydney
Noumea
Auchland
+1 hour
+2 hours
+3 hours
+4 hours
+5 hours
+6 hours
+7 hours
+8 hours
+9 hours
+10 hours
+11 hours
+12 hours
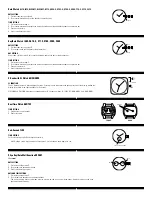
ALARM MODE
1. Press A to change to alarm mode.
2. Press C to scroll through alarms (3 alarms).
3. Press D to toggle alarm on/off.
4. Alarm will sound for 30 seconds; press any pusher to silence alarm.
(B)
(A)
(C)
(D)
ALARM SETTING
1. Press and hold B for 2 seconds to enter setting mode; minutes will begin flashing.
2. Press C to increase the digit; press D to decrease the digit.
3. Press A to set and advance to hour.
4. Press C to increase the digit; press D to decrease the digit.
5. Press B to exit setting mode.
NOTE: Alarm is automatically turned on when setting is changed.
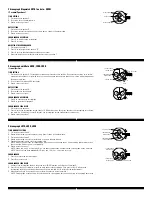
CHRONOGRAPH MODE
1. Press A to change to chronograph mode.
2. Press C to start the chronograph; press D to stop the chronograph.
3. Press D again to reset.
SPLIT TIME
1. Press C while the chronograph is running for split time (will record up to 20 laps).
2. Press D to finalize timing.
MEMORY RECALL MODE
1. Press A to change to recall mode when information is recorded in the chronograph.
2. Press C to view next lap; press D to view previous lap.
TIMER MODE
1. Press A to change to countdown timer mode.
2. Press C to start/stop the timer.
3. Press D to reset the timer when it is not running.
4. Timer will sound for 30 seconds upon reaching zero; press any pusher to silence alarm.
TIMER SETTING
1. Press and hold B for 2 seconds to enter setting mode; seconds will begin flashing.
2. Press C to increase digit; press D to decrease digit.
3. Press A to set and advance to next setting value.
4. Setting sequence is: seconds, minutes, hours.
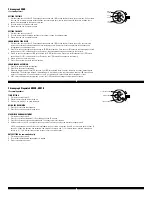
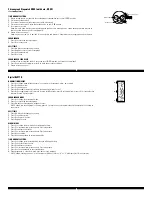
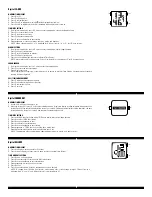
Digital FL137AX / FL137EA
NORMAL TIME DISPLAY
1. Press A to change display. Display sequence is time, calendar, seconds.
2. Press B to toggle 12/24-hour format.
TIME AND DATE SETTING
1. Press and hold B for 2 seconds to enter setting mode; year will begin flashing.
2. Press A to advance digit; press and hold A for fast advance.
3. Press B to set and advance to next setting value.
4. Setting sequence is year, month, date, hour, minute.
5. Press B to exit setting mode.
NOTE: Hour will be displayed in 24-hour format in time setting mode.
NOTE: If no pusher/button is operated for 30 seconds, all changes will be saved and the
setting will automatically return to display mode.
Digital FL137EA
(B)
(A)
(B)
(A)
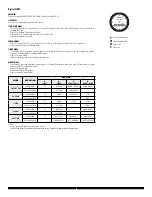
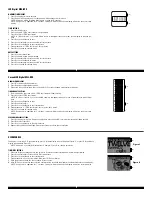
Digital FL137AX
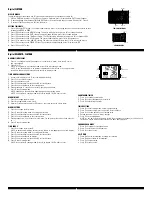
SIMPLE ANALOG
(1 crown)
DIGITAL
FL137AX
(2 pushers)
SIMPLE ANALOG
(1 crown)


