background image

10

Setup and Operation 

(continued)

b.  

Trigger Lock

. Use for continuous monitoring of  

temperatures. When the 

Lock

 icon is flashing, use 

the 

Up


 or 

Down


 button to turn “on”. Then 

press the 

MODE

 button again to enter setting. Once 

you press the measurement trigger, the 

Lock

 icon is 

shown, confirming the lock measurement mode. 

The meter will continuously display the temperaure 

until the measurement trigger is pressed again.

c.  

High Alarm

. When the 

High alarm

 icon is flashing, 

use the 

Up


 or 

Down


 button to turn “on”. Then 

press the 

MODE

 button again to enter setting. The 

High alarm

 icon will still be flashing, allowing you to 

set the alarm trigger temperature set point from –31 

to 1000°F (–35 to 537°C) using the 

Up


 and 

Down


 buttons. Press 

MODE

 button again to enter set-

ting.

d. 

 Low  Alarm

. When the 

Low alarm

 icon is flashing, 

use the 

Up


 or 

Down


 button to turn “on”. Then 

press the 

MODE

 button again to enter setting. The 

Low alarm

 icon will still be flashing, allowing you  

to set the alarm trigger temperature set point from 

–31 to 1000°F (–35 to 537°C) using the 

Up


 and 

Down


 buttons. Press 

MODE

 button again to enter 

setting.

www.

GlobalTestSupply

.com

Find Quality Products Online at:

sales@GlobalTestSupply.com

Summary of Contents for 20250-05

Page 1: ...RECISION MEASUREMENT Infrared Thermometer with 12 1 Distance to Sight Ratio and Temperature Alarm with NIST Traceable Calibration Model 20250 05 www GlobalTestSupply com Find Quality Products Online a...

Page 2: ...er off The instru ment is fully tested and calibrated to NIST traceable stan dards Careful use of this meter will provide years of reliable service Unpacking Check individual parts against the list of...

Page 3: ...surements Laser sighting User selectable C or F units Automatic data Hold MAX MIN temperature displays Automatic selection range and display resolution High and low alarms visual and audible Trigger l...

Page 4: ...eam 3 LCD 4 Down button 5 Up Laser button 6 MODE button 7 Measurement trigger 8 Battery cover 9 Handle grip 10 Temperature alarm indicator light 3 2 5 6 1 4 7 8 9 10 www GlobalTestSupply com Find Qual...

Page 5: ...con 5 Laser pointer indicator 6 Trigger lock indicator 7 High alarm indicator 8 Low alarm indicator 9 C temperature icon 10 F temperature icon 11 Low battery indicator 12 Emissivity readout 9 3 4 7 8...

Page 6: ...that the target is larger than the unit s spot size The smaller the target the closer you should be to it When accuracy is critical make sure the target is at least twice as large as the spot size Dis...

Page 7: ...g the meter by its handle point the IR sensor toward the object whose temperature is to be mea sured The meter automatically compensates for temperature deviations from ambient temperature Keep in min...

Page 8: ...acquer 0 80 to 0 95 Water 0 92 to 0 96 Lacquer matte 0 97 Ice 0 96 to 0 98 Rubber black 0 94 Snow 0 83 Plastic 0 85 to 0 95 Glass 0 90 to 0 95 Timber 0 90 Ceramic 0 90 to 0 94 Paper 0 70 to 0 94 Marbl...

Page 9: ...button to turn on the laser pointer When the laser is on the Laser icon will appear at the top of the LCD Press the Up Laser button again to turn laser off 6 While in the HOLD mode press the MODE but...

Page 10: ...o turn on Then press the MODE button again to enter setting The High alarm icon will still be flashing allowing you to set the alarm trigger temperature set point from 31 to 1000 F 35 to 537 C using t...

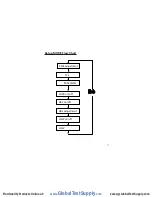
Page 11: ...11 Setup MODE Flow Chart LOCK on off HAL on off HAL adjustment LOW on off LOW EMS adjustment C F MAX MIN www GlobalTestSupply com Find Quality Products Online at sales GlobalTestSupply com...

Page 12: ...ange 31 to 1000 F 35 to 537 C Resolution 0 1 F C below 1000 1 F C above 1000 Accuracy From 58 to 68 F 35 to 20 C 4 5 F 2 5 C From 68 to 572 F 20 to 300 C 1 0 1 of reading From 572 to1000 F 300 to 537...

Page 13: ...and Storage The meter should be cleaned with a damp cloth and mild detergent when necessary Do not use solvents or abrasives Store the meter in an area with moderate temperature and humidity refer to...

Page 14: ...roper function and accurate measure ments however your quality system or regulatory body may require more frequent calibrations To schedule your recalibration please contact InnoCal an ISO 17025 calib...

Reviews: