background image

11

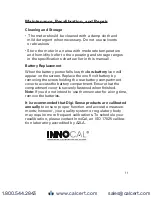
Maintenance, Recalibration, and Repair

Cleaning and Storage

s 4HEMETERSHOULDBECLEANEDWITHADAMPCLOTHAND

mild detergent when necessary. Do not use solvents
or abrasives.

s 3TORETHEMETERINANAREAWITHMODERATETEMPERATURE

and humidity (refer to the operating and storage ranges
in the specifications chart earlier in this manual).

Battery Replacement

When the battery power falls low, the 

low-battery

 icon will 

appear on the screen. Replace the one 9 volt battery by  
removing the screw holding the rear battery compartment 

COVERTOACCESSTHEBATTERYCOMPARTMENT%NSURETHATTHE


compartment cover is securely fastened when finished.  

Note:

 If you do not intend to use thermometer for a long time, 

remove the batteries.

It is recommended that Digi-Sense products are calibrated 
annually

 to ensure proper function and accurate measure-

ments; however, your quality system or regulatory body 
may require more frequent calibrations. To schedule your 
recalibration, please contact InnoCal, an ISO 17025 calibra-

TIONLABORATORYACCREDITEDBY!,!

www.calcert.com

sales@calcert.com

1.800.544.2843

0

5

10

15

20

25

30

Summary of Contents for 20250-91

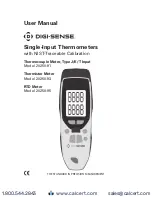
Page 1: ...UREMENT Single Input Thermometers with NIST Traceable Calibration Thermocouple Meter Type J K T Input Model 20250 91 Thermistor Meter Model 20250 93 RTD Meter Model 20250 95 www calcert com sales calc...

Page 2: ...ds Careful use of this meter will provide years of reliable service Unpacking Carefully unpack the instrument and accessories from ship ping package Check individual parts against the list of items be...

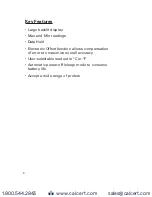
Page 3: ...LECTRONIC FFSET FUNCTION ALLOWS COMPENSATION of errors to maximize overall accuracy s 5SER SELECTABLE READOUT IN OR s UTOMATIC POWER OFF SLEEP MODE TO CONSERVE battery life s CCEPT A WIDE RANGE OF PRO...

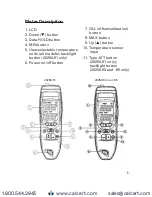
Page 4: ...ll models backlight button 20250 91 only 6 Power on off button OFFSET CALIBRATION button 8 BUTTON 9 Up S button 10 Temperature sensor input 11 Type JKT button 20250 91 only backlight button 20250 93 a...

Page 5: ...250 91 only ICON 3 Low battery indicator 4 User selectable temperature units OR 5 Primary display current OR OLD READINGS 8 ICON 7 MIN icon 8 Secondary display Max or Min readings www calcert com sale...

Page 6: ...s not connected properly the display shows If the temperature being measured is out side the meter s valid range the display shows OL overload Thermocouple Input Function 20250 91 only 1 Press JKT but...

Page 7: ...from updating Max Min Function 1 Press MAX or MIN button to display the maxi mum Max or minimum Min readings on the secondary display 4HE DISPLAY SHOWS THE RELATED 8 OR ICON 3 Simultaneously press the...

Page 8: ...an ice bath LLOW THE READINGS TO STABILIZE DJUST THE OFFSET UNTIL THE PRIMARY READING MATCHES the calibration temperature Adjusting the Offset The primary display shows the temperature plus the offse...

Page 9: ...0 1 F 0 1 C from 148 to 1832 F 99 9 to 999 9 C 1 F 1 C outside range 1 of reading 1 8 F 1 C below 148 F 99 9 C 1 of reading 0 9 F 0 5 C above 148 F 99 9 C Type K 418 to 2501 F 250 to 1372 C Type T 41...

Page 10: ...e one 9 volt battery by removing the screw holding the rear battery compartment COVER TO ACCESS THE BATTERY COMPARTMENT NSURE THAT THE compartment cover is securely fastened when nished Note If you do...

Page 11: ...Manual Part No 00100 21 www calcert com sales calcert com 1 800 544 2843 0 5 10 15 20 25 30...

Reviews: