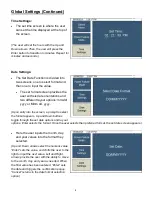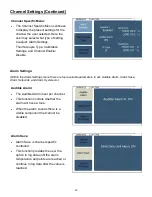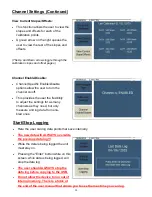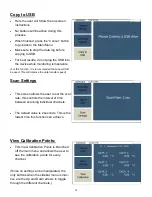
4
Front Panel
(The 12-Channel device user interface is designed to
function around eight buttons, four purposed buttons
and four navigation buttons.)
1. CANCEL Button
For all screens where the user may change a setting on the multi-
channel, pressing cancel undoes the changed setting and reverts
to the previously selected option as well as clearing the confirma-
tion popup
.
If the sidebar menu is selected, the multichannel re-
turns to the previous screen
2. ALARM Button
For all screens, the alarm button functions to silence the alarm
when it is active.
3. ENTER Button
For all screens where the user may change a setting, enter selects
the chosen value and triggers a confirmation popup
.
When the
user is in the sidebar menu, enter selects the menu option and
triggers the transition to the next screen
4. MENU Button
The MENU button provides access to all user-configurable setup parameters of the thermometer. Pressing this key once will scroll
through parameter options. Pressing and holding this key will exit to the home screen, saving any changes made up to that point.
5. UP & DOWN Arrow Buttons
For all screens with selection, up and down toggles through the settings’ options. For screens to set a value, up/down are used to
increment and decrement accordingly
.
In the sidebar menu, up and down navigates through the sidebar.
The user’s ability to continue to move upward and downward through options is shown by gray arrows adjacent to the side-
bar menu and above and below the settings options.
6. LEFT & RIGHT Arrow Buttons
The left and right buttons are only used in screens that have multiple settings to change per screen and required the ability to toggle
left and right in addition to up and down. This includes: setting the date, time, alarm set points, and alarm hysteresis values.
7.
Thermocouple Inputs
There are 12 thermocouple inputs located on the bottom of the front panel that can read temperatures of several different thermocou-
ple types. Refer to page 20 for questions on what types, the accuracy of calibration and temperature range of the thermocouples.
8.
USB Port
Here the user can plug a USB thumb drive into the 12-Channel to capture the data that was logged in an excel spreadsheet.
Display Features
The display features include aspects that are constant throughout all screens.
1. TIME & DATE
The time/date is located in the upper left corner of the screen.
The date may be set to format preference of the user.
2.
ALARM ICON
Present after an
audible
alarm has been set
.
Remains in the bottom left corner of the screen.
3.
TIME ELAPSED
Records the time since the multichannel started logging data.
Remains in the bottom left corner adjacent to the alarm icon.
4.
VISIBLE ALARM
When the alarm triggers it will cause a visible alarm no matter what screen is currently being viewed. This alarm cannot be turned off.
The screen background will become red and flash
Summary of Contents for 92000-01
Page 22: ...22 Screen Flow Charts...

