background image


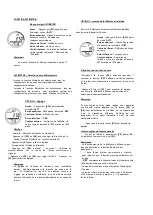
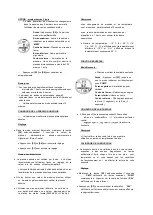
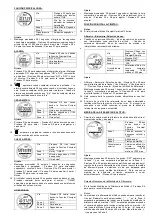
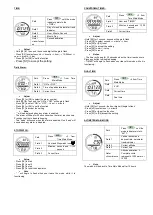
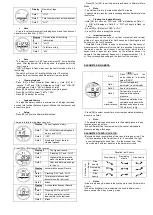
TIME: 


Path 

Press

 until the mode 

indicator points to the 
« TIME » 

Field 1 

Day  of  week,  barometer  trend 

indicator 

Field 2 

Hour, Minute, Second 

Field 3 

Month, Day 

Outer 
circumferenc
es 

Second animation  


Adjust  

- Hold [S2] for 1 second, the second digit will begin to flash  
- Press [S2] to select second --> minute --> hour --> 12/24hour --> 
year --> month --> day  
- Press [S3] or [S4] to set the function  

- Press [S1] to accept the setting  


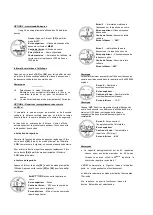
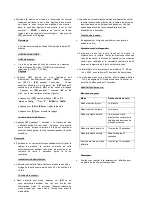
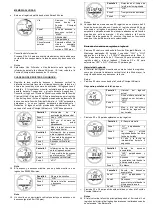
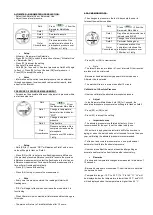
Daily Alarm:  


Path 

Press 

1  from  Time 

Main Mode. 

Field  1 

ON

” or “

OFF

” 

Field  2 

Time of a particular alarm 

Field  3 

Current time 


Adjust  

- Press [S3] or [S4] to select the alarm number  

Hold [S2] for 1 second, the “ON” or “OFF” will begin to flash  

Press [S2] to select “ON” or “OFF” --> hour --> minute  

- Press [S3] or [S4] to set the function  
- Press [S1] to accept the setting  


Note  

“ ” will be displayed when any alarm is enabled.  

- The alarm will beep for 30 seconds when the timer reaches zero. 
Press any button to disable beeping.  

Two “beep” will sound when the alarm is enabled. One “beep” will 

sound when any alarm is disabled.  
 

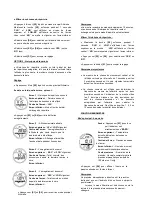
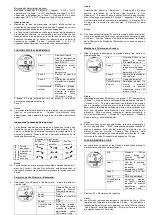
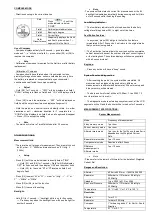
STOPWATCH: 


Path 

Press


from 

Time Main Mode 

Field  1 

Hour and Stopwatch icon 


Field  2 

Minutes,  second  and  1/100 

second 

Field  3 

Current time 


Setup  

- Press [S4] to start  
- Press [S3] to split  
- Press [S4] to stop  
- Press [S3] to reset the stopwatch  


Note  

“  ”  will  begin  to  flash  when  user  leave  the  mode  while  it  is 

functioning.  


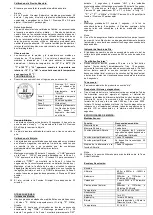
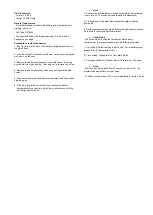
COUNTDOWN TIMER: 


Path 

Press 


3  from 

Time Main Mode 

Field  1 

Hour and “TIMER” 

Field  2 

Minutes,  second  and  1/100 

second 

Field 3 

Current time 


Adjust  

- Hold [S2] for 1 second, second will begin to flash  
- Press [S2] to select second --> minute --> hour  
- Press [S3] or [S4] to set  
- Press [S1] to accept the setting  
- Press [S4] to start --> stop  
- Press [S3] to reset  


Notes  

- The timer will beep for 30 seconds when the timer reaches zero. 
Press any button to disable beeping.  

“TIMER” will begin to flash when user leave this mode while it is 

functioning.  
 

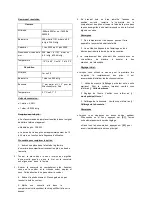
DUAL TIME:  


Path 

Press 


4 from Time 

Main Mode 

Field  

dUA

” 

Field  

Current time 

Field  

Dual time 


Adjust  

- Hold [S2] for 1 second, the hour digit will begin to flash  
- Press [s2] to select hour --> minute  
- Press [S3] or to set the function  
- Press [S1] to [S4] accept the setting  
 

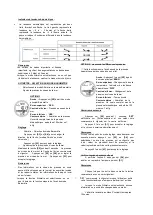
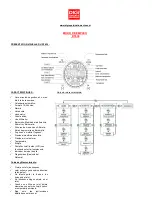
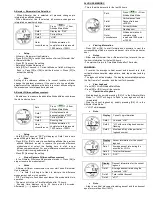
ALTIMETER MAIN MODE: 


Path 

Press

 until the 

mode indicator pints to 
“ALTI” 

Field  1 

Vertical ascent and 
descent rate, barometer 
trend indicator 

Field  2 

Current altitude 

Field  3 

Current time 

Outer 
circumference 

Altitude animation. A 
Complete circle 
represents 1000 meter or 
1000ft 


Note 

The watch will be back to Time Main Mode after 12 hours.  


Summary of Contents for DT630

Page 1: ...directionnelles entre 0 et 359 unité 1 résolution 0 1 Affiche la température résolution 0 10 Heure min sec année mois date jour Calendrier automatique format 12 24h Unités métriques m mb 0C ou anglaises ft hg OF 3 alarmes journalières 2 fuseaux horaires chronomètre et compte à rebours Illumination électroluminescente de l écran Pile Lithium avec indicateur de changement de pile Diagnostic Système ...

Page 2: ... Eclairage en fond d écran électroluminescent Affichage au format 12 24 heures Chronomètre Mesure de l écart pour l altimètre et le baromètre Répertoire des résultats et historique du répertoire Affichage de la température Indicateur de batterie faible PRÉCAUTIONS D UTILISATION ET RÉPARATION Protégez votre montre des chocs des coups violents et ne l exposez pas directement aux rayons solaires N es...

Page 3: ...ur S2 à partir du Mode Heure Ecran supérieur L icône heure et chronomètre apparaît Centre de l écran Minutes secondes et1 100 e de seconde Ecran inférieur Heure en cours Installation Appuyez sur S4 pour démarrer Appuyer sur S3 pour répartir les temps à prendre Appuyer sur S4 pour arrêter Appuyer sur S3 pour relancer le chronomètre Remarque Le symbole de l icône heure chrono commencera à clignoter ...

Page 4: ...tude de référence à cette altitude correcte donnera l indication de la pression atmosphérique au niveau de la mer OPTION 2 mesure de la différence d altitude Permet à l utilisateur de mesurer la différence d altitude absolue entre le départ et l arrivée Accès Appuyer 2 fois sur S2 à partir du mode ALTI Ecran supérieur Vitesse d ascension et de descente verticale et DIFF Centre de l écran Différenc...

Page 5: ...uche S2 à partir du mode principal de l Altitude Appuyez sur la touche S3 ou S4 pour faire défiler l historique Ecran 1 Informations sur le répertoire en cours Ecran supérieur Année Centre de l écran LO avec le numéro de répertoire en cours clignote Ecran inférieur Mois et jour du numéro de répertoire particulier Ecran 2 Informations relatives à l ascension sur le répertoire en cours Ecran supérie...

Page 6: ... S1 ou S2 pour revenir au mode principal Altimètre Remarques o La montre reviendra au mode principal après 10 minutes o Les données de l historique du répertoire restent inchangées lorsque le mode Baromètre est sélectionné Effacer l historique du répertoire o Maintenez la touche S2 enfoncée pendant 1 seconde CLR et LOG s afficheront sur l écran supérieur de la montre HIS s affichera sur l écran ce...

Page 7: ...s et les rapports météo les informations de l aéroport local ou sur Internet Lorsque la fonction Altimètre est sélectionnée on ne peut démarrer la fonction mesure de l écart du mode Baromètre OPTION 2 mesure de la différence de pression Cette fonction mesure l écart absolu de la pression barométrique après un départ ou un arrêt Accès Appuyez 2 fois sur S2 à partir du mode principal BARO Ecran supé...

Page 8: ...liser un baromètre professionnel pour calibrer la pression absolue o L utilisateur peut aussi ajuster l altimètre au bord de la mer après avoir obtenu une valeur précise à partir de la station de météo locale 08 92 68 02 N de Dpt Remarques o Les changements de pression et de température sont mesurées par intervalles de 10 secondes o Les valeurs barométriques sont mesurées par intervalles de 1 heur...

Page 9: ... o L indicateur de batterie faible s activera lorsque le niveau de voltage de la batterie sera tombé sous 2 5 V au bout de 8 à 10 fois Touche de raccourci o Dans n importe quel mode appuyez sur S3 ce qui vous permettra d accéder très vite aux bouton des commandes Après 12 secondes l appareil retourne au mode original que vous aviez à l écran juste avant la manipulation o Le bouton de raccourci rap...

Page 10: ... la pile doucement Prenez garde à ne pas toucher le bord du contour 5 Mettre une nouvelle pile dans le compartiment correspondant le côté positif doit être sur le dessus 6 En prenant soin de bien remettre l anneau en position correcte remettre le couvercle sur le compartiment des piles et tourner à l aide de la pièce dans le sens des aiguilles d une montre jusqu à ce que le tiret soit aligné avec ...

Page 11: ...torial logbook Presión atmosférica absoluta Presión al nivel del mar Temperatura Brújula Pantalla cristal líquido LCD con iluminación electro luminiscente Indicador del nivel de pila Diagnósticos Reajuste del Sistema Cuidado y Mantenimiento Proteja su reloj de choques calor extremo y exposición directa a la luz del sol No intente quitar la funda o los botones del reloj No introduzca ningún objeto ...

Page 12: ...ra aceptar FUNCIÓN PRINCIPAL ALTÍMETRO Notas El reloj volverá al Modo Principal Hora tras 12 horas Altímetro Barómetro Selección de uso Cuando se selecciona Altímetro todos los cambios de presión son interpretados como cambios de altitud Cuando se selecciona Barómetro todos los cambios de presión son interpretados como cambios de tiempo Vía Presione S2una vez desde la Función Principal Altímetro Z...

Page 13: ...circuito es un movimiento vertical que incluye un ascenso o un descenso igual a 50m 150 pies Pantalla 5 Duración en el tiempo de la información registrada Zona 1 LOG Zona 2 Tiempo total de anotación Zona 3 dUr Notas La capacidad de memoria es de 99 registros de un máximo de 20 horas de duración cada uno Cuando el registro número 99 haya sido usado el logbook empezará desde 1 otra vez LOG empezará ...

Page 14: ... Uso Altímetro Barómetro Presione S3 o S4 para cambiar la dirección de la flecha Uso Altímetro o Uso Barómetro Presione S1 para aceptar Ajuste Presión Nivel del Mar Mantenga presionado S2 durante 1 segundo Presión al nivel del mar en zona 2 comenzará a parpadear Presione S3 o S4 para fijar la presión al nivel del mar Presione S1 para aceptar Notas Se puede obtener información sobre la presión actu...

Page 15: ...mbar C M Min e imperiales como Ft inHg F Ft Min Ajuste o Presione S1 hasta que el indicador de función se encuentre directamente bajo TIME Mantenga presionado S1 y S2 durante 1 segundo La Zona 1 mostrará primeramente SET durante 2 segundos y después UNI y las unidades preseleccionadas Mantenga presionado S2 durante 1 segundo M o Ft situados en la Zona 2 comenzarán a parpadear Presione S2 para sele...

Page 16: ...a a colocar la tapa del compartimiento de la pila y gírela con ayuda de la moneda en el sentido de las agujas del reloj hasta que el punto esté alineado con close Notas 1 Una temperatura extremadamente baja puede causar que aparezca el aviso de cambio de pila En este caso el cambio de pila no es necesario El uso frecuente de la luz electro luminiscente reduce la vida de la pila El cambio de pila d...

Page 17: ...arometer Logbook and logbook history Current absolute atmospheric Sea level pressure Temperature display Compass Electro luminescent back lighted LCD Low battery indicator Diagnostics System Reset Care and Maintenance Protect your watch from shocks extreme heat and directly exposure to sunlight Don t try to remove the housing or button of the watch Don t insert any object into the watch Always put...

Page 18: ...ield 3 Current time Setup Press S4 to start Press S3 to split Press S4 to stop Press S3 to reset the stopwatch Note will begin to flash when user leave the mode while it is functioning COUNTDOWN TIMER Path Press 3 from Time Main Mode Field 1 Hour and TIMER Field 2 Minutes second and 1 100 second Field 3 Current time Adjust Hold S2 for 1 second second will begin to flash Press S2 to select second m...

Page 19: ...hen Barometer Use is selected in field 3 will begin to flash to indicate the difference measurement mode is in operation DIFF will begin to flash when user leaves this mode while it is in operation The watch will return to Time Main Mode after 12 hours Running time displays up to 99 hours and 59 minutes Afterwards appears in Field 3 24 HOURS MEMORY This is the altitude record for the last 24 hours...

Page 20: ...te The watch will return to main mode after 10 minutes Logbook history records remain unchanged when Barometer Use is selected Clearing the logbook history Hold S2 for 1 second CLR and LOG will display on Field 1 HIS will display on Field 2 NO will begin to flash on Field 3 Press S3 or S4 select YES or NO Press S1 button to accept the setting Important remarks Measurement on the rate of vertical m...

Page 21: ...n user leave the mode while it is functioning When Altimeter Use is selected all information will not change in this mode The watch will return to Time Main Mode after 12 hours 4 DAY MEMORY MODE The changes in pressure in the last 4 days help the user to forecast the weather condition Path Press 3 from the Barometer Main Mode Field 1 Day of week barometric trend indicator and MEM Field 2 Change in...

Page 22: ...acklight is on will keep the light for another 5 seconds Note To ensure sufficient electric current for pressure sensor the EL backlight is disabled automatically during sensing and it will turn on for 5 seconds after finishing the sensing Low Battery Indicator The low battery indicator will be turned on when the battery voltage level drops below 2 5V in eight out of ten times Fast Button Features...

Page 23: ... ring in the correct position replace the battery compartment cover and turn it with the coin clockwise until the dot is aligned with close Note 1 Extreme low temperatures may cause the low battery warning icon to turn on This does not require battery replacement 2 Frequent use of the electroluminescent backlight reduces battery life 3 Battery replacement should be performed with extreme care so a...

Reviews: