MIL-3000FTX Series of FastPort Print Servers
C-2
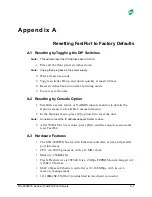
• Resetting FastPort’s NVRAM of to factory defaults
• Choosing a primary NetWare server
• Enabling/disabling protocols (e.g., TCP/IP, EtherTalk, etc.)
• Customizing LPD
C.1.3 Requirements
• A MIL-3XXX FastPort print server with firmware release 4.5.x (and
above) installed.
• NetWare file server with the PC logged into the server.
• NetWare enabled (i.e., NetWare drivers are loaded).
• Supervisor access to an object is required for some features.
C.1.4 Setup
1. Create a directory for the software (e.g., type
md Digi
and press
[Enter]. Where Digi is the directory’s name).
2. From the utility driver, copy the file
ACT.EXE
onto the recently created
directory. From
C:\Digi>
, type
copy a:\
and press [Enter].
C.1.5 Navigating in ACT
From the appropriate directory (e.g.,
c:\Digi)
, enter ACT.
1. Type
ACT
and press [Enter].
2. Select a device or a menu option by:
a. Using arrow keys, highlight an item and press [Enter].
b. Use a hot key, usually the first letter in the menu option.
3. To exit out of a menu or option, press [Esc].
4. Highlight the designated field and press [Enter]. To leave ACT, select
the
Exit
menu.
C.2 Advanced Configuration Menu in ACT
The Advanced Configuration menu has five major submenus:
•
NetWare Configuration:
Controls NetWare-specific print server
parameters.

