S M - 5 3 0 0 S e r v i c e M a n u a l
S M - 5 3 0 0 S e r v i c e M a n u a l
|
|
50
50
Initial Setup
Initial Setup
––––––––––––––––––––––––––––––––––––––––––––––
––––––––––––––––––––––––––––––––––––––––––––––––––––––––––––––––
––––––––––––––––––
5.5 Software Setup
5.5 Software Setup
5.5.6 Date and Time
5.5.6 Date and Time
Procedure
Picture
Procedure
Picture
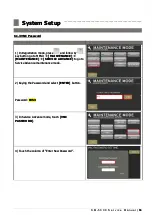
1)
1) In
In Registration
Registration mode,
mode, press
press
and
and follow
follow by
by
key button to MENU
key button to MENU
[MAINTENANCE]
[MAINTENANCE]
[MAINTENANCE]
[MAINTENANCE]
[DATE AND TIME]
[DATE AND TIME]
to go to
to go to
Date And Time menu.
Date And Time menu.
2)
2) At
At Date
Date mode,
mode, use
use
arrow
arrow key
key to
to select
select the
the
“Year” and select the
“Year” and select the date.
date.
3) Select
3) Select
[SAVE]
[SAVE]
button to save the
button to save the changed setting.
changed setting.
4) Select
4) Select
[TIME]
[TIME]
to go to Time mode, then press
to go to Time mode, then press
“Number” butto
“Number” button to enter the time.
n to enter the time.


