Chapter 4: Media Station|V10 Software
27
Configuring Audio Settings
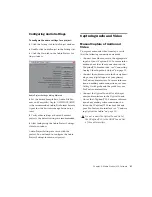
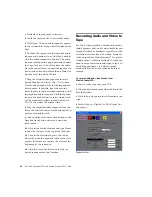
To configure the audio settings for a project:
1
Click the Settings tab in the Project window.
2
Double-click Audio Project in the Settings list.
3
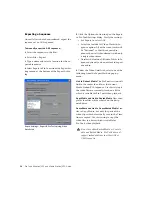
Click the Main tab in the Audio Project Set-
tings window.
4
Set the desired Sample Rate, Audio File For-
mat, and Sample Bit Depth. OMF WAVE (BWF)
is the recommended Audio File Format because
it provides the best interchange between sys-
tems.
5
Verify other settings as desired. For most
projects, the default settings are recommended.
6
After configuring the Audio Project Settings,
close the window.
Audio Project Settings are saved with the
project. You will need to configure the Audio
Project Settings for each new project.
Capturing Audio and Video
Manual Capture of Audio and
Video
To capture audio and video from tape, verify
that the following connections are made:
• Connect your video source to the appropriate
inputs of your AVoption|V10. For more infor-
mation about the video connections on the
AVoption|V10 breakout box, see “Connecting
Analog Video Input and Output” on page 13.
• Connect the audio source to the first eight an-
alog or any digital inputs of your primary
Pro Tools audio interface. For more informa-
tion on making audio connections, see your
Getting Started
guide and the guide for your
Pro Tools audio interface.
• Connect the Optical In and Out of the pri-
mary audio interface to the Optical In and
Out of the AVoption|V10. For more informa-
tion about making audio connections be-
tween the AVoption|V10 breakout box and
your Pro Tools audio interface, see “Connect-
ing Optical for Audio” on page 13).
Audio Project Settings dialog, Main tab
Do not connect the Optical In and Out of
the AVoption|V10 to the ADAT In and Out
of the audio interface.


