background image

www.digimerge.com

D221600 SERIES Quick Start Guide_R

1


Page 4

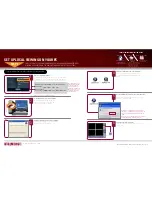
SET UP LOCAL VIEWING ON YOUR PC

STEP 2

*your system muST be connected to a router prior to powering it ON.

ThIS STEP rElATES TO rEmOTE vIEwING OvEr ThE lAN (lOCAl ArEA NETwOrK) 

by uSING A PC lOCATEd ON ThE SAmE NETwOrK AS ThAT Of ThE SySTEm.

NOTE: The system will lease 

networking information from 

your Router. If you wish to 

set your information manu-

ally, then remove the 

 from 

DHCP option. Please consult 

your Hardware Manual for 

further Menu options.

3

Follow the installation screens to complete 

DigiClient Software installation.

digiClient Software (on your local computer):

retrieve System Information:

1

To retrieve the System Information, press the INFO button 

on the Remote Control (ensure batteries are inserted) (or) 

Press the ENTER button on the front panel of the Monitor.

Install Software (on your local computer):

Insert the DigiClient Software CD into 

your local computer’s CD ROM drive 

and proceed with the installation.

record the IP and mAC Addresses in the section below:
IP AddrESS :            .             .            .

mAC AddrESS :          :           :          :           :          :

(Required for DDNS registration)

2

Computer - not included

5

Double-click the DigiClient software icon on your 

desktop to run the program.

run the digiClient Software (on your local computer):

4

Close the CD Menu Screen. A DigiClient 

icon and a DigiPlayer icon will appear on your 

desktop.

digiClient Software (on your local computer):

Set-up (on your local computer):

Click the Setup icon from the DigiClient Soft-

ware Screen

6

SET-uP buTTON

Skill Level

Intermediate

easy 

advanced

Time 

under 30 minutes

under 15 minutes

under 60 minutes

Hand Tools

Hardware

Router

Hi Speed

over 60 minutes

Time

Skills - Intermediate

Plug & Play connectors, 

On screen set up

Under 30 Minutes*

* Installation time may 

vary based on application

Skill Level

Intermediate

easy 

advanced

Time 

under 30 minutes

under 15 minutes

under 60 minutes

Hand Tools

Hardware

Router

Hi Speed

over 60 minutes

Hardware

Computer & 

Router*

LOCAL VIEWING INSTALLATION GUIDE

192.168.1.12

* Minimum System Requirement: 

Windows XP, Pentium IV, 256MB 

Ram (512MB Recommended), 

200MB Storage, High Speed 

Internet, DSL or Cable Modem

If the IP Address is 127.0.0.1 it means that you are either not connected to your local 

network or your system is not in DHCP detect mode.

NOTE: when you run DigiClient on your PC for the first 

time, you may see the windows Security Alert. Please click 

unblock to run the application. (on windows vista™ select 

“Allow”).

Please refer to your Software Manual for instructions about 

using Digi Backup Player and Storage Calculator.

DIGIMERGE

Summary of Contents for D221600 Series

Page 1: ...as and hard drive capacity may vary by model Check your package for specific content information Information in this document is subject to change without notice As our products are subject to continu...

Page 2: ...H Displays the Video Playback Search menu DISPLAY Switches the display to single quad and multi screen views PTZ Switches to PTZ Mode KEYLOCK Locks the Front Panel buttons SEQUENCE Changes the Monitor...

Page 3: ...MIN PASSOWRD IS 1234 NOTE This may take up to 15 seconds Please wait until the system compleTES LOADING Your system will perform the following System Check 1 Blue LED at the front flashes four times 2...

Page 4: ...to run the program Run the DigiClient Software on your local computer 4 Close the CD Menu Screen A DigiClient icon and a DigiPlayer icon will appear on your desktop DigiClient Software on your local c...

Page 5: ...SETUP information 8 7 System 192 168 1 12 6100 ADMIN 8 1 Enter a Name for the System 2 Enter the IP Address recorded in Step 2 1 3 Enter the Monitor TCP IP port 6100 by default 4 Enter the User ID AD...

Page 6: ...Account Information 5 DNS Server Name DIGIMERGE Domain Name tomsmith User Name tomsmith User Password your password DDNS Status OK CANCEL 4 1 2 3 REMOTE VIEWING INSTALLATION GUIDE Skill Level Interme...

Page 7: ...ress ENTER to accept 8 On the SYSTEM menu screen scroll down to APPLY and press ENTER 9 The system will now ask you to RESTART Click OK Run the DigiClient Software on your remote computer Double click...

Page 8: ...e drop down menus to assign camera positions 7 Click ADD to add the System Location 8 Click OK 1 2 3 4 5 Select the new Group you created using the drop down menu 1 and press the CONNECT button 2 to c...

Page 9: ...Monitor to VGA mode using the Multi function Mode button on the front of the Monitor or by pressing the VGA Button on the Remote Control If you press the PIP button on your remote control you can vie...

Page 10: ...front of the Monitor or by pressing the Picture Frame Button on the Remote Control 3 Configure the Picture Frame Menu to display the images If you press the PIP button on your remote control you can v...

Page 11: ...below is for a 8 channel system Storage Calculator 2 To extend the life of your monitor it is highly recommended that you take advantage of the AUTO BRIGHTNESS MAIN DISPLAY OFF features Enabling these...

Page 12: ...w digimerge com Toll Free Technical Support North America 1 866 344 4674 Email Support tech digimerge com info digimerge com Product Information Software Hardware Updates Upgrades Product Documentatio...

Reviews: