48
INSTALLERS MANUAL |
Copyright
©
2006 Digimerge Technologies Inc.
Network Connectivity
SECTION 5
Network Connectivity
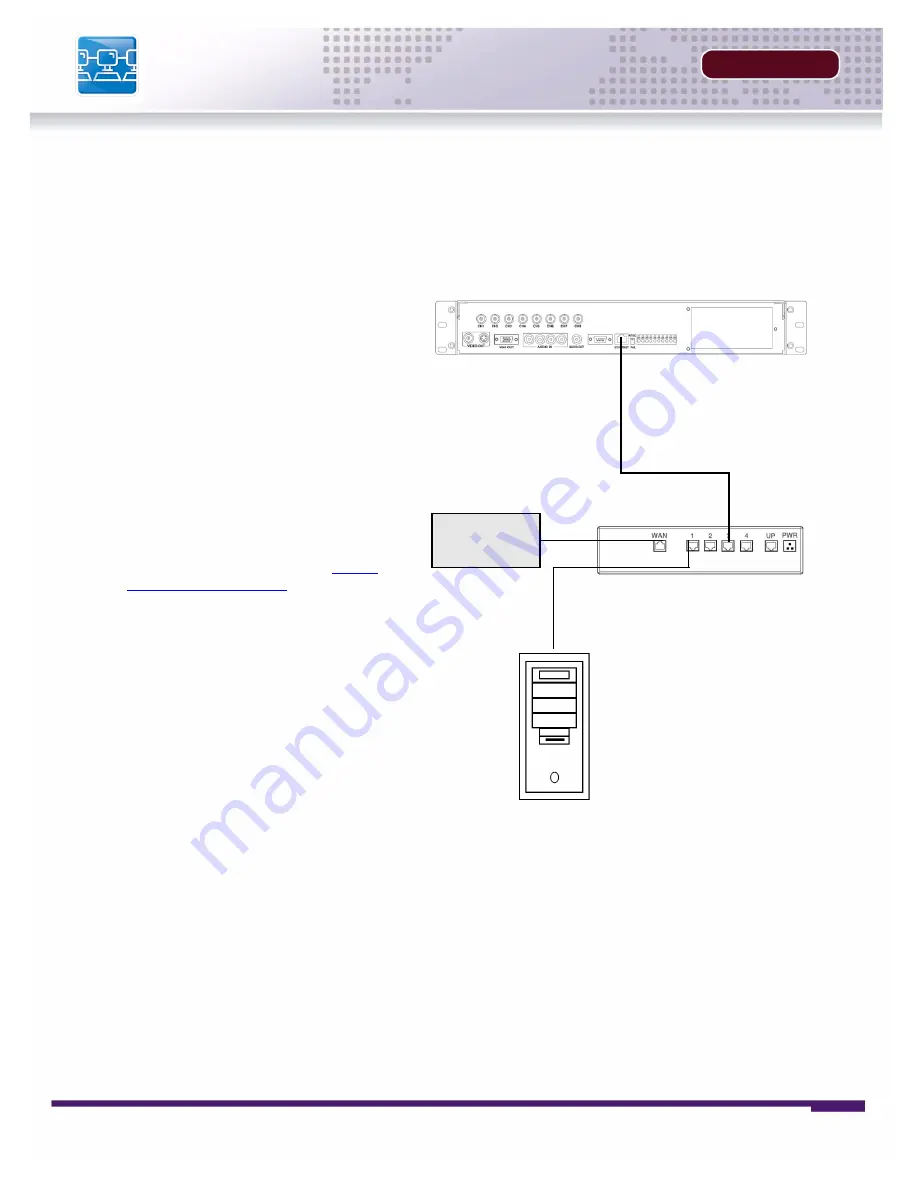
The DVR unit can be controlled using your existing network and a PC. The DVR Unit can be con-
trolled from within your network, or can also be controlled remotely through the Internet.
DVR
ROUTER
(Not Included)
PC
(Not Included)
INTERNET
1. Connect the DVR to the Router.
Power the DVR on.
NOTE:
It is recommended that the
DVR be connected to the router prior
to powering on the system.
The DVR can be automatically
assigned an IP address by the router
(and other network related settings),
or an IP address can be manually
assigned within the MENU -
NETWORK setup on Page 40.
2. Enable
PORT FORWARDING
on
your Router. Refer to the
instructions on Page 50 for details.
3. Set up a web account at
http://
DDNS.digimerge.net
. Refer to
Pages 51-53 for setup and
configuration instructions.
4. Access the DVR Software with
either a Local PC or Remote PC
using Microsoft Internet Explorer 5
(or higher). See the Operator’s
Manual for details.
NOTE
: Microsoft IE is the ONLY
supported browser at this time.
Summary of Contents for D300 SERIES
Page 6: ......
Page 9: ...FEATURE LIST SECTION 1 D300 Series DVR Features 10...
Page 11: ...PACKING DETAIL SECTION 2 Packing Detail 12...
Page 13: ...LOCATION AND CONTROL SECTION 3 D300 Series Front 14 D300 Series Back 16...
Page 18: ......
Page 46: ......
Page 54: ......
Page 55: ...Troubleshooting 56 TROUBLESHOOTING SECTION 6...
Page 58: ......
Page 59: ...DVR Specifications 60 DVR SPECIFICATIONS APPENDIX 1...
Page 61: ...Connection Motion Alarm Device 62 CONNECTING MOTION ALARM DEVICE APPENDIX 2...
Page 63: ......


