7. Adjust the angle of the camera as needed. Tighten
the four screws to secure camera angle.
8. Replace the dome cover. Twist the dome cover so
that the top and bottom notches do not align. This
locks the dome cover in place.
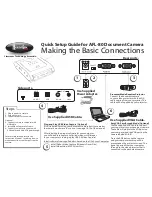
Connecting The Camera
1. Use the BNC connector to connect camera to a
monitor, switch etc.
2. Connect a 12V DC power supply to the camera.
Setup Diagram
Contents
Installing the camera
1 x Mini Color Dome
Camera
To adjust the camera angle:
1. Twist the body of the camera and the base of the
camera so that the top and bottom notch align.
2. Remove the dome cover.
3. Mark the three mounting holes from the camera
base onto the mounting surface.
4. OPTIONAL: Secure the drywall anchors into the
marked areas of the mounting surface.
5. Align the mounting holes and secure the camera in
place with the provided screws.
6. Using a Phillps screwdriver (not included), slightly
loosen the four screws on the
support ring
.
Top notch
Bottom notch
WARNING
- A
regulated
, UL/CSA
approved
12V DC power supply is
required
for use with
this camera. Use of a non-regulated, non-
conforming power supply can damage this
product and will void the warranty.
3 x Mounting Screws
Connecting the camera
Features:
•
High Resolution Image Sensor—produces sharp
and clear video
•
Fixed IR Fiter provides accurate color
reproduction
•
3.6 mm lens provides a wide viewing angle
•
Industry standard BNC video connection
•
Wall/ Ceiling mountable
ATTENTION
- Test all connections and ensure the camera is
working correctly prior to permanent installation by
temporarily connecting the camera(s) and cable(s) to the
viewing/recording solution.


