4
(7) With opposite procedure above, set the
DISK cover, expansion board base, and
expansion board cover to the PS-A unit,
respectively. The torque required to
tighten these screws is 0.5 to 0.6 N·m.
When attaching the HDD unit
to the PS-3651A
(1) Turn OFF the power switch of the PS-A
and remove the power cable. Place the
PS-A on a flat, level surface facing the
display face downwards.
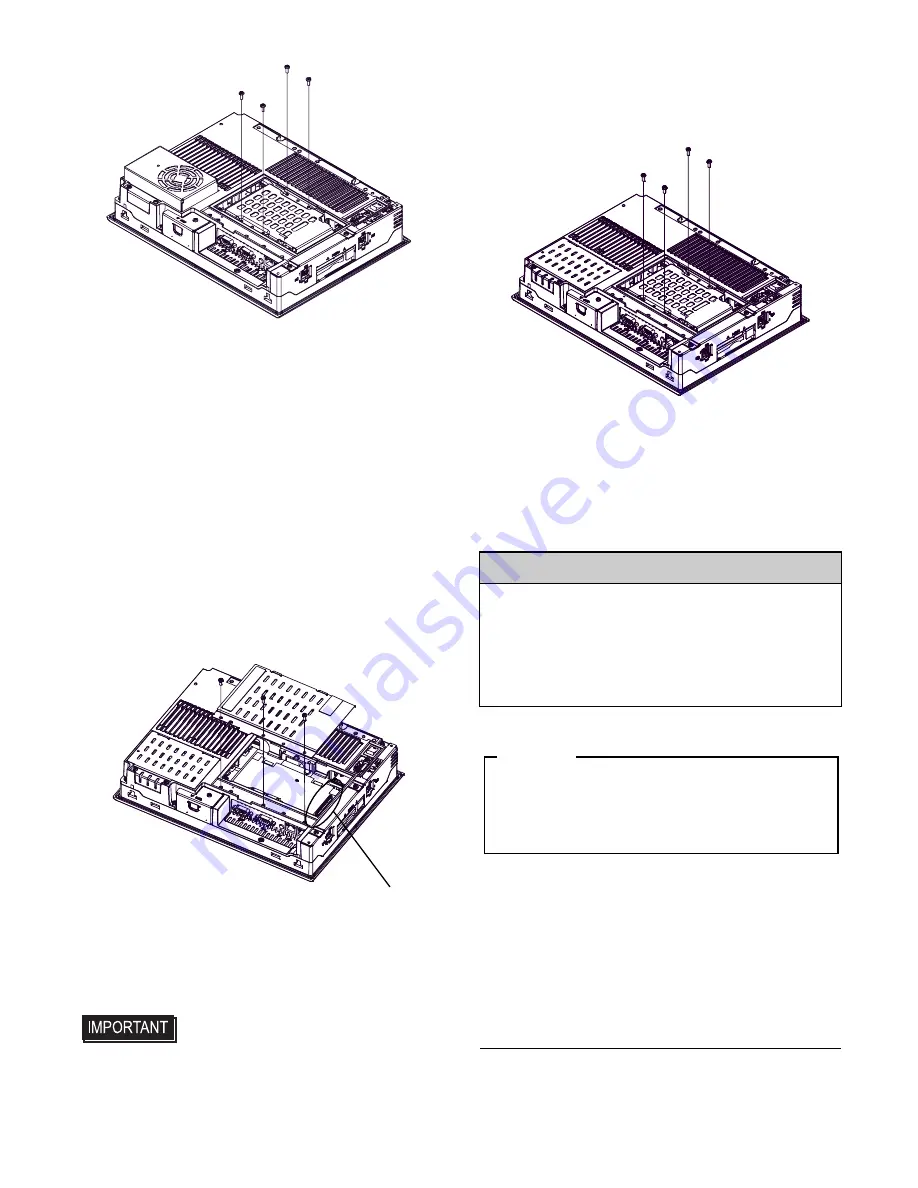
(2) Unscrew the DISK cover's screws (3)
and remove the expansion board base.
(3) Mount the HDD unit vertically on the
circuit board and plug the HDD unit
cable connector in the Serial ATA
interface.
• Mount the HDD unit vertically and
thoroughly not to hit the circuit board.
Otherwise, it may cause a malfunction
or damage the HDD unit and PS-A.
(4) Fix the HDD unit with the screws (4)
which are contained in your package.
The torque required to tighten these
screws is 0.5 to 0.6 N·m.
(5) With opposite procedure above, set the
DISK cover to the PS-A unit. The
torque required to tighten these screws is
0.5 to 0.6 N·m.
Digital Electronics Corporation
8-2-52 Nanko-higashi
Suminoe-ku, Osaka 559-0031
JAPAN
TEL: +81-(0)6-6613-3116
FAX: +81-(0)6-6613-5888
http://www.pro-face.com/
© Copyright 2010 Digital Electronics
Corporation. All rights reserved.
Serial ATA Interface
Inquiry
Do you have any questions about
difficulties with this product?
Please access our site anytime that
you need help with a solution.
http://www.pro-face.com/otasuke/
Please be aware that Digital Electronics Corpora-
tion shall not be held liable by the user for any
damages, losses, or third party claims arising
from the uses of this product.
Note


