Service Manual
6-13
Troubleshooting
6
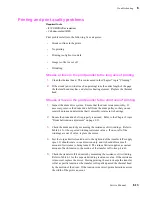
Printing and print quality problems
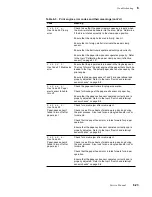
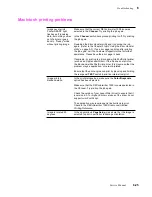
Print problems fall into the following five categories:
n
Streaks or lines in the prints
n
No printing
n
Printing too light or too dark
n
Image is offset or cut off
n
Wrinkling
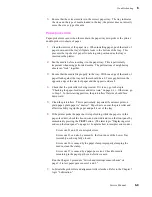
Streaks or lines in the print parallel to the long axis of printing
1.
Clean the thermal head. This is discussed in the Chapter 7 topic “Cleaning.”
2.
If the streak (a dot-wide line of no printing) runs the entire length of the page,
the thermal head may have a defective heating element. Replace the thermal
head.
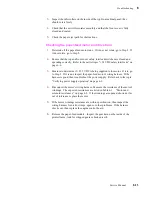
Streaks or lines in the print parallel to the short axis of printing
1.
Inspect the drum drive system. Ensure that the drum rotates smoothly. If
necessary, remove the drum drive belt from the drum pulley so that you can
rotate the drum and determine that it smoothly rotates in its bearings.
2.
Ensure the drum drive belt is properly tensioned. Refer to the Chapter 9 topic
“Drum belt tension adjustment” on page 9-11.
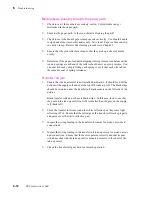
3.
Check the drum motor by measuring the resistance of its windings. Refer to
Table 6-1 for the expected winding resistance values. If one or all of the
windings are out of value, replace the motor.
4.
Test the torque limiter located next to the right end of the transfer roll's supply
spool. It should rotate in one direction only, and it should offer a small
amount of resistance to being turned. The torque limiter supplies a constant
amount of back-tension to the motion of the transfer roll to keep it taut.
5.
Check the transfer roll feed motor by measuring the resistance of its winding.
Refer to Table 6-1 for the expected winding resistance value. If the resistance
is incorrect, replace the motor. During printing, the motor keeps the transfer
roll at a specific tension as the transfer roll is pulled passed the thermal head
by the motion of the drum. If the tension is incorrect, print aberrations across
the width of the print can occur.
Required tools
n
#1 POSIDRIV® screwdriver
n
Volt-ohm
-meter (VOM)
Summary of Contents for DECcolorwriter 1000
Page 11: ...Service Manual xi...
Page 16: ...Service Manual xv...
Page 56: ...2 24 DECcolorwriter 1000 2 Installing the Printer and Drivers...
Page 64: ...3 8 DECcolorwriter 1000 3 Verifying the Printer and Host Connections...
Page 70: ...4 6 DECcolorwriter 1000 4 Key Operator Training...
Page 170: ...8 46 DECcolorwriter 1000 8 FRU Disassembly Assembly...
Page 190: ...9 20 DECcolorwriter 1000 9 Checks and Adjustments...
Page 195: ...Service Manual A 5 Field Replaceable Units List A...
Page 198: ...A 8 DECcolorwriter 1000 A Field Replaceable Units List...
Page 204: ...C 6 DECcolorwriter 1000 C Wiring Diagrams...
Page 208: ...D 4 DECcolorwriter 1000 D Test Pattern Generator...


