8-26
DECcolorwriter 1000
8
FRU Disassembly/Assembly
5.
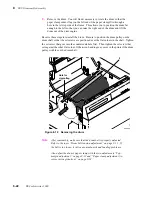
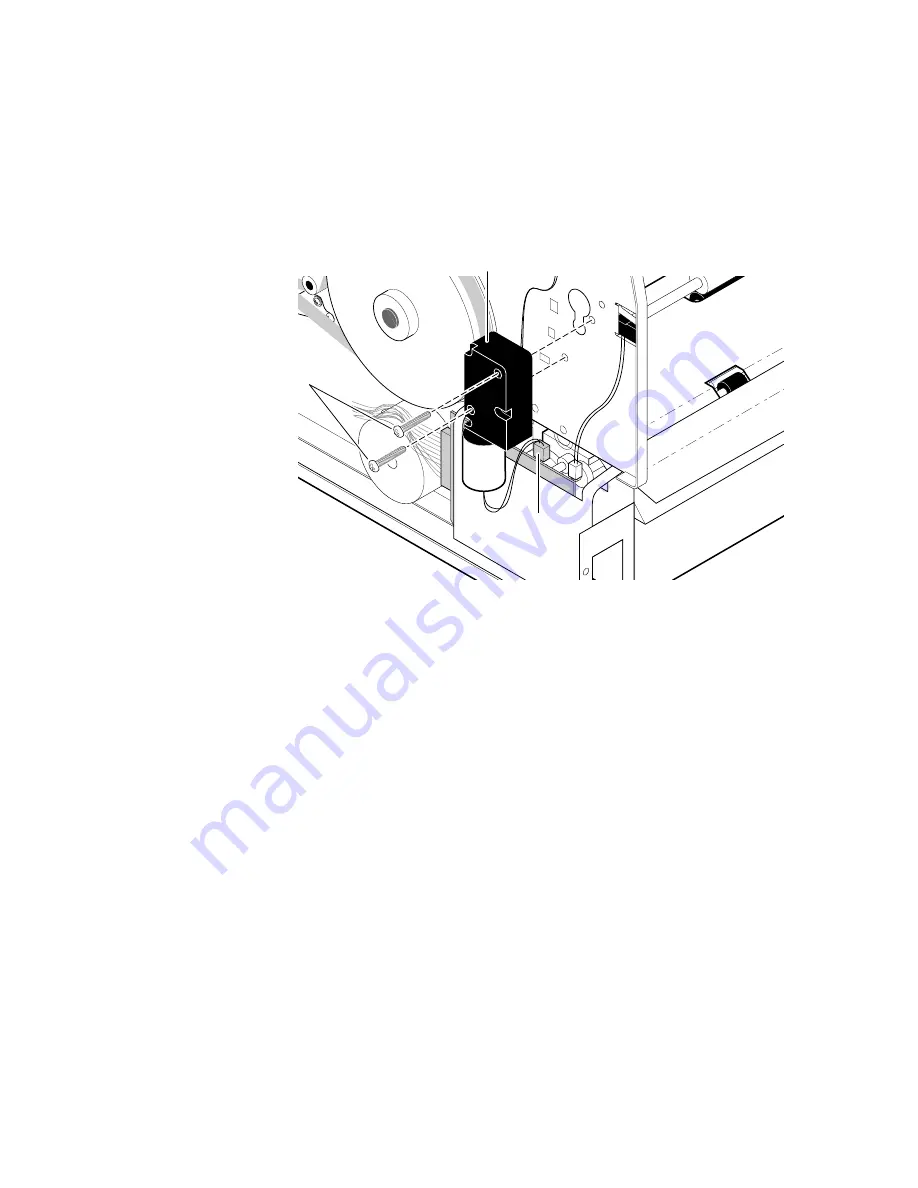
On the outside of the printer, disconnect the wiring harness leading to the
transfer roll take-up motor.
6.
Remove the two screws securing the transfer roll take-up motor to the print
engine frame. Remove the motor.
Reverse these steps to reinstall the transfer roll take-up motor. When you install the
take-up gear, be sure to position the gear's set screw over the keyed portion of the motor
shaft.
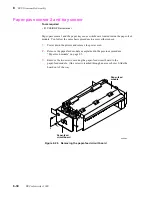
Figure 8-23 Removing the transfer roll take-up motor
6
5
Transfer roll
take-up motor
8699-48
Summary of Contents for DECcolorwriter 1000
Page 11: ...Service Manual xi...
Page 16: ...Service Manual xv...
Page 56: ...2 24 DECcolorwriter 1000 2 Installing the Printer and Drivers...
Page 64: ...3 8 DECcolorwriter 1000 3 Verifying the Printer and Host Connections...
Page 70: ...4 6 DECcolorwriter 1000 4 Key Operator Training...
Page 170: ...8 46 DECcolorwriter 1000 8 FRU Disassembly Assembly...
Page 190: ...9 20 DECcolorwriter 1000 9 Checks and Adjustments...
Page 195: ...Service Manual A 5 Field Replaceable Units List A...
Page 198: ...A 8 DECcolorwriter 1000 A Field Replaceable Units List...
Page 204: ...C 6 DECcolorwriter 1000 C Wiring Diagrams...
Page 208: ...D 4 DECcolorwriter 1000 D Test Pattern Generator...

