Service Manual
8-27
FRU Disassembly/Assembly
8
Thermal head lift motor
1.
Power down the printer and remove the power cord. Remove the cabinet top.
Refer to the earlier topic “Printer cabinet panels” on page 8-3.
2.
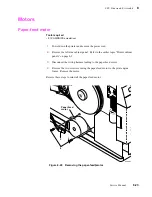
Unloop the thermal head lift belt from the thermal head lift cam roller's
pulley.
3.
Remove the screw securing the bottom of the thermal head lift motor bracket.
The transfer roll mark sensors are mounted to this bracket. Remove the
transfer roll mark sensors shield.
Note
Since you remove the transfer roll mark sensors to gain access to the
printhead lift motor, upon reassembly you should run the calibration
procedure “Calibrating the transfer roll mark sensors (reflective
sensors)” on page 9-10 to ensure that they are in proper adjustment.
Tools required
n
#1 POSIDRIV® screwdriver
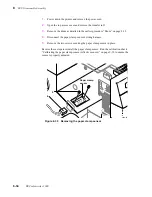
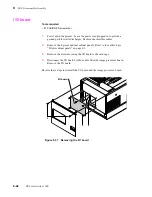
Figure 8-24 Freeing the thermal head drive belt and thermal head lift
motor bracket
8699-63A
Thermal head
lift cam roller
2
Transfer roll
mark sensor
shield
Summary of Contents for DECcolorwriter 1000
Page 11: ...Service Manual xi...
Page 16: ...Service Manual xv...
Page 56: ...2 24 DECcolorwriter 1000 2 Installing the Printer and Drivers...
Page 64: ...3 8 DECcolorwriter 1000 3 Verifying the Printer and Host Connections...
Page 70: ...4 6 DECcolorwriter 1000 4 Key Operator Training...
Page 170: ...8 46 DECcolorwriter 1000 8 FRU Disassembly Assembly...
Page 190: ...9 20 DECcolorwriter 1000 9 Checks and Adjustments...
Page 195: ...Service Manual A 5 Field Replaceable Units List A...
Page 198: ...A 8 DECcolorwriter 1000 A Field Replaceable Units List...
Page 204: ...C 6 DECcolorwriter 1000 C Wiring Diagrams...
Page 208: ...D 4 DECcolorwriter 1000 D Test Pattern Generator...


