4-3
User Maintenance
- After a print job, tightly seal the nozzle bay so the nozzles are protected
against dust and to avoid the ink from drying-out when exposed for a certain
period of time. Since on the LJ 110/120 this operation is carried out auto-
matically after a few seconds of printer inactivity, wait a few seconds before
powering off the machine after a print job.
If a black out occurs while the printer is on, power off the printer and manually
push the print head to its farthest right-hand position.
NOTE: If after a print job the personal computer is powered off before the
printer, the printer will reset itself. If the printer is powered off during its reset
phase, chances are that the print head may come to a stop outside of its parking
position.
It is suggested therefore to power off the printer before the personal computer.
Priming the Monochrome Print Head
Ink must be restored whenever the print head is replaced or whenever one or
more nozzles stop printing. This operation, however, is not required when the
initial characters of a printout are incomplete after the printer has been inactive
for a certain period of time.
Priming forces a small quantity of ink out of the nozzle. Carry out this opera-
tion only when strictly necessary so as to avoid wasting the ink and therefore
reducing the life span of the ink cartridge.
Never perform priming with the printer casing off and the ink tube discon-
nected from the pad. Priming in this condition may spash anything in the
vicinity of the end of the tube with ink.
To prime the monochrome print head:
•
Switch the printer OFF LINE (the print head will move to its parking
position).
•
Open the printer's top cover.
S-4.PM5
11/7/94, 17:02
3
Summary of Contents for DECcolorwriter 120ic
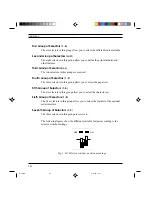
Page 58: ...3 21 Installation Fig 3 21 Fonts selector switches settings S 3 PM5 11 7 94 17 16 21 ...
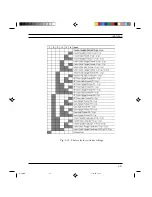
Page 59: ...3 22 Installation Fig 3 22 Character sets selector switches settings S 3 PM5 11 7 94 17 16 22 ...
Page 60: ...3 23 Installation Fig 3 23 Character sets selector switches settings S 3 PM5 11 7 94 17 16 23 ...
Page 78: ...7 3 Electrical Interconnections Fig 7 1 Main board S 7 PM5 3 14 97 3 38 PM 3 ...


