5.3 DEClaser 1152 Printer Cleaning Test Page
5.3 DEClaser 1152 Printer Cleaning Test Page
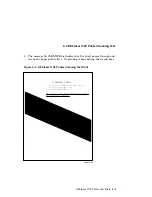
Figure 5–3 shows a Cleaning Test page.
The two-pass cleaning test cleans the fixing unit rollers. Perform the cleaning
test when:
• Installing a new EP-L cartridge
• Staining occurs at the top or bottom of transparencies
• Paper frequently jams in the fixing unit
Note:
Always use plain white paper to generate the cleaning paper. It can be
A4-size, letter-size, or legal-size paper.
Use the following procedure to clean the fixing assembly:
1. Be sure the printer is not printing and the display reads
PS READY/IDLE
.
2. Press
On Line
.
• The On Line indicator shuts off.
•
PS OFFLINE
displays on the control panel.
3. Press and hold down
Test/Font
until the display reads
CLEANING PAPER
and the LED lights on the Test/Font button.
• The cleaning paper prints.
4. Insert the printed cleaning paper into the paper tray with the printed side
facing up.
5. Press
Test/Font
to run the cleaning paper through the printer.
• The cleaning paper moves to the output tray, indicating that the fixing
assembly is clean.
6. Press
On Line
.
• The On Line indicator lights.
•
PS READY/IDLE
displays on the control panel.
Discard the cleaning paper.
5–6 DEClaser 1152 Printer Test Prints

