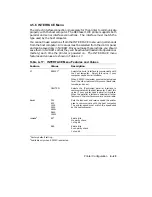
Table 4–6 (Cont.): Changing and Saving Values
Operation
Display Reads
6. Press
r
Enter
to select
the baud feature.
baud
=4800
7. Press
.
once to
display the value 9600.
baud
9600
8. Press
r
Enter
to enter
the new value.
baud
=9600 (momentarily)
#
baud rsmode dtr
9. Press
4
to return
to the menu selections.
INTERFACE SAVE->
10. Press
.
twice
to reach the
NVRAM SAVE menu.
SAVE->NVRAM LOAD
11. Press
r
Enter
to save
the baud value in
NVRAM.
OK (momentarily)
#
SAVE–>NVRAM LOAD
12. Press
On Line
to exit
the Menu Mode.
— The On Line indicator
lights.
00 READY
Verification
Verify that the baud rate has been changed by printing a copy of Test Print
A (Section 2.9), and comparing the new baud rate with the old baud rate.
Printer Configuration
4–13
Summary of Contents for DEClaser 1100 Series
Page 18: ...Figure 1 1 Components Front Right Side View MLO 005960 1 2 Operator s Guide ...
Page 21: ...Figure 1 2 Components Rear Left Side View MLO 005961 Printer Components 1 5 ...
Page 23: ...Figure 1 3 Components Inside the Printer MLO 005962 Printer Components 1 7 ...
Page 31: ...2 Pull the extension tray straight out MLO 005815 Operating Information 2 5 ...
Page 34: ...3 Tap the stack of paper on a flat surface to align the edges MLO 005967 2 8 Operator s Guide ...
Page 65: ...Figure 3 1 Control Panel MLO 005830 3 2 Operator s Guide ...
Page 177: ...Figure C 2 Serial Connections to Modem MLO 004885 Specifications C 5 ...


