2.3 Installation
An installation area of 137 cm wide by 107 cm deep (54 inches wide x 42
inches deep) is required. This provides free access and clearance to the
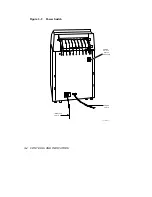
printer’s rear mounted paper rack, ON/OFF switch, paper tray, ac power
cord, and serial interface cable for operating and maintenance purposes.
A power source of 100 to 240 volts, single phase, 50-60 Hertz (Hz) must
be within 10 feet for connecting the ac power cord. Before inserting the
plug into an ac wall outlet, be certain the ON/OFF power switch located
at rear of the printer is set to OFF (0). The printer power supply is self-
adjusting. There is no need to adjust the printer power supply to suit
the mains source when this source is within the specifications.
The proper site environment requirements for LG31 printer installation
are under ‘‘Specifications’’ in Chapter 1. Environmental conditions such
as excessive humidity can cause paper sticking, while low humidity can
cause static build-up.
It is recommended that the leveling feet be adjusted to make the printer
level, if this has not already been done.
The procedure for setting/modifying printer parameters (speed (baud
rate), autowrap, and so on) are described in Chapter 4.
Chapter 4
contains initialization, and Chapter 5 contains power-up, and other
operator-implemented procedures. Procedures for loading the paper and
installing the ribbon cartridge are in Chapter 6.
2.3.1 Print Ribbon Cartridge
Refer to Section 6.3 on installing/replacing the print ribbon cartridge.
INSTALLATION AND CHECKOUT
2–11

