background image

Environmental Monitoring Unit (EMU)

3–26   UltraSCSI RAID Enclosure   

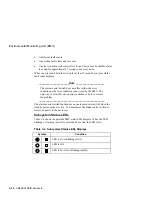
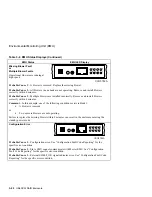
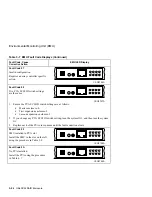
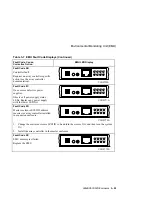
Table 3–7  EMU Fault Code Displays (Continued)

Fault Code, Cause,
Corrective Action

EMU LED Display

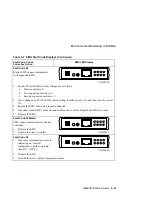
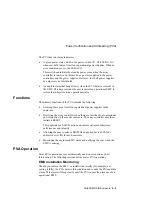
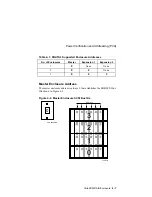
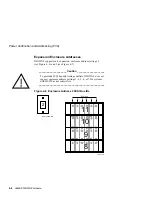
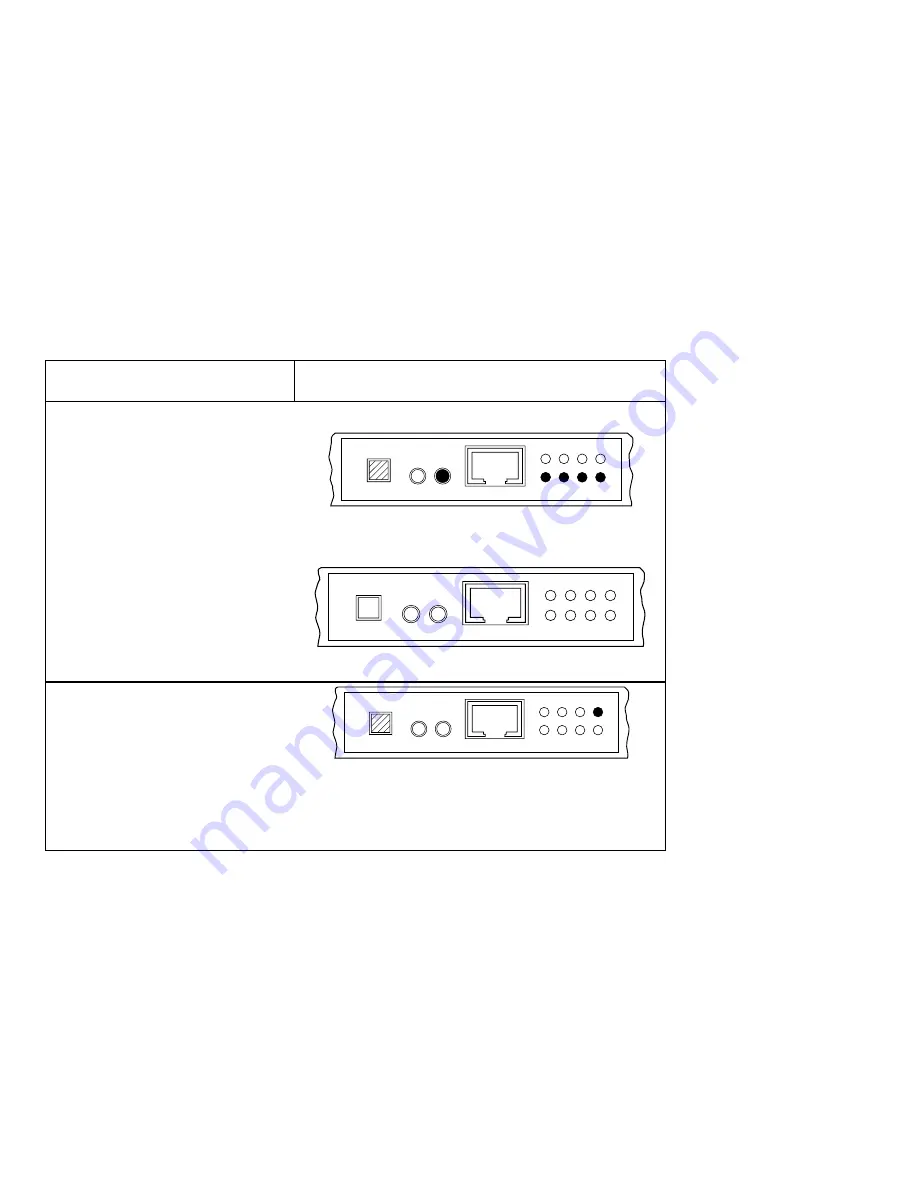
Fault Code 0F

Less than four operational power
supplies.

Replace the defective power supplies.

Comment—The EMU places the
system in the standby power mode

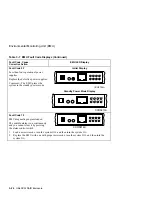
Initial Display

1

2

3

4

5

6

7

8

CXO5784A

Standby Power Mode Display

1

2

3

4

5

6

7

8

CXO5815A

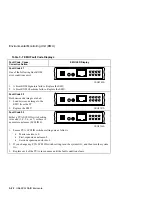
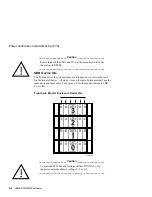
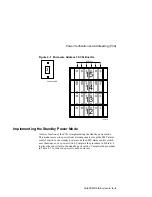
Fault Code 10

EMU diagnostic program loaded.

The audible alarm is on continuously
and you cannot clear it by pressing
the alarm control switch.

1

2

3

4

5

6

7

8

CXO5814A

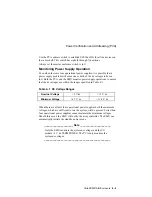
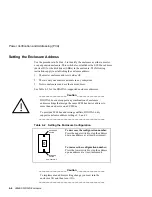
1.  Load new microcode, turn the system O

FF

, and then turn the system O

N

.

2.  Replace the EMU with one with proper microcode, turn the system O

FF

, and then turn the

system O

N

.

Summary of Contents for StorageWorks UltraSCSI DS-BA370 Series

Page 1: ...B01 January 1998 The DIGITAL DS BA370 series UltraSCSI RAID rack mountable enclosure is the basic building block of the UltraSCSI RAID subsystems This guide and the related publications comprise the b...

Page 2: ..._______ This equipment generates uses and may emit radio frequency energy The equipment has been type tested and found to comply with the limits for a Class A digital device pursuant to Part 15 of the...

Page 3: ...nclosure An UltraSCSI Bus Overview 1 4 Product Description 1 5 Enclosure Status 1 10 Typical Controller Status LEDs 1 11 Environmental Monitoring Unit EMU Status LEDs1 12 Power Verification and Addres...

Page 4: ...figuration 2 18 SBB Failure 2 19 3 Environmental Monitoring Unit EMU Product Description 3 2 Controller Status 3 3 I O Module Status 3 4 Enclosure Configuration Information 3 4 EMU Front Panel 3 5 EMU...

Page 5: ...9 Replacing a PVA 4 11 5 Single Ended I O Modules Replacing I O Modules and Cables 5 3 Expanding the UltraSCSI Bus 5 3 Controlling the Internal SCSI Bus 5 4 Controlling the External SCSI Bus 5 4 Contr...

Page 6: ...9 Power Supply Error Condition Reporting 6 10 Replacing a Power Supply 6 11 Power Controller Error Condition Reporting 6 13 Replacing a Power Controller 6 14 7 Storage Devices Handling an SBB 7 2 SBB...

Page 7: ...tabilization A 4 B Assembling an UltraSCSI RAID Subsystem Installation Sequence B 2 Installing the Power System B 3 Installing the EMU B 4 Installing the PVA B 4 Installing the Disk Drives B 4 Install...

Page 8: ...gure 2 6 SBB Status LEDs 2 19 Figure 3 1 EMU 3 1 Figure 3 2 EMU Location 3 2 Figure 3 3 EMU Major Component Locations 3 5 Figure 3 4 EMU Communication Connections 3 8 Figure 3 5 EMU Status LEDs 3 14 F...

Page 9: ...3 16 Table 3 5 DC Voltage Ranges 3 17 Table 3 6 EMU Status Displays 3 18 Table 3 7 EMU Fault Code Displays 3 22 Table 3 8 Removing an EMU 3 27 Table 3 9 Installing an EMU 3 27 Table 3 10 EMU Communic...

Page 10: ...ED Displays 6 10 Table 6 2 Removing a Power Supply 6 12 Table 6 3 Installing a Shelf Power Supply 6 13 Table 6 4 Removing an AC Input Power Controller 6 15 Table 6 5 Installing an AC Power Controller...

Page 11: ...either a data center cabinet or a departmental server cabinet Structure The organization of this manual is as follows Chapter 1 This chapter describes the UltraSCSI RAID enclosure functions uses comp...

Page 12: ...ment procedures Chapter 7 This chapter describes the disk drives operation functions uses configuration and replacement procedures Chapter 8 This chapter describes blower operation status reporting an...

Page 13: ...ic type indicates emphasis and publication titles Italic type in the glossary indicates a cross reference A R As required LED is OFF LED is ON or blinking slowly LED is FLASHING blinking rapidly Warni...

Page 14: ...sion 7 0 Configuration Manual EK HSZ70 CG HSZ70 Array Controller HSOF Version 7 0 Service Manual EK HSZ70 SV Installing a Host Bus Cable Ferrite Bead EK SWXES IG Installing an HSZ70 ECB Cable EK HSZ70...

Page 15: ...________________ ACHTUNG ___________________ Dieses ist ein Ger t der Funkst rgrenzwertklasse A In Wohnbereichen k nnen bei Betrieb dieses Ger tes Rundfunkst rungen auftreten in welchen F llen der Ben...

Page 16: ...m DS SWXRE HA with 2 ac power controllers DS BA35X HE 8 180 W shelf power supplies BA35X HH 24 disk drives 2 4 9 GB 6 1 N A 48 4 48 4 RAID Array 7000 Subsystem DS SWXRE HA with 2 ac power controllers...

Page 17: ...X HE 8 180 W shelf power supplies BA35X HH 24 disk drives 2 4 9 GB 6 1 N A 48 4 48 4 RAID Array 7000 Subsystem DS SWXRE HA with 2 ac power controllers DS BA35X HE 8 180 W shelf power supplies BA35X HH...

Page 18: ...SES Template Word 7 Blank Page Fix by Peter LaQuerre...

Page 19: ...SCSI small computer system interface RAID random array of independent disks enclosure DS BA370 series see Figure 1 1 is the basic building block for DIGITAL single ended UltraSCSI RAID subsystems Figu...

Page 20: ...UltraSCSI operation ______________________Note _____________________ The DS model number prefix defines new DIGITAL storage products In some cases these numbers may be similar to an existing product n...

Page 21: ...Introducing the UltraSCSI RAID Enclosure Ultra SCSI RAID Enclosure 1 3 Figure 1 2 Typical DS BA370 Applications 0 1 0 0 1 0 0 1 0 0 1 0 0 1 0 0 1 0 CXO6264A...

Page 22: ...the same distances as single ended Fast SCSI signals However the UltraSCSI bus can run over much greater distances than Fast SCSI in either single ended or differential mode To attain these greater di...

Page 23: ...he shelf power supplies A minimum of five and a maximum of eight shelf power supplies DS BA35X HH Eight dual speed blowers DS BA35X ML that cool the components by drawing air in through the front and...

Page 24: ...the SCSI bus ID of each shelf See Figure 1 3 for bus and shelf identifiers when viewing the enclosure from the front Figure 1 3 Typical Enclosure Bus and Device Addressing CXO6266A 2 3 4 5 6 1 SCSI b...

Page 25: ...ion to verify that your controller can support multiple cabinets ________________________________________________ Table 1 1 UltraSCSI Subsystems Capacities Enclosures SCSI Buses Disk Drives Total Disk...

Page 26: ...lly assigns SCSI bus device addresses 0 1 2 and 3 to the four disk drive shelves Master EMU The environmental monitoring unit in the master enclosure is the Master EMU This is the only EMU that commun...

Page 27: ...ller I O Module This device provides termination for the internal UltraSCSI buses and is the connection point for the cables connecting the six buses to an expansion enclosure SCSI Bus Controllers A h...

Page 28: ...gure 1 4 The green LED is the System OK LED the amber LED is the Fault LED When the Fault LED is on you must check the other status LEDs to determine the cause of the error For an enclosure in a pedes...

Page 29: ...ntroller OCP LEDs Reset button Port Fault LEDS 6X Port button 6X 1 2 3 4 5 6 CXO5732A Host port power fault LED The green array controller LED in the RESET button indicates controller status This LED...

Page 30: ...2 System fault LED amber 3 Temperature fault LED amber 4 Power status LED green 6 Blower fault Error Condition and Fault Code LEDs amber Power Verification and Address PVA Status LEDs The PVA Figure 1...

Page 31: ...ion for detailed information about these LEDs Figure 1 9 Power Supply Status LED Locations CXO 4787A MC Shelf status LED Green Power supply status LED Green SBB Status LEDs Each SBB see Figure 1 10 ha...

Page 32: ...Ds CXO5829A External TERMPOWER Internal TERMPOWER Options The following sections describe the UltraSCSI RAID subsystem user selectable options Power The standard UltraSCSI enclosure power configuratio...

Page 33: ...timum power redundancy With separate ac power sources for each ac power controller there are no single points of failure _____________________Note ______________________ For optimum operation each ac...

Page 34: ...undant subsystem with two UltraSCSI controllers two cache modules and external cache batteries is the most effective and efficient method of ensuring continuous subsystem operation UltraSCSI Bus Expan...

Page 35: ...th each system This chapter supplements and expands on this information Other chapters in this manual contain detailed information about individual component functions operations error conditions and...

Page 36: ...nd are SCSI bus nodes Adapters Controllers Storage devices 4 Every node on a bus must have a unique SCSI ID 5 The SCSI ID for controller A is always 7 6 The SCSI ID for controller B is always 6 7 Ther...

Page 37: ...se the information in the controller specific documentation ________________________________________________ The following general configuration rules apply to the UltraSCSI RAID array controllers 1 T...

Page 38: ...s are device dependent a A bus with all UltraSCSI devices has a maximum transfer rate of 40 MB sec b A bus with one wide 16 bit FAST 10 SCSI devices VW suffix installed has a maximum transfer rate of...

Page 39: ...iguration rules apply to the UltraSCSI RAID subsystem enclosures 1 The only compatible power controller is the model DS BA35X HE 2 The only compatible power supply is the model DS BA35X HH 180 W The b...

Page 40: ...SCSI ID switch setting for the master enclosure is always 0 2 UltraSCSI subsystem expansion enclosures use either PVA SCSI ID switch setting 2 or 3 The PVA SCSI ID switch setting for the first expansi...

Page 41: ...______ Before applying power to the subsystem be sure to configure the entire subsystem to include the host and the array controller as described in the appropriate publications ______________________...

Page 42: ...t Power Controller 1 0 CXO5113A AC Input Power Controller and SBB Shelf Power Supply Locations 17 11 CXO5808A 19 20 21 22 23 24 13 14 15 16 18 7 8 9 10 12 1 2 3 4 5 6 Controller A Controller B EMU PVA...

Page 43: ...requires pressing the standby power switch on each EMU ___________________ Caution _____________________ Failure to clear the cache module and shut down the array controller before removing power will...

Page 44: ...he array controller documentation 2 Shut down the array controller press and hold the PVA standby power switch CALLOUT 1 on an expansion enclosure until the master EMU initiates a power shut down on a...

Page 45: ...losure Table 2 3 Turning On the DC Power 1 When there are no expansion enclosures go to Step 3 2 Momentarily press the EMU alarm control switch CALLOUT 2 on each expansion enclosure CXO5774A 1 2 3 4 5...

Page 46: ...ion enclosure until the master EMU initiates a power shut down on all enclosures When there is no expansion enclosure press and hold the PVA standby power switch CALLOUT 1 on the master enclosure unti...

Page 47: ...On the Subsystem Power 1 When there are no expansion enclosures go to Step 4 2 Starting with an expansion enclosure turn ON all the power controllers by pressing 1 on each power switch 1 0 CXO5488A AC...

Page 48: ...6 lists the major enclosure components and the status monitored Table 2 6 Enclosure Status Monitoring Component Status Monitored Enclosure Intake air temperature Exhaust temperature AC input power Nu...

Page 49: ...____ The primary elements of the enclosure status are the enclosure power and the blowers Loss of either a dc voltage or a blower is an error condition The enclosure notifies the user of the problem b...

Page 50: ...e amber LED is the system fault LED The green LED indicates the enclosure is operational This LED can be ON as long as at a minimum number of redundant components such as blowers or power supplies are...

Page 51: ...n a blower problem or a power problem Replace the defective blower or power components 2 Observe individual SBBs for error condition 3 Check the array controller optional system maintenance terminal f...

Page 52: ...ating properly For detailed information about the power supply status LEDs see Chapter 6 Power Distribution SBB Configuration Part of the initial configuration procedure for the subsystem involves con...

Page 53: ...ity can the array controller start configuring the SBB As part of the configuration process the array controller will restore all data that was on the original disk SBB Failure The LEDs on the SBBs Fi...

Page 54: ...SES Template Word 7 Blank Page Fix by Peter LaQuerre...
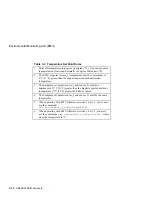
Page 55: ...ocode status information The EMU and the array controller can exchange and process some of this information Figure 3 1 EMU CXO 5497A MC ___________________ Caution _____________________ Proper operati...

Page 56: ...onfiguration faults and notifies the user of existing or impending failures using one or more of the following error reporting systems EMU LEDs EMU audible alarm Error messages on the host interface E...

Page 57: ...ller is operational an overtemperature condition causes the EMU to turn the enclosure power OFF When the master enclosure has an overtemperature condition clearing the cache module prior to turning of...

Page 58: ...type it can display this information on the optional maintenance terminal An integrated circuit on each I O module functions as a bus expander The EMU and the array controller can enable or disable t...

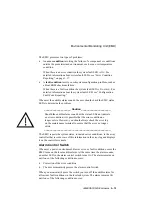
Page 59: ...ponent Locations CXO5774A 1 2 3 4 5 6 7 1 EMU communications connector 2 System fault LED amber and alarm control switch 3 Temperature fault LED amber 4 Power status LED green 5 RS232 Connector 6 Blow...

Page 60: ...the user defined temperature setpoints this amber LED CALLOUT 3 is ON until the overtemperature condition is corrected Power Supply Status LED This green LED CALLOUT 4 is ON whenever ALL the followin...

Page 61: ...more blowers are not operating One or more blowers are not operating at the correct speed Removal of a blower The blower LEDs are also on when there is a configuration fault Configuring the EMU Config...

Page 62: ...shing an EMU EMU communication bus you ensure that the master EMU can monitor and control all the enclosures in the UltraSCSI subsystem Figure 3 4 EMU Communication Connections CXO5820A DIGITAL recomm...

Page 63: ...blowers operating at high speed should prevent an overtemperature condition occurring and shutting down the enclosure You must use the following CLI commands to set the temperature set point for each...

Page 64: ...onship between C and F Fahrenheit Always use the rules in Table 3 3 when setting the temperature set points The EMU sensor monitors the EMU air temperature while the two enclosure sensors monitor the...

Page 65: ...C F C F C F C 32 0 50 10 68 20 86 30 104 40 34 1 52 11 70 21 88 31 106 41 36 2 54 12 72 22 90 32 108 42 37 3 55 13 73 23 91 33 109 43 39 4 57 14 75 24 93 34 111 44 41 5 59 15 77 25 95 35 113 45 43 6...

Page 66: ...ambient intake temperature 3 The backplane set points sensor_1 and sensor_2 must be a minimum of 13 C 23 F greater than the highest expected ambient temperature 7 C 13 F greater the EMU set point 4 Th...

Page 67: ...__________ DIGITAL recommends using the set emu fanspeed automatic so that each EMU can implement corrective action whenever one of the following error conditions occurs A blower fails You remove a bl...

Page 68: ...c power in the enclosure to prevent component overheating When you momentarily depress the alarm control switch the EMU audible alarm will turn OFF and the fault status LEDs remain ON At this time the...

Page 69: ...arm sound but the status LEDs not indicate an error condition it is possible that the error condition no longer exists However you should always check the error log on the maintenance terminal to ensu...

Page 70: ...ror condition or the error condition code stored by the EMU The only way to clear this stored error condition code is to correct the problem ________________________________________________ The alarm...

Page 71: ...ur operational power supplies cannot maintain the minimum voltages Should this occur the EMU will notify the array controller The EMU can automatically initiate the standby power mode when controller...

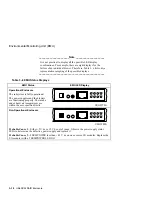
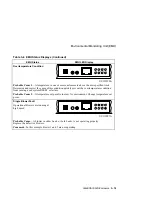
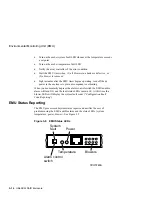
Page 72: ...able 3 6 EMU Status Displays EMU Status EMU LED Display Operational Enclosure The subsystem is fully operational The power supplies and the blowers are functioning properly The intake and exhaust air...

Page 73: ...and correct the cause of this condition quickly prevent the overtemperature condition from causing a subsystem RESET or failure Probable Cause 2 A temperature set point is too low for environment Cha...

Page 74: ...l blowers correctly within 8 minutes Comment In this example one of the following conditions exists in Bank 1 A blower is removed or Two or more blowers are not operating Failure to replace the missin...

Page 75: ..._ Until you momentarily press the FLASHING alarm control switch the blower LEDs cannot display the fault codes ________________________________________________ Each time you momentarily press the alar...

Page 76: ...microcode images are bad 1 Load microcode image to the EMU from the PC 2 Replace the EMU 1 2 3 4 5 6 7 8 CXO5761A Fault Code 03 Either a PVA SCSI ID switch setting is invalid 1 4 5 6 or 7 or there is...

Page 77: ...change any PVA SCSI ID switch setting turn the system OFF and then turn the system ON 3 Ensure the EMU cables are properly connected 4 Disconnect each EMU cable and connect them one at a time Replace...

Page 78: ...67A 1 Ensure the PVA SCSI ID switch settings are as follows Master enclosure 0 First expansion enclosure 2 Second expansion enclosure 3 2 If you change any PVA SCSI ID switch setting turn the system O...

Page 79: ...C One or more defective power supplies Observe all power supply status LEDs Replace any power supply with the lower LED OFF 1 2 3 4 5 6 7 8 CXO5771A Fault Code 0D Master enclosure SCSI ID address inco...

Page 80: ...laces the system in the standby power mode Initial Display 1 2 3 4 5 6 7 8 CXO5784A Standby Power Mode Display 1 2 3 4 5 6 7 8 CXO5815A Fault Code 10 EMU diagnostic program loaded The audible alarm is...

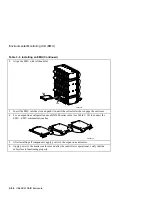
Page 81: ...e procedure in Table 3 9 Table 3 8 Removing an EMU 1 Shut down the system by clearing the cache module and shutting down the controller 2 Turn Off the enclosure power 3 Pull the extractor latches forw...

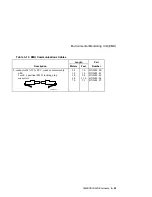
Page 82: ...d push it in until the extractor latches engage the enclosure 4 For an expansion configuration use a BN26M series cable see Table 3 10 to connect the EMU EMU communications bus CXO5820A 5 After instal...

Page 83: ...ble 3 10 EMU Communications Cables Length Part Description Meters Feet Number 8 conductor 24 AWG PVC round cable assembly with 2 each 8 position 8MP locking plug connectors CXO5747A 0 5 1 0 3 0 4 0 7...

Page 84: ...SES Template Word 7 Blank Page Fix by Peter LaQuerre...
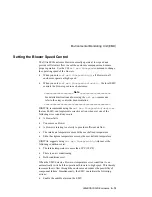
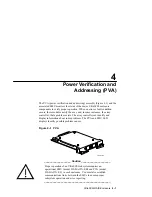
Page 85: ...ontroller that a problem exists The array controller can identify and display information about some problems The PVA and EMU LED displays identify possible problem causes Figure 4 1 PVA CXO 5737A ___...

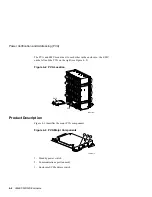
Page 86: ...he enclosure the EMU on the left and the PVA on the right see Figure 4 2 Figure 4 2 PVA Location CXO5754A EMU PVA Product Description Figure 4 3 identifies the major PVA components Figure 4 3 PVA Majo...

Page 87: ...de the following Ensuring there are at least four operational power supplies in the enclosure Notifying the array controller when there are less than four operational power supplies in the master encl...

Page 88: ...h enclosure are arranged on six vertical buses in four horizontal shelves All six devices on the same horizontal shelf use the same device address or ID See Figure 4 4 for the master enclosure SBB dev...

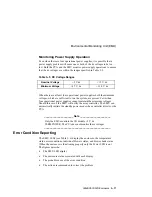
Page 89: ...dc voltages are within the ranges specified in Table 4 1 Table 4 1 DC Voltage Ranges Nominal Voltage 5 V dc 12 V dc Minimum Voltage 4 7 V dc 11 4 V dc When there are at least four operational power s...

Page 90: ...__ DIGITAL does not support any combination of enclosure address settings that assign the same SCSI bus device address to more than one device on a SCSI bus To preclude SCSI bus addressing conflicts D...

Page 91: ...dresses No of Enclosures Master Expansion 1 Expansion 2 1 0 None None 2 0 2 None 3 0 2 3 Master Enclosure Address The master enclosure address is always 0 that establishes the SBB SCSI bus IDs shown i...

Page 92: ...6 and 3 see Figure 4 7 ____________________ Caution ____________________ To preclude SCSI bus addressing conflicts DIGITAL does not support enclosure address settings 1 4 5 6 or 7 for systems with HS...

Page 93: ...de A major function of the PVA is implementing the standby power mode This mode removes dc power from all components except the EMU alarm control switch In the standby power mode the EMU alarm control...

Page 94: ...wn on all enclosures If there is no expansion enclosure press and hold the PVA standby power switch CALLOUT 1 on the master enclosure until the EMU initiates a power shut down CXO5821A 1 2 3 3 The enc...

Page 95: ...7 to replace a defective PVA Complete the procedure in Table 4 7 when assembling an UltraSCSI RAID enclosure Table 4 6 Removing a PVA 1 Shut down the array controller and turn off power in the enclos...

Page 96: ...lign the PVA with the right hand slot CXO5754A EMU PVA 3 Insert the PVA into the slot and push it in until the extractor latches engage the enclosure 4 Push in on the extractor latches to firmly seat...

Page 97: ...uses Establishing SCSI bus communications between Figure 5 1 Single Ended I O Module CXO5816A ___________________ Caution _____________________ Not all array controllers support an UltraSCSI RAID subs...

Page 98: ...rconnection point between the array controller in the master enclosure and the devices in the expansion enclosures In an UltraSCSI RAID subsystem the I O modules the internal SCSI buses and the array...

Page 99: ...roller and 2 Turn off the enclosure power Failure to do so can induce a controller error condition Expanding the UltraSCSI Bus Each I O module has a UltraSCSI single ended bus expansion integrated cir...

Page 100: ...SCSI Bus The I O module controls the external SCSI bus in the following manner Provides single ended SCSI bus termination for the external bus Distributes TERMPOWER 5 V dc to the external SCSI bus Tur...

Page 101: ...ller An operational controller will automatically turn off without implementing procedures to clear the cache module The result is that the controller will cease to operate and be in an error state a...

Page 102: ...ernal TERMPOWER LEDs are ON during normal operation Whenever there is a TERMPOWER overcurrent condition or there is no TERMPOWER the associated LED is OFF See Table 5 1 for possible causes of TERMPOWE...

Page 103: ...s or between disk drives ________________________________________________ To expand a SCSI bus use the 68 pin VHDCI receptacle connectors on the I O module and a BN37A series cable See Table 5 2 for a...

Page 104: ...n UltraSCSI Subsystem ____________________ Caution ____________________ Not all array controllers support an UltraSCSI RAID subsystem with more than one enclosure Read the array controller documentati...

Page 105: ...Preliminary Procedures Complete the procedure in Table 5 3 before installing the cables Table 5 3 Preliminary Cabling Procedures 1 Select the UltraSCSI cables for each segment based upon the distances...

Page 106: ...us Cables Length Order Description Meters Feet Number 68 conductor SCSI cable with 2 VHDCI straight plug connectors with jack screws CXO5702A 0 3 0 5 1 0 1 5 2 0 1 0 1 6 3 3 4 9 6 6 BN37A 0C BN37A 0E...

Page 107: ...ubsystem 1 On the host dismount the UltraSCSI RAID subsystem disk drives 2 Connect a maintenance terminal to an array controller CXO5716A Other controller This controller 3 Shut down the other array c...

Page 108: ...expanded configurations ________________________________________________ ______________________Note _____________________ Each bus requires two BN37A cables a total of 12 cables _____________________...

Page 109: ...Repeat Steps 1 and 2 for all the I O modules 4 On the first master I O module align the Cable A connector with the left connector CXO5854A Cable A Gently insert the cable connector into module connect...

Page 110: ...ble Tighten the wire tie CXO5841A 6 4 2 5 3 1 6 4 2 5 3 1 6 4 2 5 3 1 Cable A Cable B 7 Align the Cable B connector with the right connector Gently insert the cable connector into module connector Tig...

Page 111: ...he remaining SCSI buses 12 Turn the subsystem on see Table 5 7 and verify that it is functioning properly Table 5 7 Turning On the UltraSCSI Subsystem 1 Restore power to each enclosure by turning ON t...

Page 112: ...this procedure for the I O modules on each SCSI bus starting with SCSI bus 1 Each SCSI bus requires one BN37A cable for a total of 6 cables ____________________ Caution ____________________ Overtighte...

Page 113: ...pport bracket and around the cable Tighten the wire tie 5 Align the module with the Port 1 backplane connector in the master enclosure shroud Gently insert the module and fully seat it Use a screwdriv...

Page 114: ...connector with the left connector on the other I O module Gently insert the cable connector into module connector Tighten both cable connector thumb screws to fully seat the connector 9 Install a wire...

Page 115: ...ing an I O Module 1 Shut down the array controller see Table 5 10 Use a screwdriver to loosen the two spring loaded mounting screws on the I O module 2 Grasp the module by the cable support bracket an...

Page 116: ...s on the cable support bracket and around the cable Tighten the wire tie 5 Align the right cable with the I O module connector 6 Gently insert the cable connector into module connector Tighten both ca...

Page 117: ...ller supports expanded configurations ________________________________________________ Complete the procedure in Table 5 11 to remove expansion cable Complete the procedure in Table 5 12 to install ca...

Page 118: ...and remove it from the enclosure shroud 3 Repeat Steps 1 and 2 for the other I O module 4 Cut the wire tie on the left cable Loosen the thumb screws and remove the cable CXO5940A 5 Label the cable co...

Page 119: ...he holes on the cable support bracket and around the cable Tighten the wire tie 5 Align the right cable with the I O module connector 6 Gently insert the cable connector into module connector Tighten...

Page 120: ...SES Template Word 7 Blank Page Fix by Peter LaQuerre...
Page 121: ...sure power distribution to include the following The enclosure power system and components see Figure 6 1 Power distribution configurations standard redundant optimum Configuring the power distributio...

Page 122: ...____ The power controller power cords are integral to the data center cabinets For the departmental server cabinets the user supplied power cords are country specific The SBB shelf ac power cords are...

Page 123: ...of eight power supplies Two power controllers distribute ac power to four supplies on power bus A and power bus B This configuration requires two ac power sources AC Power Source The power controller...

Page 124: ...r controller a power controller failure disables the enclosure Figure 6 2 AC Power Input Controller 1 0 CXO5488A AC power switch AC receptacle ____________________ Caution ____________________ The onl...

Page 125: ...supply model BA35X HF can not be used ________________________________________________ The shelf power supply converts the ac voltage to 5 V dc and 12 V dc and distributes these voltages throughout th...

Page 126: ...both buses the optimum power configuration n 4 with two ac power sources Power bus A uses black power cords The grey power cords are for power bus B AC power controller A controls the black power cor...

Page 127: ...sure and on the upper right corner see Figure 6 5 Figure 6 5 Standard Power Configuration CXO5929A The standard power configuration has the following components 1 ac power source 5 shelf power supplie...

Page 128: ...edundant Power Configuration CXO5797A DIGITAL recommends this power configuration for complete data protection with maximum redundancy of all enclosure power system components Any one of the following...

Page 129: ...components 3 power supplies DS BA35X HH 1 ac power controller DS BA35X HE To implement this configuration from n 1 or an n 4 configuration requires a second ac power source DIGITAL recommends this pow...

Page 130: ...being reported The recommended corrective action Figure 6 7 Power Supply Status LEDs CXO 4787A MC POWER STATUS LED GREEN POWER SUPPLY STATUS LED GREEN Table 6 1 Shelf Power Status LED Displays If the...

Page 131: ...isk drives Normally you can replace one shelf power supply without removing power from the enclosure There are two methods for replacing shelf power supplies the hot swap method and the cold swap meth...

Page 132: ...nting tabs together to release the power supply from the shelf CXO 4314A MC 5 Use both hands and pull the power supply out of the shelf 6 Insert the power supply into an electrostatic shipping contain...

Page 133: ...Insert the shelf power supply into the guide slots and push it in to fully seat it and the bezel mounting tabs engage the shelf 4 Connect the power cord to the shelf power supply 5 Both status LEDs sh...

Page 134: ...roller ___________________ WARNING __________________ Only qualified service personnel can replace an ac power controller To prevent the possibility of injury or death as a result of electrical shock...

Page 135: ...Controller 1 Press O on the ON OFF switch 2 Disconnect the ac power cord 3 Loosen the two retaining screws CXO 5186A MC 1 0 1 0 AC Power Entry Controller A ON OFF Switch AC Input Power Cord Retaining...

Page 136: ...r controller OFF 3 Align the first power controller with either slot A or slot B in the lower left corner of the RAID enclosure CXO 5186A MC 1 0 1 0 AC Power Entry Controller A ON OFF Switch AC Input...

Page 137: ...ed are error conditions and the associated LED displays ___________________ Caution _____________________ The DIGITAL UltraSCSI RAID enclosure supports 3 5 inch disk drive SBBs This enclosure does not...

Page 138: ...or handling an SBB to prevent damage Figure 7 1 SBB Handling Rules Do NOT stack SBBs Do NOT set the SBB on its edge Do NOT drop the SBB Do NOT force the SBB into the shelf Set the SBB on its side Set...

Page 139: ...array controller or host for processing The SBB LEDs define the status of the individual SBBs Each storage SBB has two LED indicators see Figure 7 2 that display the SBBs status These LEDs have three...

Page 140: ...The SBB is operating normally The SBB is inactive and there is no fault The SBB is probably not responding to control signals DIGITAL recommends that you replace the SBB The SBB is active and is spinn...

Page 141: ...ry label see Figure 7 3 on the side of the SBB or the SBB identification label see Figure 7 4 on the bezel Figure 7 3 Typical SBB Regulatory Label CXO5916A The SBB bezel label includes the following d...

Page 142: ...is the array controller port or SCSI bus 6 The SCSI bus device width where N an 8 bit device W a 16 bit device 7 The StorageWorks shelf type Wide or Narrow in which you can install the device where N...

Page 143: ...itive electronic device from electrostatic discharge ESD use the following precautions 1 Wear an ESD wrist strap 2 Do not touch the printed circuit board or the backplane connector 3 Do not lay the de...

Page 144: ...replace SBBs from a system that is on line and active Warm Swap When you perform a warm swap power is present on the SBB enclosure connector and there is no data on the bus Before you perform a warm...

Page 145: ...emoving and replacing an SBB Over the active product life of 5 years this is the equivalent of 40 replacement cycles per year or approximately 1 cycle every 9 days The replacement cycle limit applies...

Page 146: ...complete the procedure in Table 7 3 Table 7 2 Removing an SBB 1 To perform a hot swap go to Step 4 2 To perform a warm swap quiesce the SCSI bus 3 To perform a cold swap turn off the ac power control...

Page 147: ...ping container and ensure it is the correct model CXO 4562A MC 2 When assembling an UltraSCSI enclosure go to Step 3 To install a single SBB insert each SBB into the guide slots and push it in until i...

Page 148: ...troller B EMU PVA Cache B Cache A Power bus A Power bus B A B 4A 3A 2A 1A 3B 2B 1B 4B Shelf 4 Shelf 3 Shelf 2 Shelf 1 4 Starting at the left end install all the devices in shelf 2 devices 7 through 12...

Page 149: ...ng to establish and maintain the proper external that is the ambient environment Failure to achieve these goals could cause components to malfunction thereby causing the comprising data integrity The...

Page 150: ...ling When the overtemperature condition is caused either by the intake temperature or the exhaust temperatures backplane being too high the EMU initiates routines that can cause a power shut down to o...

Page 151: ...blower The combination of the connectors and the blower mounting tabs provide positive mating of the blower with blower plenum When an error condition involving the blowers the intake temperature or t...

Page 152: ...r DIGITAL recommends that you replace a defective blower immediately If you remove a blower and do not replace it within 8 minutes the EMU can implement the standby power mode thereby protecting the c...

Page 153: ...Use both hands to firmly press the upper and lower blower mounting tabs together to release the blower CXO5753A Guide Connector Lower mounting tab not shown Upper mounting tab 2 Pull the defective blo...

Page 154: ...at it is a model DS BA35X MK 2 Orient the replacement blower so that the connector and guide pin align with the backplane blower connector CXO5753A Guide Connector Lower mounting tab not shown Upper m...

Page 155: ...StorageWorks UltraSCSI enclosure with 24 disk drives SBBs and the following major electronic components CXO5555A 1 2 3 5 6 7 8 9 10 4 8x 6x 8x 2x 2x 2x 1 DS BA370 Enclosure 6 Cache Module 2 each 2 Bl...

Page 156: ...__________________________________________ Physical and Electrical Specifications The following specifications apply to a single Ultra SCSI enclosure with all the components installed Shipping Dimensi...

Page 157: ...les 0 5 micron or larger per cubic foot of air Nominal airflow 50 cubic ft minute Heat Dissipation 3070 BTUs hr Minimum Operating Environment Required for proper operation Temperature 10 C to 40 C 50...

Page 158: ...nsation on the outside of the SBB Stabilize the device and the SBB in the operating environment for 6 hours or until the condensation is no longer visible whichever is longer Do not install a storage...

Page 159: ...enter cabinet SW600 series and then testing the subsystem for proper operation CXO5797A __________________ WARNING____________________ With all the components installed a RAID enclosure with the packi...

Page 160: ...ansion enclosure to the master enclosure and test the subsystem operation The assembly procedures for an enclosure are almost identical to those described elsewhere in this publication Therefore rathe...

Page 161: ...atic discharge do not touch the connector ________________________________________________ _____________________Note ______________________ The ac power controller has no user serviceable components S...

Page 162: ...e multiple EMUs install the EMU EMU bus cables listed in Table 3 10 Installing the PVA Each UltraSCSI enclosure requires a PVA for proper operation Complete the procedure in Table 4 7 to install a PVA...

Page 163: ...ng Expansion Cables ___________________ Caution _____________________ Not all array controllers support more than one enclosure Read the controller documentation to verify that it does support more th...

Page 164: ...all only one set of array controllers and cache modules in an UltraSCSI RAID subsystem By default this enclosure becomes the master enclosure and always has address 0 _________________________________...

Page 165: ...a Power controllers and power supplies b EMU c PVA d Disk Drives e I O Modules f UltraSCSI expansion cables 2 Align controller A with the top controller slot device address 7 17 11 CXO5813A 19 20 21 2...

Page 166: ...e extractor latches engage the enclosure CXO5602A 4 Push in on the extractor latches to firmly seat the array controller 5 Align controller A cache module with the cache module A slot in the enclosure...

Page 167: ...er B Installation 1 Complete the sequential installation of the following UltraSCSI enclosure components a Power controllers and power supplies b EMU c PVA d Disk Drives e I O Modules f UltraSCSI expa...

Page 168: ...nd push it in until the extractor latches engage the enclosure 7 Push in on the extractor latches to firmly seat the cache module Internal Cables All internal cables are cabinet specific The cabinet u...

Page 169: ...air temperature The temperature of the air surrounding the cabinet enclosure shelf or SBB that dissipates the heat generated by the device Also referred to as the intake air temperature array controll...

Page 170: ...rs and receivers may be part of extenders as well as part initiators and targets Bus segments can be either single ended SE or differential DF The terminator properties determine the bus segment type...

Page 171: ...ce to a numbered callout in a figure carrier See modular carrier CE Mark A European Economic Community EEC certification label that identifies electronic devices authorized for sale within member nati...

Page 172: ...itial installation or StorageWorks subsystem upgrades or when conditions preclude using either the warm swap or hot swap method See also warm swap and hot swap command line interpreter See CLI control...

Page 173: ...bus expanders and similar device interconnected to form a SCSI bus Connectors expanders and hubs do not use a SCSI bus ID See also nodes device connector Any connector physically part of a SCSI devic...

Page 174: ...e that monitors the status of the UltraSCSI RAID enclosure to include power intake air temperature blower status and so forth detects error and fault conditions displays these conditions reports the c...

Page 175: ...oving electronic devices within the United States FCC Class A This certification label appears on electronic devices for use only in a commercial environment within the United States A CE Mark certifi...

Page 176: ...CSI protocol and normally operates in the initiator role host port adapter A host controller device that adapts the host system I O bus to the array controller SCSI bus configuration hot swap A method...

Page 177: ...group of devices addressable as a virtual unit maintenance terminal The operator terminal used to identify an HS family controller to enable its host paths to define its subsystem configuration and to...

Page 178: ...SCSI bus ID and are nodes Hubs expanders and converters are devices and do not have a SCSI bus ID An UltraSCSI bus can have a maximum of 16 nodes SCSI bus addresses 0 through 15 A narrow bus can have...

Page 179: ...n warm swapping an SBB quiescent A bus that is inactive still or dormant radio frequency interference See RFI RAID Redundant array of independent disks A set of storage techniques devised to increase...

Page 180: ...connecting device that permits the attachment of accessories or provides the capability to mount or link units 2 The device that connects a differential SCSI bus to a single ended SCSI bus 3 The devi...

Page 181: ...arget IDs assigned to the host device and the SCSI controllers and the devices it controls See also SCSI device side device address SCSI ID See SCSI device ID SCSI port 1 Software The channel that con...

Page 182: ...ended SCSI bus See TERMPOWER storage array An integrated set of storage devices storage array subsystem See storage subsystem storage sets A grouping of disk drives that make up a new distinct contai...

Page 183: ...vice that performs an operation requested by an initiator target ID See SCSI device ID terminators The interconnect components that form the ends of the transmission lines in bus segments A SCSI domai...

Page 184: ...nections between various combinations SCSI devices bus extenders and terminators UL Underwriters Laboratories An organization that tests and certifies electrical devices UltraSCSI An improvement in SC...

Page 185: ...y See shelf power supply VHDCI Very High Density Cable Interface A 68 pin interface with connectors on 0 8 mm centers Required for UltraSCSI warm swap A method of device replacement whereby the comple...

Page 186: ...SES Template Word 7 Blank Page Fix by Peter LaQuerre...
Reviews: