35
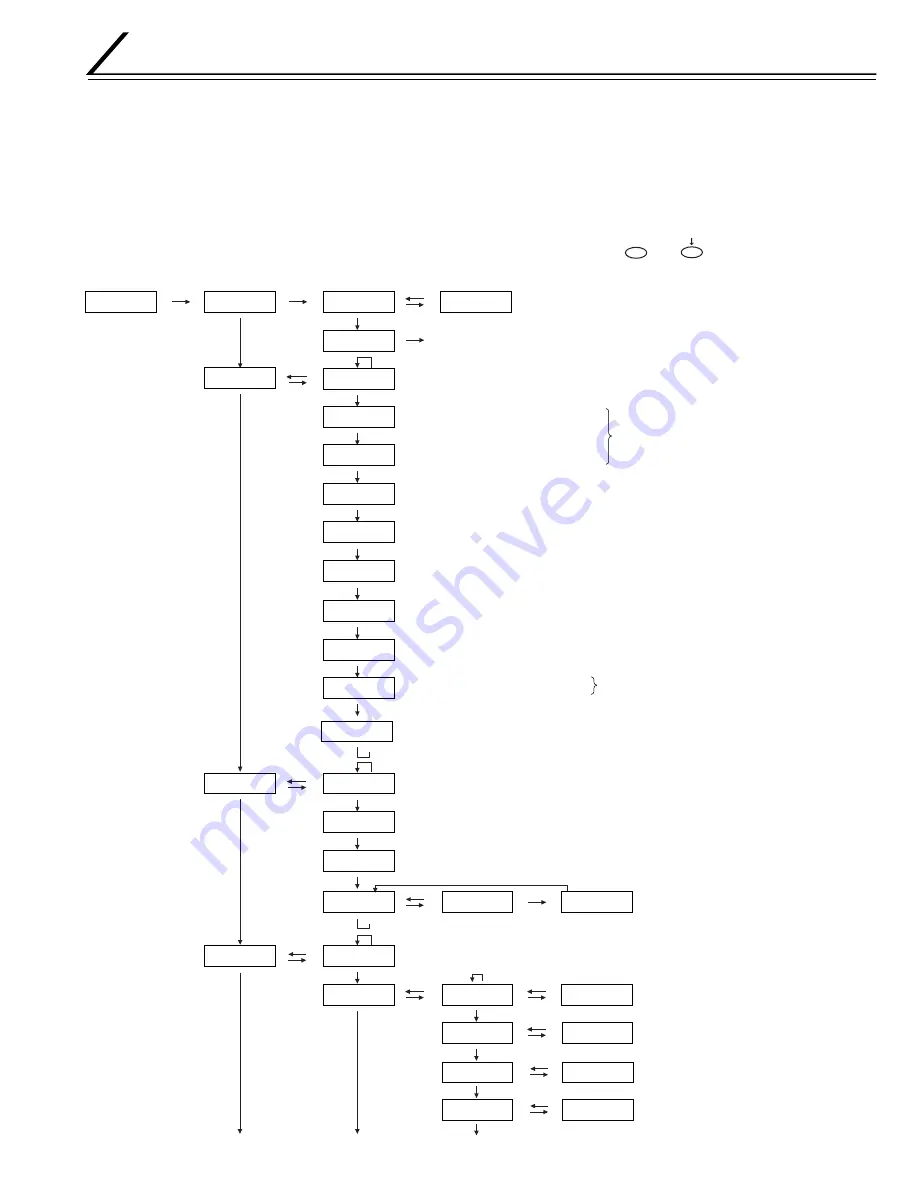
USE OF SERVICE MODE
At the time of operation by the user, the "User mode" is used, while the "Service mode" is used at the time of servicing.
Refer to the instruction manual for the user mode.
1) Fine adjustment of the printing position
2) Printing of the built-in test pattern
3) Individual operation of motors
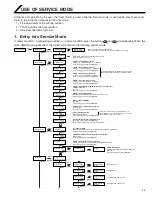
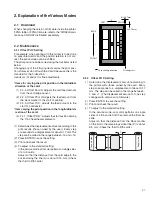
1. Entry into Service Mode
In ready condition, in preheating condition, or in error condition, press the buttons
MENU
and
simultaneously. When the
button [MENU] is released first, the printer will enter into the following service mode.
[MENU]
>
Service Mode
>
>
Download Ready
>
Download Ready
>
Download
>
OK?
Power off
After 1 sec
Completion
Start
[ENTER]
[EXIT]
>
Maintenance
>
0
[MENU]
>>
Offset Prt Y
0
[MENU]
>>
Offset Prt X
0
[MENU]
>>
Offset Trf X
0
[MENU]
>>
Offset Card X
>>
Default LUT
Standard Density
[MENU]
[MENU]
>>
Card Fan
On
[MENU]
>>
MG JIS TYPE
Lo-Co
[MENU]
>>
Printing Side
Single
[MENU]
>>
Times
>>
Card Loading
Standard
[MENU]
>>
Test Select
>>
Test Select
OK?
Testing...
Downloading..
Keep Power On
[EXIT]
[ENTER]
Color
[MENU]
>>
Pattern
>
Off-line Test
>
[EXIT]
[ENTER]
[EXIT]
[ENTER]
[ENTER]
Start of the firmware download function
The new firmware becomes effective after power OFF or rebooting.
The new firmware becomes eflective after power off.
[EXIT] End of Service mode.
[MENU]
[MENU]
[MENU]
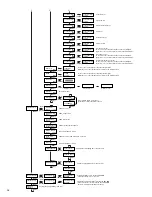
Setting of the printing position Y
[-15(Front) – -1(Front),0,+1(Back) - +15(Back)]
Select with [
↑
][
↓
] and save with [ENTER].
Setting of the card stop position X
[-7(Left) – -1(Left),0,+1(Right) – +7(Right)]
Select with [
↑
][
↓
] and save with [ENTER].
8
[MENU]
>>
VGAIN
Setting of the Vth gain (Supplementary function for the future
: Always set to 8.
)
[0 - +15]
Select with [
↑
][
↓
] and save with [ENTER].
Setting of the printing density
[Standard Density,Low Density, High Density,User's LUT]
Select with [
↑
][
↓
] and save with [ENTER].
Card cooling fan ON/OFF
[On, Off]
Select with [
↑
][
↓
] and save with [ENTER].
Different type of JIS magnetic encoding
[Lo-Co, Hi-Co]
Select with [
↑
][
↓
] and save with [ENTER].
Card supplying direction
[Standard, Right Side]
Select with [
↑
][
↓
] and save with [ENTER].
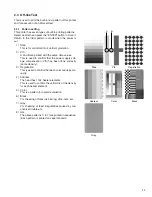
Test pattern setting
[Step,Vth,Registration,Addres,Color,Black,Gray,All,(YMCK+K),(K+YMCK)]
Select with [
↑
][
↓
] and set with [ENTER].
Switching between printing single side and both sides
[Single, Both]
Select with [
↑
][
↓
] and set with [ENTER].
Setting of the number of times for testing
[1,2,3,4,5,6,7,8,9,10,20,30,40,50,100,200,300,400,500,Endless]
Select with [
↑
][
↓
] and set with [ENTER].
Setting the test type
[Print,Feed,IC(Contact),IC(Antenna),MG(JIS),
MG(ISO),]
Select with [
↑
][
↓
] and set with [ENTER].
1
Setting of the printing position X
[-7(Left) – -1(Left),0,+1(Right) – +7(Right)]
Select with [
↑
][
↓
] and save with [ENTER].
Setting of the retransfer position X
[-7(Left) – -1(Left),0,+1(Right) – +7(Right)]
Select with [
↑
][
↓
] and save with [ENTER].
The positions where the setting value of –15 was
actually setup by the version of a firmware differ.
Under user mode, when the “IC Antenna Pos.” is
“Ext. Unit/Ad.on” or the “IC Contact Pos.” is “Ext. Unit”,
the “Right Side” cannot be selected.
[MENU]
>>
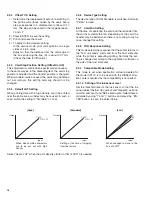
Actuator
>
>>>
Ink TUP Mo.
OK?
>>>
Ink TUP Mo.
Testing..
[MENU]
>>
Sensor
1000010101010110
>
Diag. Test
>
[MENU]
>>>
Ink SPY Mo.
OK?
>>>
Ink SPY Mo.
Testing..
[MENU]
[EXIT]
[ENTER]
[EXIT]
[ENTER]
[ENTER]
[ENTER]
[MENU]
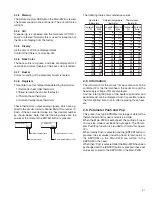
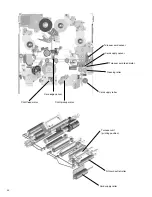
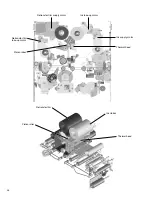
Ink take-up motor
Ink supply motor
1
2
3
[MENU]
>>
Ink Sensor OFF
107
Ajust the threshold level of the ink-Sensor
Select with [
↑
][
↓
] and save with [ENTER].
Answered On or Off. [off:transmission,on:interruption.]
[MENU]
>>>
Media TUP Mo.
OK?
>>>
Media TUP Mo.
Testing..
[ENTER]
[ENTER]
[MENU]
>>>
Media SPY Mo.
OK?
>>>
Media SPY Mo.
Testing..
Retransfer Film take-up motor
Retransfer Film supply motor

