Cards
Cards have Run Out
v
Replenish the cards.
v
The card hopper is able to store up to about 200 cards with a thickness
of 0.76 mm.
Cautions:
v
Get ready cards that are designated by the authorized dealer.
v
If the security lock function is turned on, the card hopper will be
locked. Turn off the function from the computer. After loading the
card, turn on the function again from the computer.
v
Do not touch the printing surface of the card. Touching it may cause
printing errors. Put on the supplied gloves when handling the cards.
v
To prevent card jams from occurring, limit the number of cards
stored in the card hopper at any time to about 100 pieces regardless
of the card thickness.
v
When using new cards, set them after making sure that they are not
adhered to each other due to static.
v
Align the cards before setting them in the printer. Otherwise, the card
hopper cover may not close properly, and this may damage the printer.
v
Printing the card on the side with the magnetic stripe may cause
printing errors or damage to the card’s functions. If you want to do
so, please consult our authorized dealers in advance.
v
To set cards with both functions (magnetic stripe and contact IC),
follow the procedure for setting the contact IC card.
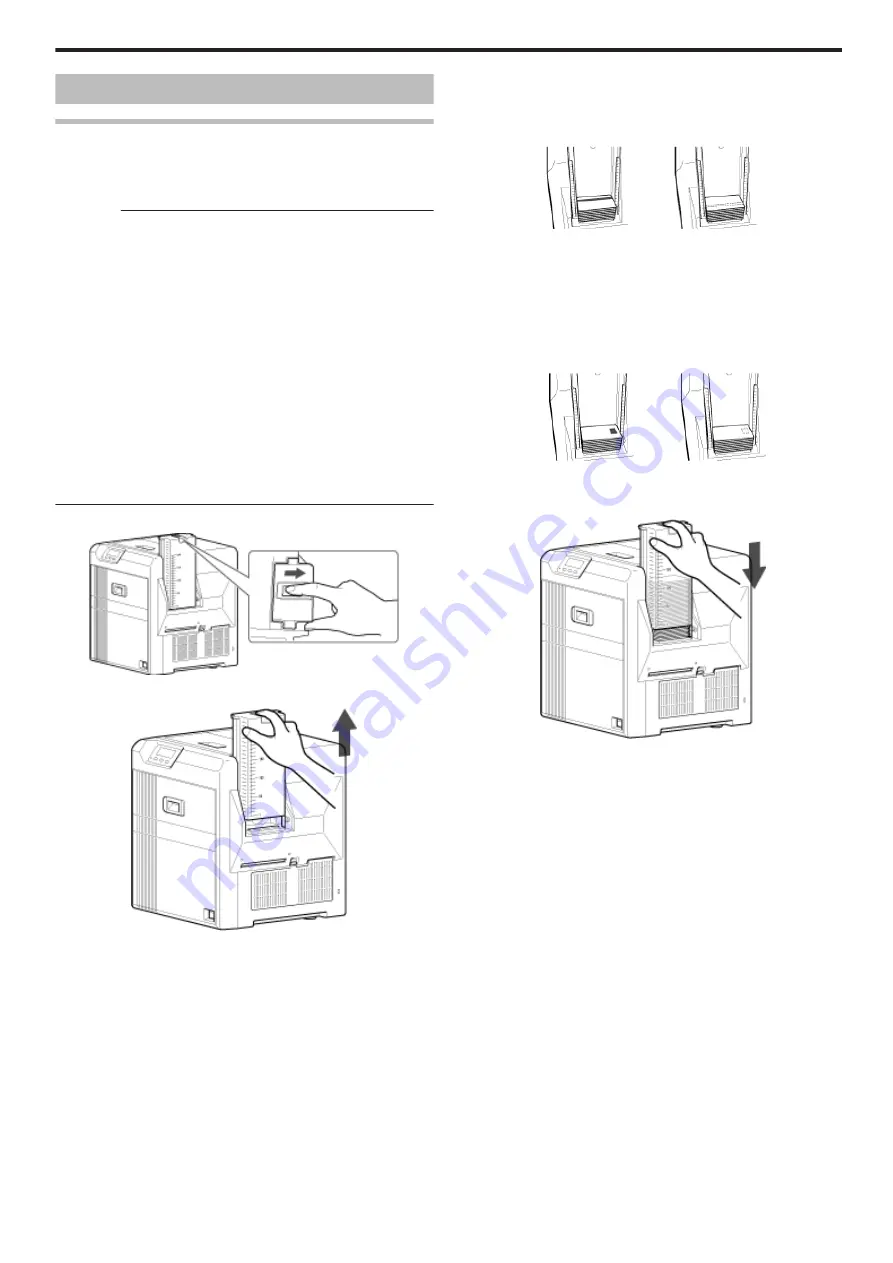
1
Set the card hopper knob to [OPEN]
.
2
Lift to remove the card hopper cover
.
3
Align the orientation of the cards, and set them in the printer
m
Magnetic stripe cards
v
Set the card with the magnetic stripe facing upward and toward
the printer, or facing downward and toward you.
.
m
ISO contact IC cards
v
Set the card with the Contact IC terminal facing upward and
toward the rear of the printer, or downward and toward the rear of
the printer.
v
For single-sided printers, set the cards with the IC terminal facing
down and toward the rear of the printer.
.
4
Install the card hopper cover, and set the card hopper knob to
[LOCK]
.
Replacement
29
Summary of Contents for XID 8300
Page 1: ...Instruction Manual ID 8300 Retransfer Printer X LST1007 001B ...
Page 4: ...Warnings Before Use 4 ...
Page 5: ...Caution Before Use 5 ...
Page 18: ... Operating the Printer 18 ...
Page 63: ...63 ...


