Quick Start Guide
Rev Date: 08/21
Copyright © Digital Watchdog. All rights reserved.
Specifications and pricing are subject to change without notice.
2. Installation
Quick Manual
Ver. 1.0 / 2021.05
Before installing and using the Camera, please read this manual carefully.
Be sure to keep it handy for future reference.
Outdoor Dome Camera
Junction Box
Manual
1. Dimension & Accessories
Manual
Template Sheet
Boom Pad
Screw &
Plasc Anchor-4pcs
Mount
Screw 4ea
4.5
4-Ø 10
121
4-Ø 4.5
88
15
4
40
Allen Wrench
2
3
4
1
Using provided template sheet, make
holes on the ceiling panel in the desired
locaon.
By ghtening four screws provided,
aach the mount bracket on the panel.
Connect the cables respecvely.
Aer passing the cables through the
hole in the boom of bracket, align the
orientaon of screws in the camera
mechanism to be assembled into the
mount.
Please check if all the camera and accessories are included in the package.
INSTALLATION
1
Using the mounting template or the junction box itself, mark and drill the necessary holes on the mounting surface.
2
Secure the junction box to the mounting surface using the screws and anchors included. Use the mounting pad between
the junction box and mounting surface as needed.
3
To mount the camera to the mounting accessory, remove the dome from the camera base using the wrench included
with the camera.
NOTE:
Do not touch the lens when handling the camera.
4
Pass wires through and make all necessary connections.
5
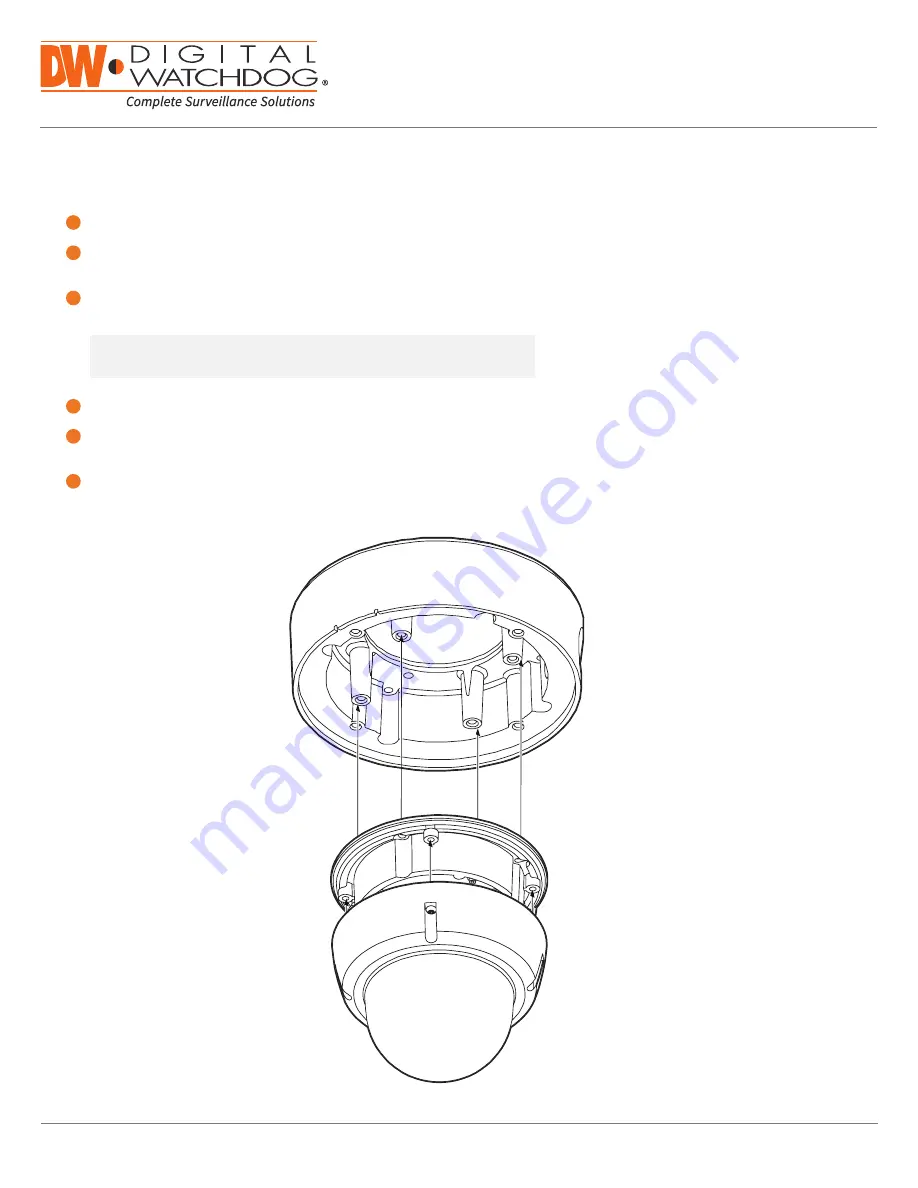
Secure the camera to the mounting bracket using the included screws. Align the camera’s mounting holes with the ones
in the junction box.
6
Adjust the camera’s lens position and angle, then place the cover dome over the camera lens and affix the cover to the
bracket with the original dome housing’s screws.


