background image

PRECAUTIONS

Do not open or modify.

Do not open the case except during maintenance and installation, for it may be dangerous and can cause damages.

Do not put objects into the unit.

Keep metal objects and flammable substances from  entering the camera. It can cause fire, short-circuits, or other damages.

Be careful when handling the unit. 

To prevent damages, do not drop the camera or subject it to shock or vibration.

Do not install near electric or magnetic fields.

Protect from humidity and dust.

Protect from high temperature.

Be careful when installing near the ceiling  of a kitchen or a boiler room, as the temperature may rise to high levels.

Cleaning 

To remove dirt from the case, moisten a soft cloth with a soft detergent solution and wipe. 

Mounting Surface

The material of the mounting surface must be strong enough to support the camera.

TROUBSHOOTING

Before sending your camera for repair, check the following or contact our technical specialist.

No VIDEO

Check the coaxial cable and make sure it is connected securely.

Check the lens’ iris adjustment at the menu setup of the camera. 

Check the power supply and make sure the camera has the proper voltage and current.

Out-of-Focus VIDEO

Check the clear dome cover and the lens for dirt or fingerprints. Use a soft cloth and gently clean.

Check the lens manual focal and zoom adjustment. Field test monitor is recommended.

FCC COMPLIANCE

This equipment has been tested and found to comply with the limits for a Class B digital device, pursuant to Part 15 of the 

FCC

rules. These limits are designed to 

Provide reasonable protection against harmful interference .when the equipment is operated in a residential environment. This equipment generates, uses, and 

radiates radio frequency energy; and if it is not installed and used in accordance

with the instruction manual, it may cause harmful interference to radio communications.

WARNING

: Changes or modifications are not expressly approved by the manufacture.

Summary of Contents for Infinity C233W

Page 1: ...Infinity C233W 11192010 User Manual Version 2 Camera with ICON Menu ...

Page 2: ...amera for repair check the following or contact our technical specialist No VIDEO Check the coaxial cable and make sure it is connected securely Check the lens iris adjustment at the menu setup of the camera Check the power supply and make sure the camera has the proper voltage and current Out of Focus VIDEO Check the clear dome cover and the lens for dirt or fingerprints Use a soft cloth and gent...

Page 3: ...3D DNR 3D Digital Noise Reduction Produces less noise and more color during low light application HME Highlight Mask Exposure Masks overly exposed light to produce a true video image of any environment SLC Side Light Compensation DIS Digital Image Stabilizer Programmable Privacy Zone 6 Motion Detection Easy Icon Driven OSD Menu with Built In Joystick Negative Imaging Mirror Image Control Auto Sens...

Page 4: ...o front camera after mounting the included C ring to the lens To use CS Mount lens fix the lens directly into the front camera without the C ring 2 To adjust the focus slide the focus lever on the side of the front camera 3 Please tighten the focus lever after the adjustment in order to prevent being out of focus ...

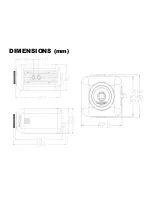
Page 5: ...DIMENSIONS mm ...

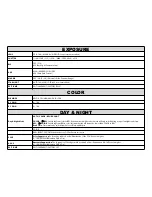
Page 6: ...noise C SUP Color Suppression Color will be reduced at low illumination if the C SUP Level is higher 0 100 Not Available when DNR is On A SUP Aperture Suppression The sharpness of the edges will be reduced at low illumination if A SUP Level is higher 0 100 Not Available when DNR is On EXIT JUMP EXIT SAVE EXIT FACTORY SET EXPOSURE LENS DC 0 100 MANUAL VIDEO DC Lens is recommended SHUTTER 1 160 1 10...

Page 7: ...C OFF ON SLC Side Light Compensation HME OFF ON HME Highlight Masking Exposure DIS OFF ON DIS Digital Image Stabilizer EXIT JUMP EXIT SAVE EXIT FACTORY SET MOTION OMNI Focus Lens Only MOTION OFF ON SET WINDOW ALL SET Set the Entire Screen ALL CLEAR Clear the Entire Screen SENSITIVITY 1 120 SHOW INDICATOR OFF ICON TRACE DELAY OUT 1 15 Motion Alarm Zoom In Delay EXIT JUMP EXIT SAVE EXIT FACTORY SET ...

Page 8: ...RY SET SETUP CAMERA ID 0 255 TITLE OFF ON DPC OFF AUTO DPC Dead Pixels Cancellation MONITOR CRT LCD LANGUAGE English Japanese Chinese BAUDRATE 2400 4800 9600 14400 19200 38400 Protocol is Pelco D fixed cannot be changed hardcoded into the DSP OMNI LENS OFF 1 10 for OMNI PLUS CAMERA only EXIT JUMP EXIT SAVE EXIT FACTORY SET ...

Page 9: ...SYNC SYNC INTERNAL AUTO V PHASE 0 199 EXIT JUMP EXIT SAVE EXIT FACTORY SET EXIT EXIT Exit the menu SAVE EXIT Exit the menu and save the setting FACTORY SET Reset the menu setting to factory default ...

Page 10: ... x250 OFF 3D DNR OFF ON SLC OFF ON HME OFF ON DIS OFF ON Privacy Zone 6 Programmable Zone Size Lens Focal Length 3 3 12mm Varifocal Auto Iris Lens Resolution Horizontal 560 TV Lines Color 580 TV Lines BW Video Output VBS 1 0Vp p VBS 1 0Vp p 75 Load S N Ratio S N Ratio 50dB OSD OSD YES Environmental Conditions Operating Temperature 10 55 14 131 Humidity Less than 90 Power Power Requirement 12VDC 24...

Reviews: