U
Enter
R
L
D
Quick Start Guide
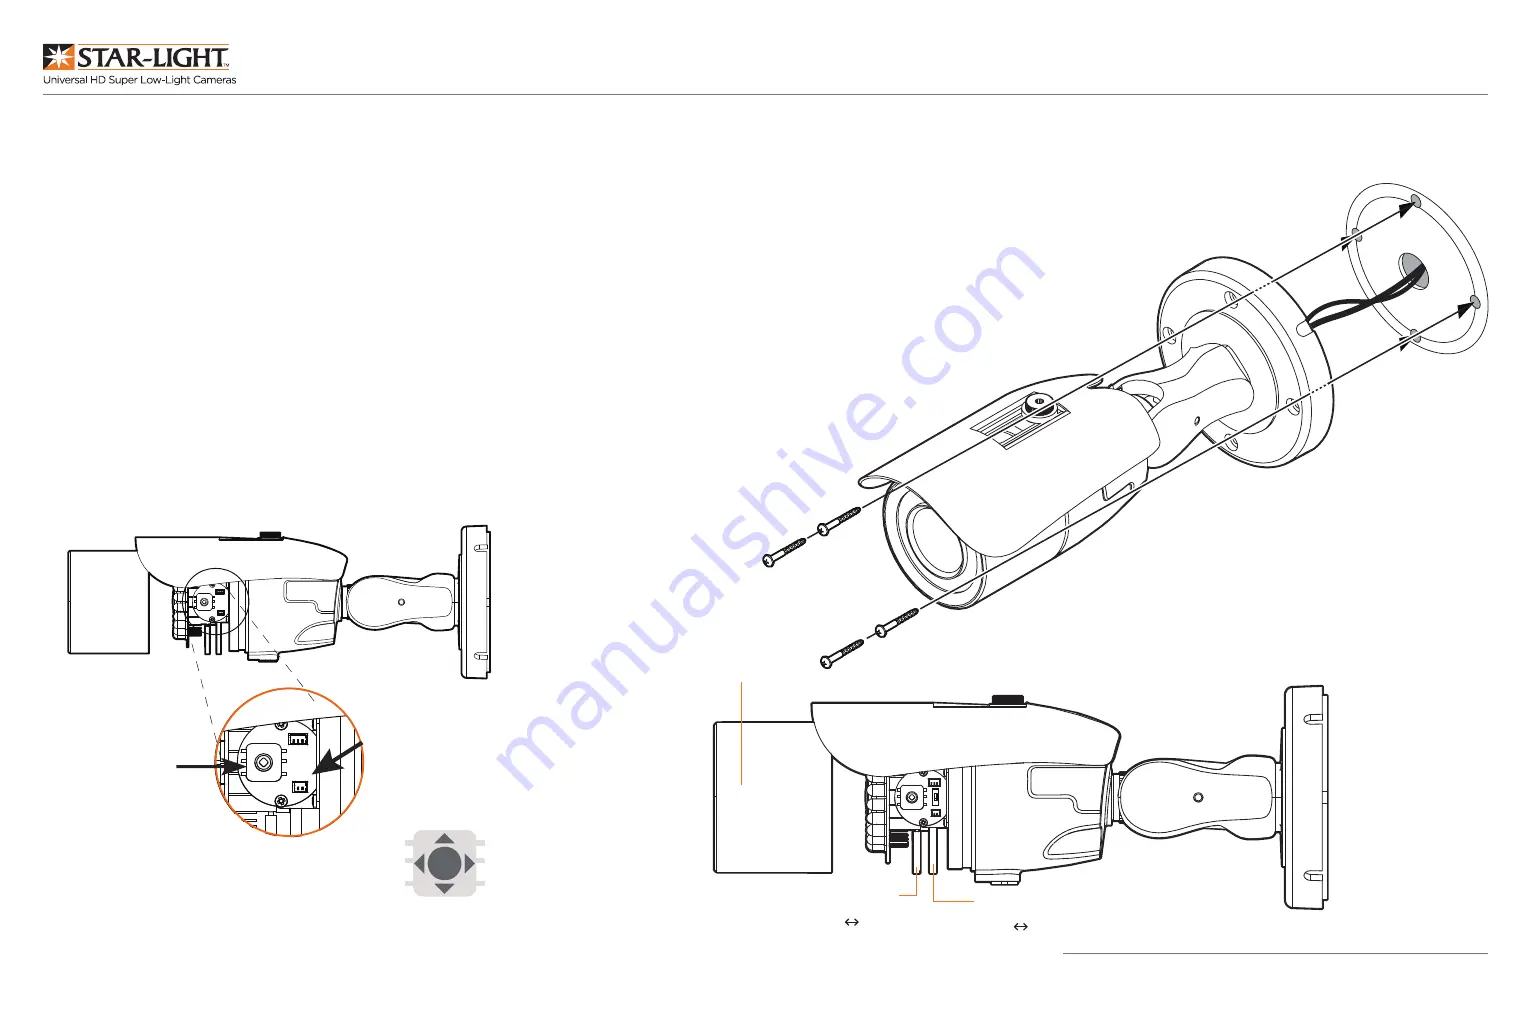
1. Once all cables have been connected, use the screws included
with the camera to properly mount and secure the camera to the
mounting surface.
2. To adjust the camera’s tilt, loosen the screws at the base of the
camera’s bracket. The camera’s max angles are:
Pan: 0°~ 360°
Tilt: 0°~ 90°
3. To adjust the camera’s focus and zoom:
a. Remove the sun-shield and front case from the camera.
b. Unlock the zoom or focus screws by rotating them
counterclockwise.
c. Adjust the zoom and focus screws at the base of
the camera module to achieve a clear image.
d. Tighten the screws and close the front case
by rotating it clockwise.
STEP 4 – INSTALLING THE CAMERA
Front Case
Focus Lever
Far
↔
Near
Zoom Lever
Wide
↔
Tele
Rev Date: 09/19
Copyright © Digital Watchdog. All rights reserved.
Specifications and pricing are subject to change without notice.
Front case
Joystick for
OSD menu
control
Test video connector
for on-site
configuration
CVBS(960H)
HD-CVI
HD-A
HD-TVI
Zoom lever
Wide Tele
Focus lever
Far Near
1. The camera supports HD-Analog, HD-CVI and HD-TVI signals. To
switch between the signals:
a. Remove the camera’s dome to access the joystick and OSD
control on the base of the camera.
b. Use the OSD Switch to switch the camera’s signal.
- To switch the camera to HD-TVI mode, press OSD joystick to the
left for 5 seconds.
- To switch the camera to HD-Analog mode, press OSD joystick to
the right for 5 seconds.
- To switch the camera to CVBS mode, press OSD joystick up
for 5 seconds.
- To switch the camera to HD- CVI mode, press OSD joystick
down for 5 seconds.
STEP 3 – CHANGING THE SIGNAL IN
THE CAMERA


