background image

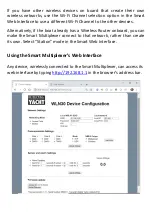
From the Web Interface you can configure all the Smart Multiplexer features. 
 

1.


Networking Mode 


In Access Point mode, the Smart Multiplexer creates its own wireless network with the name, 
password, IP address, Port and Wi-Fi channel you select. If you leave the Password box blank, it 

will create an “Open” unprotected network.


In Station mode, the Smart Multiplexer will try to join another wireless network whenever it 
powers up. The network can be selected from a drop down list and if it is password protected, 
enter the correct password in the password box. 
 

2.


Communication Settings 


Set Baud rate to Standard 

4800

 or High Speed 

38400 f

or each of the three ports 


Set the communication protocol to 

UDP

 or 

TCP


Set Port 1 NMEA Output to output the Multiplexed data (38400) or Wireless App data (4800)  
 

3.


Firmware Update 


The firmware of the Smart Multiplexer can be updated using web interface, simply click the 

“Choose file” button to browse your device for the firmware update file and then once selected, 
click the “Upload Firmware” button


After 

changing any of the settings on the Web Interface, click the “Update Settings” 

button to save and apply your changes. If the changes affect the networking, then 
the Smart Multiplexer will reboot and you will need to reconnect wirelessly to it. 

If you make a mistake with a setting or forget a password, reset the Smart 
Multiplexer to factory defaults by pressing and holding the Reset button for 10 
secs or more. 

For diagnostic 
purposes, you can 
view the received 
NMEA0183 data by 

clicking the “View 
Data” butto

n which 

opens a new 
browser tab 
displaying the raw 
NMEA0183 data 
received.


Summary of Contents for WLN30

Page 1: ...WLN30 SMART WIRELESS NMEA MULTIPLEXER Version 1 01...

Page 2: ...unit you should consult the user manual of the navigation equipment that you are connecting this unit to 2 Before you start You will need the following items and tools to complete the installation The...

Page 3: ...cable connections Maintaining the compass safe distance of 0 5m Best location for Wi Fi reception i e not inside a metal enclosure Installation Step 1 Cabling Run 12v or 24v power connections to the S...

Page 4: ...No wireless connection Data Slow Blink Data UDP Connection OFF Wireless device connected No Data No Power Turn off the Smart Multiplexer and continue with the NMEA USB and Wireless installation Insta...

Page 5: ...Smart Multiplexer Port 1 is set to 38400 baud while Port 2 and 3 are set to 4800 baud but they can all be changed via the WLN30 s built in web interface Installation Step 5 Wireless Interfacing By def...

Page 6: ...on that accepts NMEA data over a TCP or UDP connection and setup the connection Consult the help documentation for your App to see how wireless data connections should be configured The Smart Multiple...

Page 7: ...er devices Alternatively if the boat already has a Wireless Router onboard you can make the Smart Multiplexer connect to that network rather than create its own Select Station mode in the Smart Web In...

Page 8: ...et Port 1 NMEA Output to output the Multiplexed data 38400 or Wireless App data 4800 3 Firmware Update The firmware of the Smart Multiplexer can be updated using web interface simply click the Choose...

Reviews: