4 - 6
How Do I ...?
DigiGate-700
for Windows
™
®
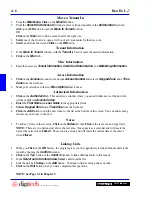
1. From the
Main Menu
,
Click
on the
Move In
button.
2. From the
Select Unit to Move In
window enter a valid unit number in the
Unit Number
field and
click
on the
OK
button to open the
Move In Tenant
window.
OR
Click
on the
Size
field to find a vacant unit of the right size.
3.
Select
one of the choices to open a list box of all vacant units for that size code.
4.
Select
a unit from the list and
Click
on the
OK
button.
Move a Tenant In
Tenant Information
1. In the
Move In Tenant
window with the
Tenant
tab active enter the needed information.
2.
Click
on the
Misc
tab.
Misc Information
1. Enter the necessary
Tenant Information
,
Credit Card Information
, and
Marketing Information
.
Access Information
1.
Click
on the
Access
tab, and enter a unique
Access Number
and select a
Keypad Zone
and a
Time
Zone
from the list boxes.
2. Make your selections in the two
Misc Options
check boxes.
Authorized Information
1.
Click
on the
Authorized
tab. This activates a window where you can add other users of the unit who
will have different
Access Codes
.
2.
Enter
the
First Name
and
Last Name
in the appropriate fields.
3.
Select
a
Keypad Zone
and a
Time Zone
from the list boxes.
4.
Click
the
Add
button to add the new tenant to the list at the bottom of the screen. You can add as many
tenants as you choose to the unit.
Notes
1. To add any Notes in the text area,
Click
on the
Notes
tab, then
Click
in the text area, and type freely.
NOTE:
There are two buttons just above the text area. One appears as a calendar and will insert the
date at the cursor when
Clicked
. The second is a clock and will insert the current time at the cursor
when
Clicked
.
Linking Units
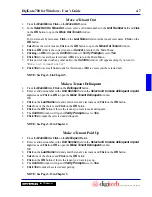
1. When you
Click
on the
OK
button, the program gives you the opportunity to link additional units to the
tenant by opening the
Confirm
window.
2.
Click
on the
Yes
button in the
Confirm
window to link additional units to this tenant.
3. In the
Select units to link window
,
Select
a unit from the list.
4. Link the unit by
Clicking
on the
Add
button. Continue to link as many units as needed.
5.
Click
on the
Exit
button when you have completed this operation.
NOTE: See Page 3-2 in Chapter 3.
Summary of Contents for DigiGate-700
Page 1: ...World Class Security Solutions DigiGate User s Guide ...
Page 2: ......
Page 3: ...User s Guide DigiGate 700 ...
Page 166: ...This Page Left Blank Intentionally 3 86 Operating Instructions DigiGate 700 for Windows ...
Page 202: ...This Page Left Blank Intentionally B 8 Appendix Title DigiGate 700 for Windows ...
Page 224: ...This Page Left Blank Intentionally G 6 DigiGate 700 for Windows Program Error Codes ...
Page 244: ...This Page Left Blank Intentionally K 8 DigiGate 700 for Windows Program Registration Codes ...
Page 262: ...X 10 Index DigiGate 700 for Windows This Page Left Blank Intentionally 2 3 ...
Page 263: ......
Page 264: ......
Page 265: ......
Page 266: ...DigiGate User s Guide Digitech International Inc 800 523 9504 toll free www digitech intl com ...

