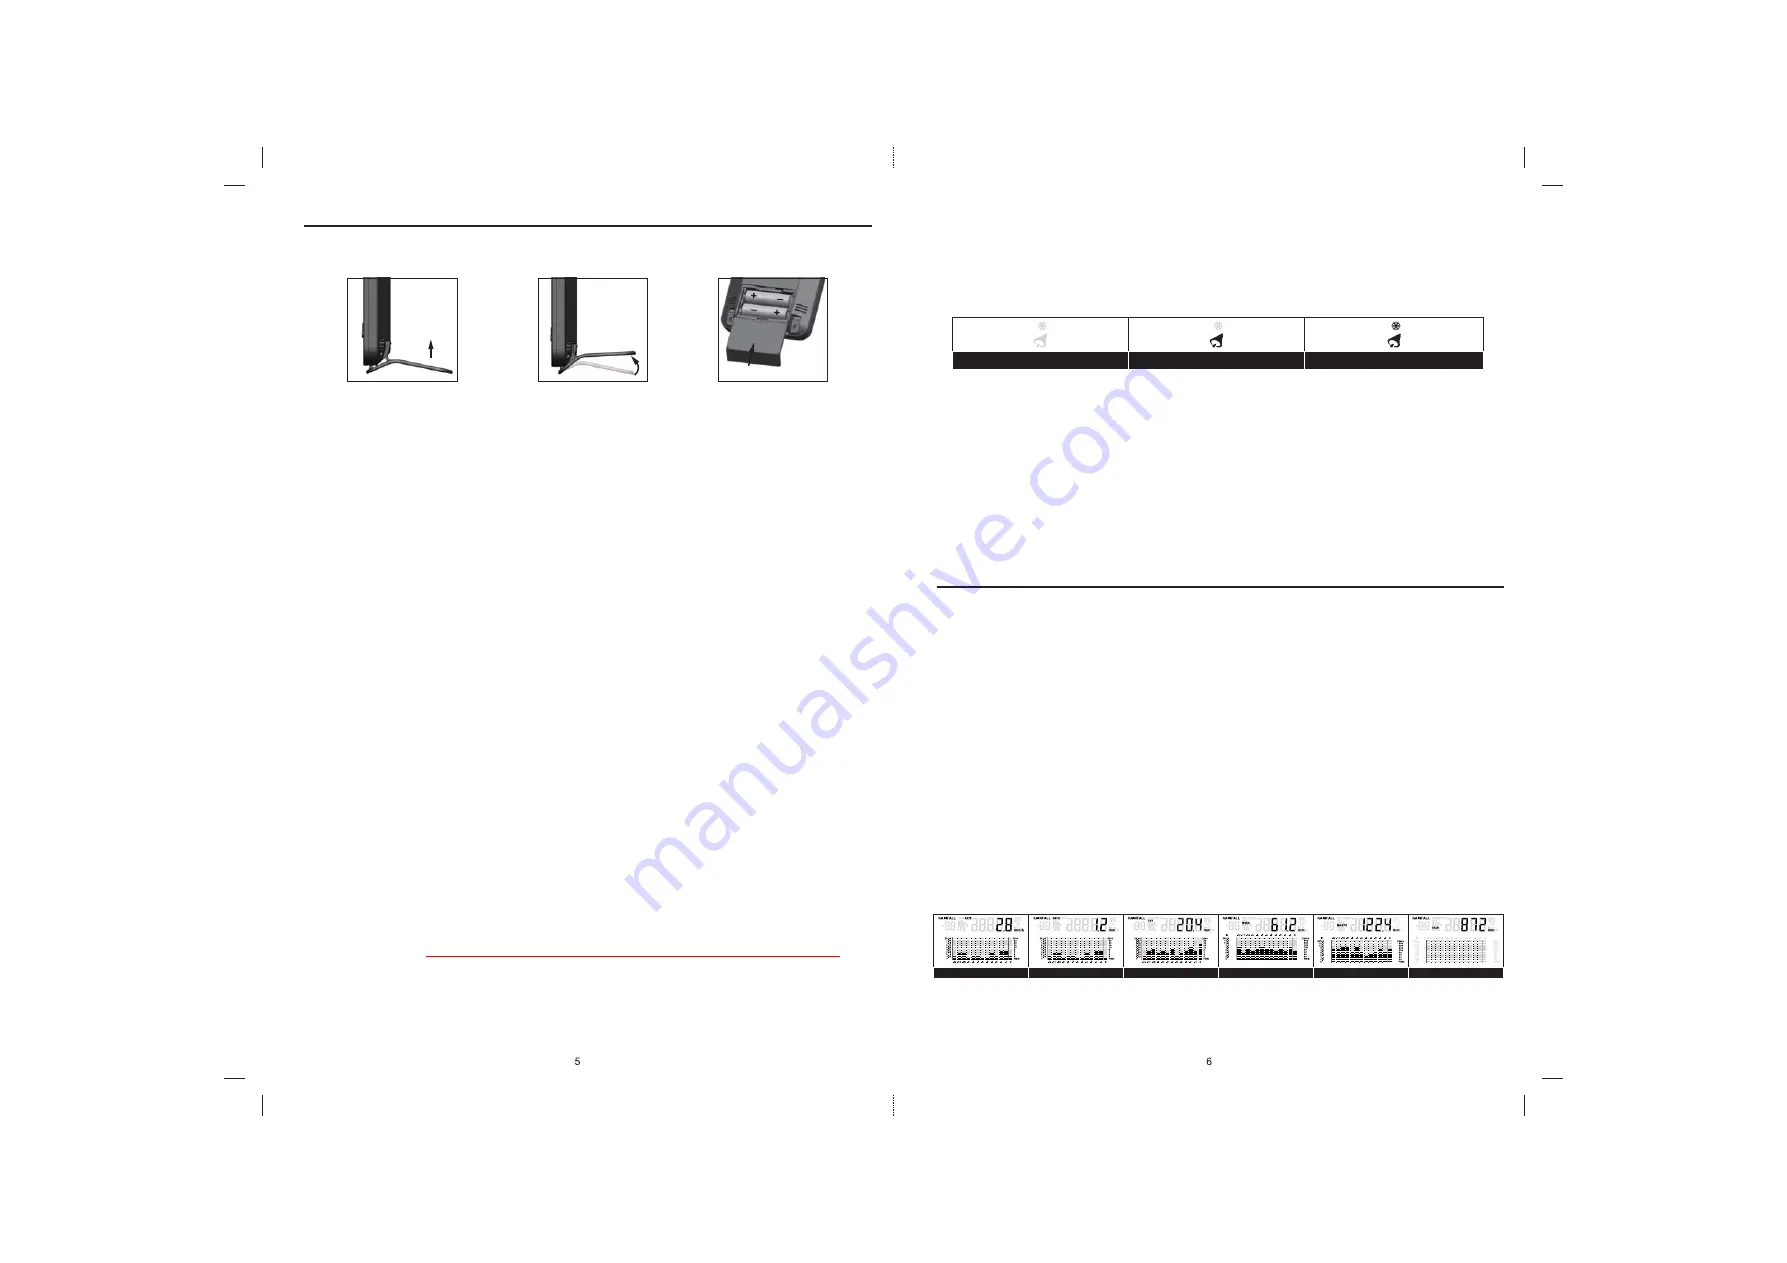
Alarm off
Alarm on
Alarm with ice-alert
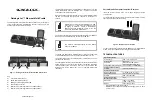
Hour rainfall
Rate rainfall
Day rainfall
Week rainfall
Month rainfall
Year rainfall
DISPLAY MAIN UNIT
Stand and Batteries Installation
The unit is designed for desktop or wall mount for easy viewing.
1. Remove the battery door of the main unit.
2. Insert 2 new AA size batteries according to the “
+
/
-
” polarity mark on the battery compartment.
3. Replace the battery door.
4. Press the
[ SCAN ]
button.
5. Once the batteries are inserted, all the segments of the LCD will be shown briefly.
6. The clock will start scanning for the wireless signal reception 917 MHz in 8 seconds.
NOTE:
If no display appears on the LCD after inserting the batteries, press the
[ RESET ]
button by using a pointed object.
Pairing of Wireless Sensor with Display Main Unit
After insertion of batteries, the Display Main Unit will automatically search and connect the wireless sensor (antenna
blinking).
Once the connection is successful, antenna mark and readings for outdoor temperature and rainfall will appear on the display.
Changing Batteries and Manual Pairing of Sensor
Whenever you changed the batteries of the wireless sensor, pairing must be done manually.
1. Change the batteries to new ones.
2. Press the
[ RESET ]
button on the sensor.
3. Press the
[ SCAN ]
button on the Display Main Unit.
NOTE:
1. Pressing
[ RESET ]
button at bottom of the wireless sensor will generate a new code for pairing purpose.
2. Always dispose old batteries in an environment safe manner.
To Manually Set the Clock
1. Press and hold
[ CLOCK ]
button for 2 seconds until “12 or 24 Hr” flashes.
2. Use
[ UP ]
/
[ DOWN ]
button to adjust, and press
[ CLOCK ]
button to proceed to the next setting.
3. Repeat 2 above for setting of
HOUR
,
MINUTE
,
YEAR
,
MONTH
&
DATE
or
DATE
&
MONTH
,
MONTH
,
DATE
,
HOUR OFFSET
,
LANGUAGE
.
NOTE:
1. The unit will automatically exit setting if no key was pressed in 60 seconds.
3. The range of hour offset is between -23 and +23 hours.
4. The language options are English (
EN
), French (
FR
), German (
DE
), Spanish (
ES
), Italian (
IT
), Dutch (
NL
) and Russian (
RU
).
To Turn on/off Alarm Clock (With Ice-alert Function)
1. Press the
[ ALARM ]
button any tine to show the alarm time.
2. Press
[ ALARM ]
button to activate the alarm.
3. Press again to activate alarm with ice-alert function.
4. To disable the alarm, press until the alarm icon disappears.
To Set the Alarm Time
1. Press and hold
[ ALARM ]
button for 2 seconds to enter alarm setting mode. HOUR will begin flashing.
2. Use
[ UP ]
/
[ DOWN ]
button to adjust HOUR, and press
[ ALARM ]
button to proceed to set MINUTE.
3. Repeat 2 above to set MINUTE, then press
[ ALARM ]
button to exit.
NOTE:
1. Once set the alarm time , alarm function activate automatically.
2. Pressing the
[ ALARM ]
button twice when alarm time is being displayed will activate the temperature-adjusted pre-alarm. The alarm
will sound 30 minutes earlier if it detects outside temperature is below -3°C.
RAINFALL
The device displays how many mm / inches of rainfall are accumulated in one hour time period, based on current
rainfall rate that is updated every minute.
To Select the Rainfall Display Mode
Press
[ RAIN ]
button to toggle between:
●
RATE
Current rainfall rate in past an hour (e.g., 07:40~08:40)
●
HOUR
The HOUR display indicate the total rainfall from on the hour
●
DAY
The DAY display indicate the total rainfall from midnight
●
WEEK
The WEEK display indicate the total rainfall from the current week
●
MONTH
The MONTH display indicate the total rainfall from the current calendar month
●
YEAR
The YEAR display indicate the total rainfall from the current calendar year
NOTE:
User can select the measurement unit for rainfall by sliding the
[ MM/IN ]
switch.
Graphical Histogram Display
Histogram presents an easy view of rainfall change pattern over a period of time in a graphical manner. The time scale of the
graph automatically changes according to the rainfall display modes:
Rate >> Hour >> Day >> Week >> Month >> Year
1. By default, the graph is presented in Hourly scale when rainfall is in Rain Rate.
2. There is no graphical display when Yearly Rainfall is selected.


