`
IP CAM User’s Guide
P
P
a
a
n
n
/
/
T
T
i
i
l
l
t
t
I
I
P
P
S
S
u
u
r
r
v
v
e
e
i
i
l
l
l
l
a
a
n
n
c
c
e
e
C
C
a
a
m
m
e
e
r
r
a
a
IP CAM USER’S GUIDE
PAGE
21
/57 Rev.
PV1.0
六
.
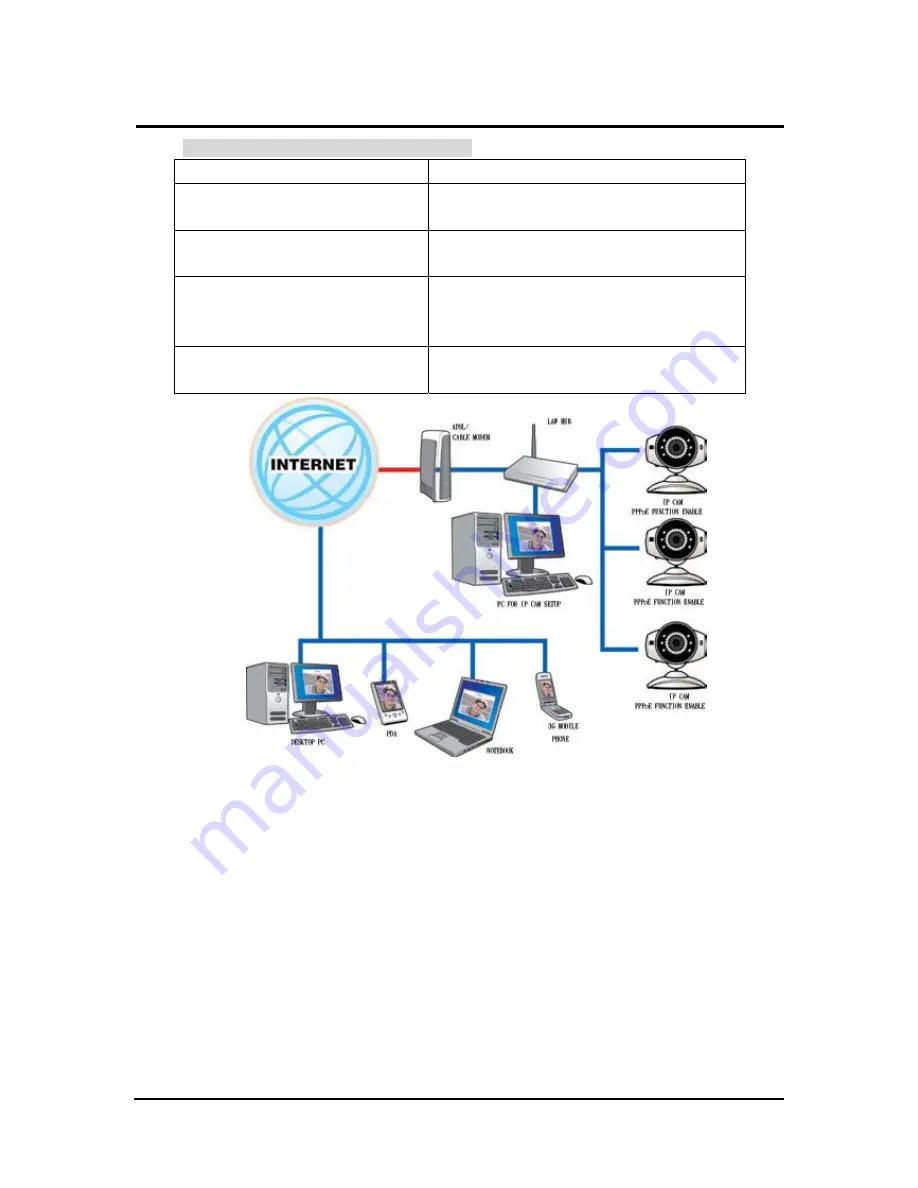
IP-CAM Network Framework Installation 6
Way to access Internet
Use dial-up ADSL or Cable Modem
Physical IP Address
Owns several float IP addresses
(dispatched by ISP dynamically)
IP Share or LAN Hub
Must be equipped with DHCP and NAT
functions
Network Setup for IP -CAM
LAN Enable / Manually
Web Server Port Number, need to be
adjusted
Suitable Objects
Users with several float IP addresses and
several IP-CAMs installed
1.
Please acquire the necessary information of ADSL dial-up from your ISP.
ISP relational information: ADSL dial-up account name and password
2.
Connect the RJ-45 terminator on the rear of IP-CAM to the red test network cable.
One end is connected to the network card of computer; the other end is connected to
the rear side of the IP-CAM.
3.
Refer to
2.4-3 PPPoE - IP Address Settings
for typing account name and
password.
4.
Please type the
Mail server setup
information of IP-CAM.
5.
Install IP-CAM on LAN Hub.
6. Use CAM_EZ Search tool to find out the float IP address assigned by ISP for the
ADSL currently.
7.
Open IP browser and type in the physical IP address (such float IP is dispatched by
ISP) of the IP-CAM, e.g., http://211.78.174.94.
8. Follow the steps above to configure for each IP-CAM.


