background image

Page 26

BAY Collection

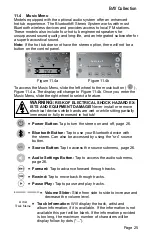
11.5  Turning the Stereo ON

1.  From the stereo menu, Figure 11.5a, press the power button ( 

 ) 

to bring up the power on display, Figure 11.5b.

2.  Press the power icon (   ) in the middle of the display.

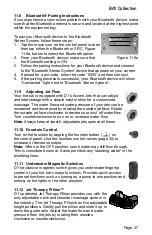
11.6  Audio Settings Submenu

To enter the Audio Settings Menu, slide the right wheel to the settings 

button ( 

 ), Figure 11.6a. The display will change to Figure 11.6b. The 

Audio Settings menu offers an enhanced audio experience by providing 

adjustments to certain settings.

 = 

Balance Slider:

 Slide from side to side to increase 

and decrease the balance level between the left and 

right.

 = 

Fade Slider:

 Slide from side to side to increase and 

decrease the fade level between the front and back.

 = 

Subwoofer Slider:

 Slide from side to side to increase 

and decrease the subwoofer level from minimum to 

maximum.

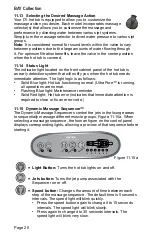
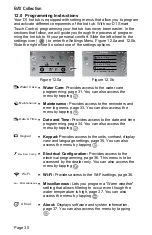
11.7  Source Menu

Slide the right wheel to the source icon ( 

src

 )  

to select an audio source to listen to, Figure 11.7a. 

Only the devices available will be displayed.

Bluetooth

Audio is off

8:01 am

src

Bluetooth

Power

Press icon to turn on the 

audio

8:01 am

src

Figure 11.5b

Figure 11.5a

Bluetooth

Speakers

8:01 am

Max

Front

Right

Balance

Fade

SubWoofer

Min

Rear

Left

src

Bluetooth

Audio is off

8:01 am

src

Figure 11.6a

Figure 11.6b

Right

Balance

Left

Front

Fade

Rear

Max

SubWoofer

Min

Bluetooth

Source

Bluetooth

FM

8:01 am

src

Figure 11.7a

Summary of Contents for Amore Bay

Page 1: ...Owner s Guide BAY COLLECTION ...

Page 2: ...Spa Information My Spa Model Name Serial Number Date Installed Dealer s Name ...

Page 3: ...rt 230V 50Hz Models 15 8 0 Hot tub Fill Up Procedure 15 9 0 Hot tub Features 20 10 0 Start up 21 10 1 Start up Sequence 21 10 2 D1 SmartHUB Touch Control 21 11 0 Operating Instructions 23 11 1 D1 SmartHUB Touch Control 23 11 2 Activating the Jets Pumps 23 11 3 Lights Menu 24 11 4 Music Menu 25 11 5 Turning the Stereo ON 26 11 6 Audio Settings Submenu 26 11 7 Source Menu 26 11 8 Bluetooth Pairing I...

Page 4: ... 38 13 1 Cleaning the filters 38 13 2 Surface Care 40 13 3 Maintaining the Hot Tub Cabinet 40 13 4 Pillow Care 41 13 5 Draining 41 13 6 Winterizing 41 13 7 Special Cold Weather Instructions 41 13 8 Maintaining the Cover 42 13 9 Restarting Your Hot Tub in Cold Weather 43 14 0 Water Quality Maintenance 43 14 1 UltraPure Plus 43 14 2 pH Control 44 14 3 Sanitizing 44 14 4 Other Additives 45 15 0 Prote...

Page 5: ...ference received including interference that may cause undesired operation This equipment has been tested and found to comply with the limits for a Class B Digital Device pursuant to Part 15 of the FCC Rules These limits are designed to provide reasonable protection against harmful interference in a residential installation This equipment generates uses and can radiate radio frequency energy and i...

Page 6: ... or hanging jewelry away from suction fittings rotating jets or other moving components to avoid entrapment that could lead to drowning or severe injury Never use the hot tub unless all suction guards filter filter lid or skimmer assembly are installed to prevent body and or hair entrapment Never operate or use the hot tub if the filter filter lid or skimmer assembly are broken or any part of the ...

Page 7: ...t tub The electrical circuit supplied for the hot tub must include a suitable ground fault circuit interrupter GFCI as required by NECArticle 680 42 4 WARNING RISK OF SEVERE INJURY OR DEATH Extreme caution must be exercised to prevent diving or jumping into the hot tub or slipping and falling which could result in unconsciousness drowning or serious injury Remember that wet surfaces can be very sl...

Page 8: ...ing hot tub use may lead to unconsciousness with the possibility of drowning 7 WARNING RISK OF SEVERE INJURY OR DEATH Prolonged immersion in a hot tub may be injurious to your health Observe a reasonable time limit when using the hot tub Exposures at higher temperatures can cause high body temperature over heating Symptoms may include dizziness nausea fainting drowsiness and reduced awareness Thes...

Page 9: ...een given supervision or instruction concerning use of the appliance by a person responsible for their safety 12 NOTE This hot tub is not intended nor designed to be used in a commercial or public application The hot tub buyer shall determine whether there are any code restrictions on the use or installation of this hot tub since local code requirements vary from one locality to another Hot Tub Sa...

Page 10: ...uction or skimmer assembly This has been reported in persons who when submerge themselves underwater allowing hair to come close and or within the reach of the suction fittings suction covers or skimmer assembly Keep hair away from suction fittings suction covers filter filter lid or skimmer assembly Children are at risk for hair entrapment if swimming under water Never allow children to play or g...

Page 11: ...r skimmer assembly Never allow your jewelry swimsuit or hair accessories to come close to the suction fittings suction covers or skimmer assembly Never allow children to play or get near the suction fittings suction covers filter filter lid or skimmer assembly 3 2 Hyperthermia Prolonged immersion in hot water may induce hyperthermia over heating The use of alcohol or drugs can greatly increase the...

Page 12: ...within 10 feet 3m of the hot tub shall be bonded to the equipment grounding buss with copper conductors not smaller than No 6 AWG 10 mm 5 SAVE THESE INSTRUCTIONS WARNING DANGER NO CLIMBING OR WALKING ON TOP RAIL SHALLOW WATER NO DIVING NO JUMPING DIVING OR JUMPING MAY CAUSE DEATH PARALYSIS OR PERMANENT INJURY HOW TO PREVENT DIVING JUMPING ACCIDENTS This is a non diving pool Aquatic Fitness System ...

Page 13: ...r drainage could allow rain overflow and other casual water to flood the equipment and create a wet condition in which it would sit in For spas which will be recessed into a floor or deck install so as to permit access to the equipment either from above or below for servicing Make certain that there are no obstructions which would prevent removal of all side cabinet side panels and access to the j...

Page 14: ... hot tub indoors WARNING In addition to maintenance of filters and water chemistry proper ventilation is recommended to reduce the risk of contracting a waterborne illness e g an infection bac teria or virus and or respiratory ailments that could be present in the air or water Consult a licensed architect or building contractor to determine your specific needs if installing your hot tub indoors Pr...

Page 15: ...tub To ensure proper support the hot tub must sit flat on the intended foundation 5 0 General Electrical Safety Instructions Your new Dimension One hot tub is equipped with the D1 SmartHUB Touch Control system It contains the most advanced safety and self protective equipment in the industry Nonetheless this hot tub must be installed properly to ensure dependable usage Please contact your local de...

Page 16: ...ensure proper connections Do not use aluminum wire When using wire larger than 6 10 mm add a junction box near the hot tub and reduce to short lengths of 6 10 mm wire to connect to the hot tub 4 The electrical supply for this product must include a suitably rated switch or circuit breaker to open all ungrounded supply conductors to comply with Section 422 20 of the National Electrical Code USA ANS...

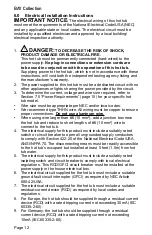
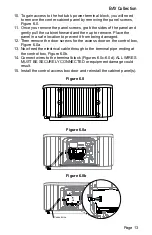
Page 17: ...ce the panel in a safe location to prevent it from being damaged 12 Then remove the door screws for the access door on the control box Figure 6 0a 13 Now feed the electrical cable through to the terminal pipe ending at the control box Figure 6 0b 14 Connect wires to the terminal block Figures 6 0c 6 0d ALL WIRES MUST BE SECURELY CONNECTED or equipment damage could result 15 Install the control acc...

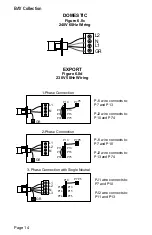
Page 18: ...s to P10 and P74 PJ1 wire connects to P7 and P10 PJ2 wire connects to P13 and P74 PJ1 wire connects to P7 and P10 PJ2 wire connects to P11 and P13 L1 N GR P10 P13 P5 1 Phase Connection P7 P15 P75 P74 P14 P11 2 Phase Connection L1 N L2 P10 P13 P5 P7 P15 P75 P74 P14 P11 GR 3 Phase Connection with Single Neutral N P10 P13 P5 P7 P15 P75 P74 P14 P11 L1 L2 L3 GR ...

Page 19: ... 1 Prepare The Hot tub For Filling Clear all debris from the hot tub Although the hot tub shell has been polished at the factory you may want to treat it with a specially formulated hot tub cleaner Consult your authorized Dimension One dealer for additional information prior to filling hot tub Remove the filters as illustrated in Section 13 1 CAUTION Do not leave the spa shell exposed to the sun d...

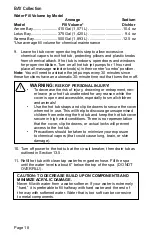
Page 20: ... automatically activate Activate Jets Pump 1 to prime the pump page 23 Let it run for about 10 15 seconds Repeat this process with all the pumps Once all the pumps are primed cleared of airlocks and there are no flow errors reinstall the filter cartridges and close the air bleeder caps 4 Add Start Up Chemicals Turn on the jet pumps when adding chemicals in order to circulate the chemicals thorough...

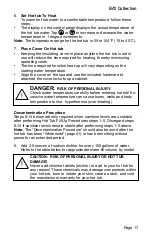
Page 21: ...temperature carefully before entering hot tub Ex cessive water temperature can cause burns welts and body temperature to rise hyperthermia over heating Decontamination Procedure Steps 8 14 below are only required when sanitizer levels are unstable after performing Hot Tub Fill Up Procedures steps 1 5 Disregard steps 8 14 if sanitizer levels remain stable after performing steps 1 5 above Note The D...

Page 22: ...ile the cover is open and accessible especially to small children and animals Use the hot tub straps and clip tie downs to secure the cover when not in use This will help to discourage unsupervised children from entering the hot tub and keep the hot tub cover secure in high wind conditions There is no representation that the cover clip tie downs or actual locks will prevent access to the hot tub P...

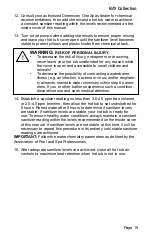
Page 23: ...lments maintain water chemistry within step 6 param eters If you or other bathers experience such a condition discontinue use and seek medical attention 14 Establish a sanitizer reading no less than 3 0 4 0 ppm free chlorine or 2 0 4 0 ppm bromine then allow the hot tub to set undisturbed for 8 hours Retest water after 8 hours to determine if sanitizer levels are stable If sanitizer levels are sta...

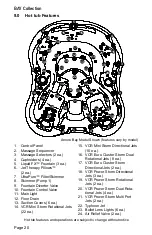
Page 24: ...FX Fountain 3 ea 6 Jet Therapy Pillows 2 ea 7 UltraPure Filter Skimmer 8 Skimmer Pump 1 9 Fountain Diverter Valve 10 Fountain Control Valve 11 Main Light 12 Floor Drain 13 Suction Covers 6 ea 14 VCR Mini Storm Rotational Jets 22 ea 15 VCR Mini Storm Directional Jets 10 ea 16 VCR Euro Cluster Storm Dual Rotational Jets 8 ea 17 VCR Euro Cluster Storm Directional Jets 2 ea 18 VCR Power Storm Directio...

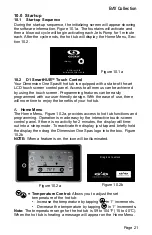
Page 25: ... The Home Menu Figure 10 2a provides access to hot tub functions and programming Operation is made easy by the interactive touch screen control panel If there is no activity for 2 minutes the display will time out into a sleep mode To reactivate the display just tap and briefly hold the display then drag the Dimension One Spas logo into the box Figure 10 2b NOTE When a feature is on the icon will ...

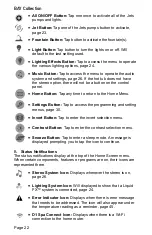
Page 26: ...tton Tap to access the programming and setting menus page 30 Invert Button Tap to enter the invert selection menu Contrast Button Tap to enter the contrast selection menu Snooze Button Tap to enter a sleep mode A message is displayed prompting you to tap the icon to continue B Status Notifications The status notifications display at the top of the Home Screen menu When certain components features ...

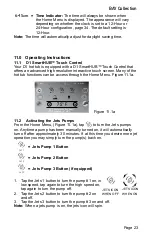
Page 27: ...ctivating the Jets Pumps From the Home Menu Figure 11 1a tap to turn the Jets pumps on Anytime a pump has been manually turned on it will automatically turn off after approximately 30 minutes If at this time you desire more jet operation you may simply turn the pump s back on Jets Pump 1 Button Jets Pump 2 Button Jets Pump 3 Button if equipped 1 Tap the Jets 1 button to turn the pump 1 on in low s...

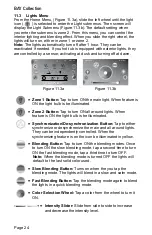
Page 28: ...ON the light bulb is be illuminated Synchronization De synchronization Button Tap to either synchronize or desynchronize the main and all around lights They can be independently controlled When the synchronizing feature is on the icon be illuminated in yellow Blending Button Tap to turn ON the blending modes Once to turn ON the slow blending mode tap a second time to turn ON the fast blending mode...

Page 29: ...evices while hands are wet or while sitting partially immersed or fully immersed in hot tub Power Button Tap to turn the stereo on and off page 26 Bluetooth Button Tap to use your Bluetooth device with the stereo Can also be accessed by using the src source button Source Button Tap to access the source submenu page 26 Audio Settings Button Tap to access the audio submenu page 26 Forward Tap to adv...

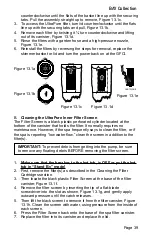
Page 30: ...he left and right Fade Slider Slide from side to side to increase and decrease the fade level between the front and back Subwoofer Slider Slide from side to side to increase and decrease the subwoofer level from minimum to maximum 11 7 Source Menu Slide the right wheel to the source icon src to select an audio source to listen to Figure 11 7a Only the devices available will be displayed Bluetooth ...

Page 31: ... and decreased by rotating the outside jet face Rotate the outside jet face clockwise to decrease or shut off water flow Turn counterclockwise to turn on or increase water flow Note Always keep at least 6 adjustable jets open at all times 11 10 Fountain Control Turn on the fountain by tapping the fountain button on the control panel Use the fountain control valves page 20 to increase or decrease o...

Page 32: ...unctioning normal UltraPure is running all operations are normal Flashing Blue light Maintenance reminder Solid Red light Hot tub error indicates that immediate attention is required to clear or fix an error code 11 15 Dynamic Massage Sequencer The Dynamic Massage Sequencers control the jets in the lounge areas to sequentially massage different muscle groups Figure 11 15a When selecting a massage ...

Page 33: ...in the sequence Sequence 1 Steps through each individual zone one at a time from zone A through F then reverses the sequence Sequence 2 Activates all zones at once then deactivates individual zones one at a time from A through F Then it reverses that sequence Sequence 3 Activates alternate groups of zones It activates Zones A C and E all at once then switches to Zones B D and F Sequence 4 Steps th...

Page 34: ... Date Time Date and Time Provides access to the date and time programming page 34 You can also access the menu by tapping Keypad Keypad Provides access to the units contrast display view and language settings page 35 You can also access the menu by tapping Electrical Config Electrical Configuration Provides access to the electrical programming page 36 This menu is to be accessed by the dealer only...

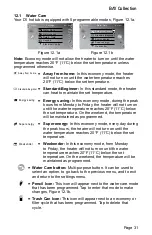
Page 35: ...rgy In this economy mode every day during the peak hours the heater will not turn on until the water temperature reaches 20 F 11 C below the set temperature Weekender Weekender In this economy mode from Monday to Friday the heater will not turn on until the water temperature reaches 20 F 11 C below the set temperature On the weekend the temperature will be maintained as programmed Water Care butto...

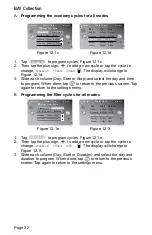
Page 36: ...ange to Figure 12 1f 3 Slide each column Day Start or Duration and select the day and duration to program When done tap to return to the previous screen Tap again to return to the settings menu Settings Water Care Away from home 8 01 am Every day Economy Start Stop 1 00am 3 00am 12 00am 12 00am Weekend Economy 2 Filter cycle 2 Settings Water Care 8 01 am Sunday Monday Weekend Mon Fri 6 30am 7 30am...

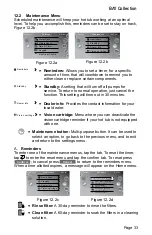
Page 37: ...elect an option to go back to the previous menu and to exit and return to the settings menu A Reminders To enter one of the maintenance menus tap the tab To reset the timer tap to enter the reset menu and tap the confirm tab To reset press Confirm to cancel press Cancel to return to the reminders menu When a time allotted expires a message will appear on the Home menu Rinse filter A 30 day reminde...

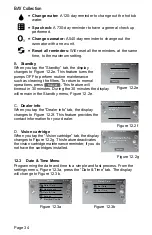
Page 38: ...re 12 2f This feature provides the contact information for your dealer D Vision cartridge When you tap the Vision cartridge tab the display changes to Figure 12 2g This feature deactivates the vision cartridge maintenance reminder if you do not have the cartridges installed 12 3 Date Time Menu Programming the date and time is a simple and fast process From the settings menu Figure 12 3a press the ...

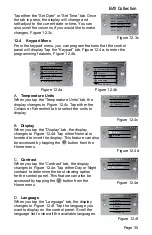
Page 39: ... the Contrast tab the display changes to Figure 12 4e Tap either Day or Night contrast to determine the best viewing option for the control panel This feature can also be accessed by tapping the button from the Home menu D Language When you tap the Language tab the display changes to Figure 12 4f Tap the language you want to display on the control panel Scroll the language list to view all the ava...

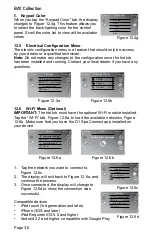
Page 40: ...d on your device 1 Tap the network you want to connect to Figure 12 6c 2 The display will exit back to Figure 12 6a and continue the process 3 Once connected the display will change to Figure 12 6d to show the connection was successful Compatible devices iPod touch 3rd generation and later iPhone 3GS and later iPad Requires iOS 5 0 and higher Android 2 2 and higher compatible with Google Play Sett...

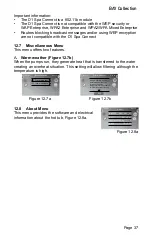
Page 41: ... run they generate heat that is transferred to the water creating an overheat situation This setting will allow filtering although the temperature is high 12 8 About Menu This menu provides the software and electrical information about the hot tub Figure 12 8a Figure 12 7b Settings Miscellaneous 8 01 am Warm weather Info messages Figure 12 7a Settings Warm weather 8 01 am When a pump is running it...

Page 42: ...the suction fittings suction covers or pump s be sure that the flow rates are compatible and are in compliance with the VGB Safety Act page 6 Never replace a suction fitting or suction cover with one rated less than the flow rate marked on the original suction fitting Using improper suction fittings or suction covers can create a body or hair suction entrapment hazard that may lead to drowning or ...

Page 43: ... the filter or if the spa is reporting low water flow clean the screen in addition to the filter s IMPORTANT To prevent debris from getting into the pump be sure to remove any floating debris BEFORE removing the filter screen 1 Make sure that the breaker to the hot tub is OFF or put the hot tub in Stand By mode 2 First remove the filter s as described in the Cleaning the Filter Cartridges section ...

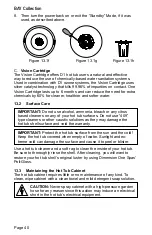
Page 44: ...r other caustic solutions as they may damage the hot tub shell surface and void the warranty IMPORTANT Protect the hot tub surface from the sun and the cold Keep the hot tub covered when empty of water Sunlight and ex treme cold can damage the surface and cause it to peel or blister Use a hot tub cleaner and a soft rag to clean the inside of your hot tub Be sure to thoroughly rinse the shell After...

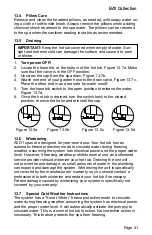
Page 45: ... cap 13 6 Winterizing All D1 spas are designed for year round use Your hot tub has an automatic freeze protection mode to circulate water during freezing weather assuming the system has electrical power and the proper water level However if freezing weather prohibits normal use an authorized service provider should winterize your hot tub Draining the unit will not prevent freeze damage as small am...

Page 46: ... sponge or soft bristle brush use diluted or mild soap to gently scrub the top 3 Rinse and clean and do not allow soap to dry on the cover Do not use soap on the underside of the cover 4 Please check with your Dimension One Spas dealer for recommended cover care and conditioning products Use non petroleum based conditioners to keep the vinyl supple 5 Do not use any solvents abrasive cleaners or st...

Page 47: ...hful conditions for soaking and even damage to your hot tub investment For specific guidance on maintaining water quality consult your authorized dealer who can recommend the appropriate chemical products WARNING FAILURE TO MAINTAIN WATER QUALITY WILL Increase risk of contracting a waterborne illness e g an infection bacteria or virus and or respiratory ailments Damage the equipment components and...

Page 48: ...e opening the appliance 14 2 pH Control pH is a measure of relative acidity or alkalinity of water and is measured on a scale of 0 to 14 The midpoint of 7 is said to be neutral above which is alkaline and below which is acidic In hot tub water it is very important to maintain a slightly alkaline condition of 7 4 to 7 6 Problems become proportionately severe the further outside of this range the wa...

Page 49: ... For specific guidance on maintaining water quality consult your authorized dealer who can recommend the appropriate chemical products 15 0 Protective Conditions Error Messages There are a number of unique functions designed into your D1 hot tub to protect it from damage and or to aid in troubleshooting The error indica tor as well as a screen will notify you when the hot tub needs imme diate atte...

Page 50: ... provide shade for equipment side of spa Contact your authorized dealer or service organization FCL The pressure switch is closed Contact your authorized dealer or service organization SP in Input voltage issue Contact your authorized dealer or service organization HR Hardware error was detected thermal fuse Contact your authorized dealer or service organization UPL The hot tub pack does not have ...

Page 51: ...e not provided with an outdoor antennae when provided it should be installed in accordance with Article 810 of the National Electrical Code ANSI NFPA 70 6 Do not service this product yourself as opening or removing covers may expose you to dangerous voltage or other risk of injury Refer all servicing to qualified service personnel 7 When the power supply connections or power supply cord s are dama...

Page 52: ...www d1spas com 2017 Dimension One Spas All trademarks and registered trademarks are the property of their respective owners PN 6530 538 Rev C 10 18 ...

Reviews: