28
ACCUMULATOR INSTALLATION
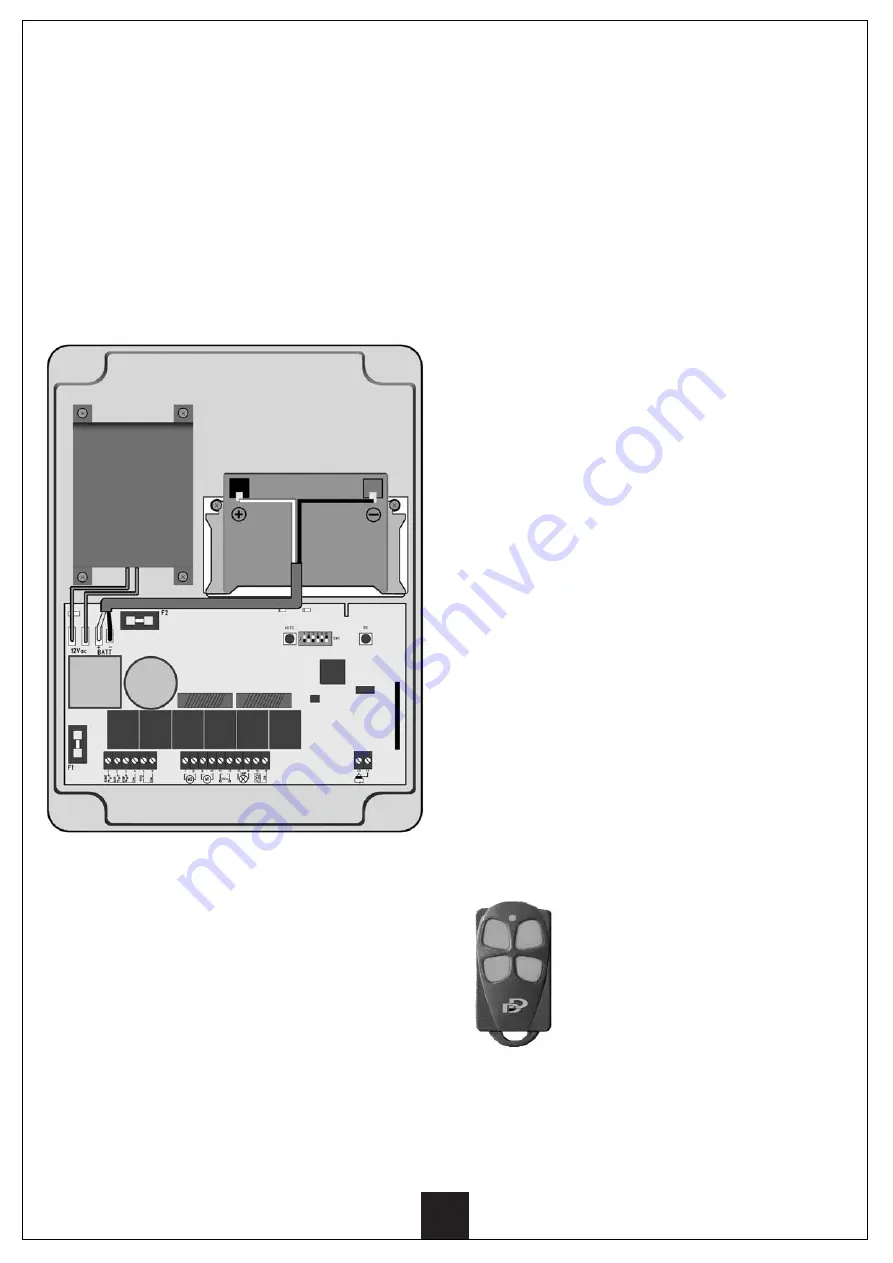
If the antiblackout function is required, a no-maintenan-
ce lead accumulator needs to be connected by means
of special coupling terminals, by strictly complying with
the silk screen printing polarities of the control card.
The accumulator shall have the following characteristics:
TYPE
lead and with no maintenance need
VOLTAGE
12 VOLT
CAPACITY
4,2 Ah
A handy kit comprising a free-maintenance lead batter y
(12V - 4,2Ah), twin lead for connection to the PRG12PP,
and batter y holder.
CAUTION: Batteries must be removed before device dis-
posal according to the regulations in force.
Disconnect electric power before any operation.
PROGRAMMING
As soon as these automation components have been
connected according to the indications shown on the
silk-screen printing and on the card as well, with refe-
rence to the hereabove page, we kindly recommend to
set up the opening and closing time auto learning.
The control card is equipped with LED indicators (L1,
L2), a micro switch selector (SW2) to set up the opera-
tion logic and two buttons to star t the program phase
as well.
TIME AUTO-LEARNING
Before star ting, select “one door” or “double door”, by
means of the SW2, according to the kind of installation
required (see table at page 11), and put the “light” or
“heavy” door selector on “light door” Press the AUTO
button on the control card and keep it pressed for 10
seconds at least. LED L1 will star t blinking and, at the
same time, the two motors (one at a time) will work by
carr ying out two opening and closing cycles respecti-
vely.
BE EXTREMELY CAREFUL DURING THE TIME AUTO-LEAR-
NING AVOIDING TO IMPEDE THE DOOR MOVEMENT.
If during the self-learning movements one of the two
doors stops before closing or opening, put the “light
door” or “heavy door” selector on “heavy door” (see
table at page 11) and repeat ever ything again.
This could happen if the gate doors are too heavy or
the friction is too much.
Now, proceed with the transmitter recording
TRANSMITTER RECORDING
To carr y out the transmitter recording proceed as
follows:
•
Press the RX key and keep it pressed for 2
seconds.
•
Led L1 will turn on.
•
Within 10 seconds, transmit by means of the remote
control device by pressing one of the 4 keys.
•
Led L1 will turn off.
•
Proceed in the same way with the other transmitters.
As soon as the memor y is full (after 48 recorded trans-
mitters) Led L1 carries out 5 triple blinkings.
To cancel the 48 codes proceed as follows:
•
Press the RX key and keep it pressed for 10
seconds.
•
Led L1 will carr y out 5 single blinkings to show that
all the memor y content has been removed.
Once recorded, the transmitter key functions are setup
as follows:
Key 1
: the START command allows to acti-
vate the opening of the door/s during the
whole stroke.
Key 2
: the START PEDESTRIAN command
allows to activate only one door opening,
the one being connected to the M1
terminals, for half time as to the star t
time.
1
2
Summary of Contents for KIT BATT12V
Page 2: ...KIT BATT12V INSTRUCCIONES 1 INSTRU ES 11 INSTRUCTIONS 21 NOTICES 31 ANLEITUNGEN 41 E P GB F D...
Page 53: ......
Page 54: ......


