background image

12

EF830

In

 more 

detail

 . . .

Settings

Setting weekday and time

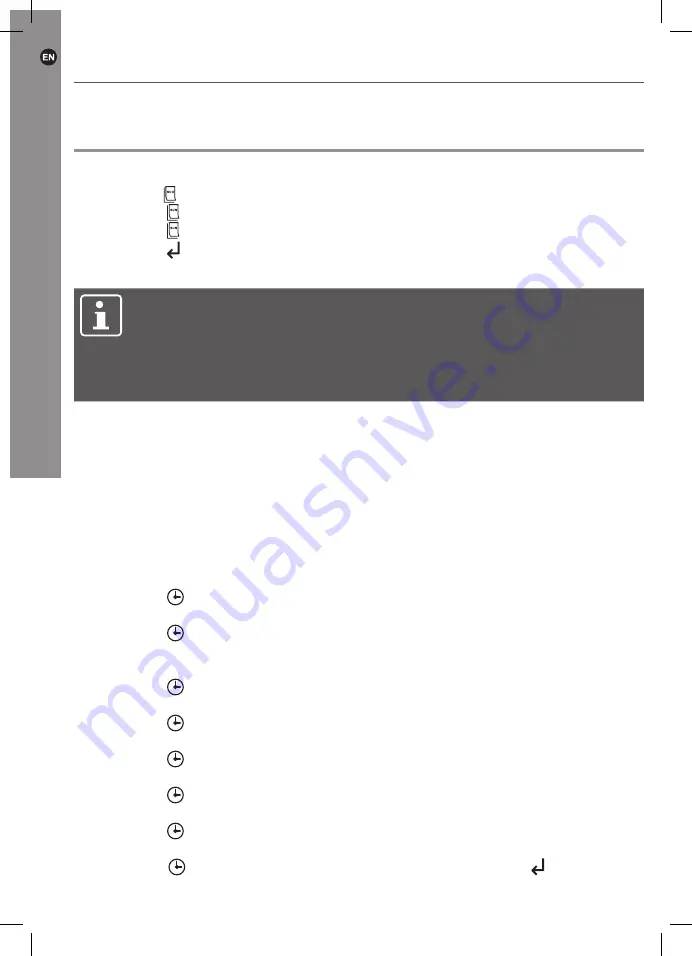
1.  Press the 

 key. When the date is flashing, press the “▲” or “▼” key to select the day.

2.  Press the 


key again, then press the “+” or “-” key to set the hour.

3.  Press the 


key again, then press the “+” or “-” key to set the minute.

4.  Press the 

 key to confirm the setting.

Setting temperature

NOTE:

 This setting is only applicable for the temperature in standard heating mode, 

not for the temperature in the timer mode. The default set temperature is 20 °C.

The appliance only starts working, when the set temperature is higher than 

the room temperature.

If timer is on, temperature cannot be set manually. Please switch off timer 

mode by pressing the timer on/off key.

Press the “+” or “-” key to set the temperature, which ranges from 15 to 30 °C.

After the temperature setting has been completed, the display flashes about 5 seconds, 

then shows the room temperature.

Setting timer


> Up to 10 different timer settings can be programmed.


> Each timer setting has its date, power-on time and power-off time.


> The maximum duration of each timer setting is 23 hours 50 minutes.


> If the power-off time of the timer setting falls on the following day, it is 

unnecessary to set the date – just set the power-off time.

1.  Press the   key, the timer number starts blinking (01-10).

2.  Press the “+” or “-” key to select a timer number.

3.  Press the   key. The cursor on the left side of the day blinks.

4. 

Press the “▲” or “▼” key to move the cursor to the corresponding day. Press the “+” 

key to add a corresponding day, or press the “-” key to delete a day.

5.  Press the   key to set the on time. The hour digit starts blinking.

6.  Press the “+” or “-” key to set the hour.

7.  Press the   key. The minute digit starts blinking.

8.  Press the “+” or “-” key to set the minute.

9.  Press the   key, to set the off time. The hour digit starts blinking.

10. Press the “+” or “-” key to set the hour.

11. Press the   key. The minute digit starts blinking.

12. Press the “+” or “-” key to set the minute.

13. Press the   key. The temperature digit starts blinking.

14. Press the “+” or “-” key to set the temperature.

15. Press the   key to continue with the Timer setting or press the 

 key to confirm 

the setting.

Product function

5059340241678-EF830_A5_IM_GB-V03.indd   12

5059340241678-EF830_A5_IM_GB-V03.indd   12

13-05-2021   13:17:29

13-05-2021   13:17:29

Summary of Contents for 5059340241678

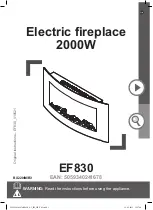
Page 1: ...structions EF830_V10521 WARNING Read the instructions before using the appliance EF830 EAN 5059340241678 BX220IM B3 5059340241678 EF830_A5_IM_GB V03 indd 1 5059340241678 EF830_A5_IM_GB V03 indd 1 13 0...

Page 2: ...tain them for future reference Getting Started 02 Safety information 03 Your product 06 In more detail 07 Product functions 08 Cleaning and maintenance 14 Technical specification 16 Installation 18 50...

Page 3: ...itch on off the appliance provided that it has been placed or installed in its intended normal operating position and they have been given supervision or instruction concerning use of the appliance in...

Page 4: ...e socket outlet so that in case of an emergency the appliance can be unplugged immediately Pull the power plug out of the socket outlet to completely disconnect the appliance from the voltage If the a...

Page 5: ...vent that the heater stops working as a result of overheating take the following immediate steps Switch the electricity off at the socket or off the fireplace power switch Remove any objects that are...

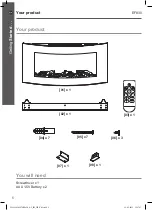
Page 6: ...C _ IC SUN 03 x 1 02 x 1 07 x 1 08 x 1 04 x 7 06 x 3 05 x 7 You will need Screwdriver x 1 AAA 1 5V Battery x 2 Your product 5059340241678 EF830_A5_IM_GB V03 indd 6 5059340241678 EF830_A5_IM_GB V03 ind...

Page 7: ...more detail Product functions 08 Cleaning and maintenance 14 Technical specification 16 Installation 18 5059340241678 EF830_A5_IM_GB V03 indd 7 5059340241678 EF830_A5_IM_GB V03 indd 7 13 05 2021 13 1...

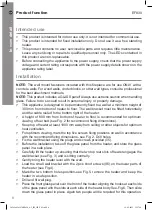
Page 8: ...t of the heater A height of 600 mm from bottom of heater to floor is recommended for optimum viewing of fuel bed see Fig 2 for recommend fixing dimensions Keep top of heater at least 1000 mm away from...

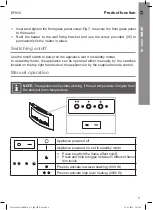
Page 9: ...es located on the top right hand side of the appliance or by the supplied remote control Manual operation NOTE The appliance only starts working if the set temperature is higher than the ambient room...

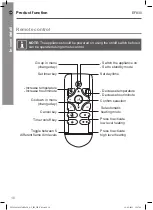
Page 10: ...ture Decrease hour minute Confirm selection Set automatic heating mode Press to activate low level heating Press to activate high level heating Go down in menu change day Cancel key Set timer key Time...

Page 11: ...number 5 Timer on 6 Timer off 7 Flame dim level 8 Heating level low heating level high heating level 9 Automatic heating mode 10 Time temperature display 11 Standby mode icon Product function 5059340...

Page 12: ...he maximum duration of each timer setting is 23 hours 50 minutes If the power off time of the timer setting falls on the following day it is unnecessary to set the date just set the power off time 1 P...

Page 13: ...han the set temperature by around 10 C the high heating power will be turned on 2 The room temperature is lower than the set temperature by around 5 C but 10 C the lower heating power will be turned o...

Page 14: ...iance by lightly running a vacuum cleaner nozzle over the guards to remove any dust or dirt that may have accumulated inside or on the unit 6 CAUTION Do not use harsh detergents chemical cleaners or s...

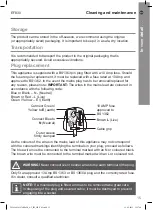
Page 15: ...Yellow to E earth 10 AMP fuse approved to BS 1362 Connect Blue to N Neutral Brown L Live Outer sleeve firmly clamped Cable grip As the colours of the wires in the mains lead of this appliance may not...

Page 16: ...ments of the applicable UK Regulations For indoor use only Class I product must be connected to earth Waste electrical products should not be disposed of with household waste Please recycle where faci...

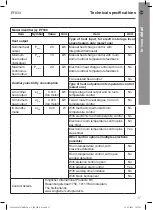
Page 17: ...control No At minimum heat output elmin 0 014 fan motor kW Two or more manual stages no room temperature control No In standby mode elSB 0 48 W With mechanic thermostat room temperature control No Wi...

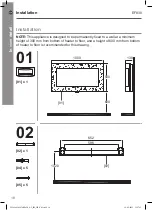
Page 18: ...00 mm from bottom of heater to floor and a height of 600 mm from bottom of heater to floor is recommended for this drawing 01 01 x 1 01 1000 500 138 600 02 02 x 1 04 x 5 05 x 5 02 652 596 1020 Install...

Page 19: ...19 EF830 In more detail 03 04 06 x 2 07 x 1 07 06 Installation 5059340241678 EF830_A5_IM_GB V03 indd 19 5059340241678 EF830_A5_IM_GB V03 indd 19 13 05 2021 13 17 31 13 05 2021 13 17 31...

Page 20: ...20 EF830 In more detail 05 04 x 2 07 x 1 01 07 06 Installation 5059340241678 EF830_A5_IM_GB V03 indd 20 5059340241678 EF830_A5_IM_GB V03 indd 20 13 05 2021 13 17 32 13 05 2021 13 17 32...

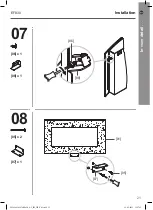
Page 21: ...F830 In more detail 07 06 x 1 08 x 1 06 08 08 05 x 2 07 x 1 07 05 01 Installation 5059340241678 EF830_A5_IM_GB V03 indd 21 5059340241678 EF830_A5_IM_GB V03 indd 21 13 05 2021 13 17 32 13 05 2021 13 17...

Page 22: ...ngdom EU Manufacturer Kingfisher International Products B V Rapenburgerstraat 175E 1011 VM Amsterdam The Netherlands www diy com www screwfix com www screwfix ie To view instruction manuals online vis...

Reviews: