background image


KDS6401E 


TROUBLESHOOTING GUIDE 


GENERAL 

Problem 

Cause 

Solution 

Service Manual 

Reference 

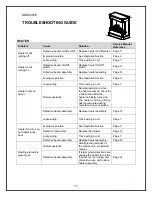
Circuit breaker trips 
or fuse blows when 
unit is turned on 

Improper circuit current rating 

Additional appliances may 
exceed the current rating of 
the circuit breaker or fuse.  
Plug unit into another outlet 
or install unit on a dedicated 
15 amp circuit 


Unit turns on or off 
by itself 

Optional remote control has a 
similar frequency to other 
remotes in the area 

Replace hand held remote 
control 


Radio frequency disturbance 
from outside sources 

Lights dim in room 
while the unit is on 

Unit is drawing close to circuit 
current rating 

Move the unit to another 
outlet or install unit on a 
dedicated 15 amp circuit 


Power cord gets 
warm 

Normal operation 

The power cord may get 
slightly warm to the touch 
when the heater is on 


Defective power cord 

Replace power cord 

Page 13 


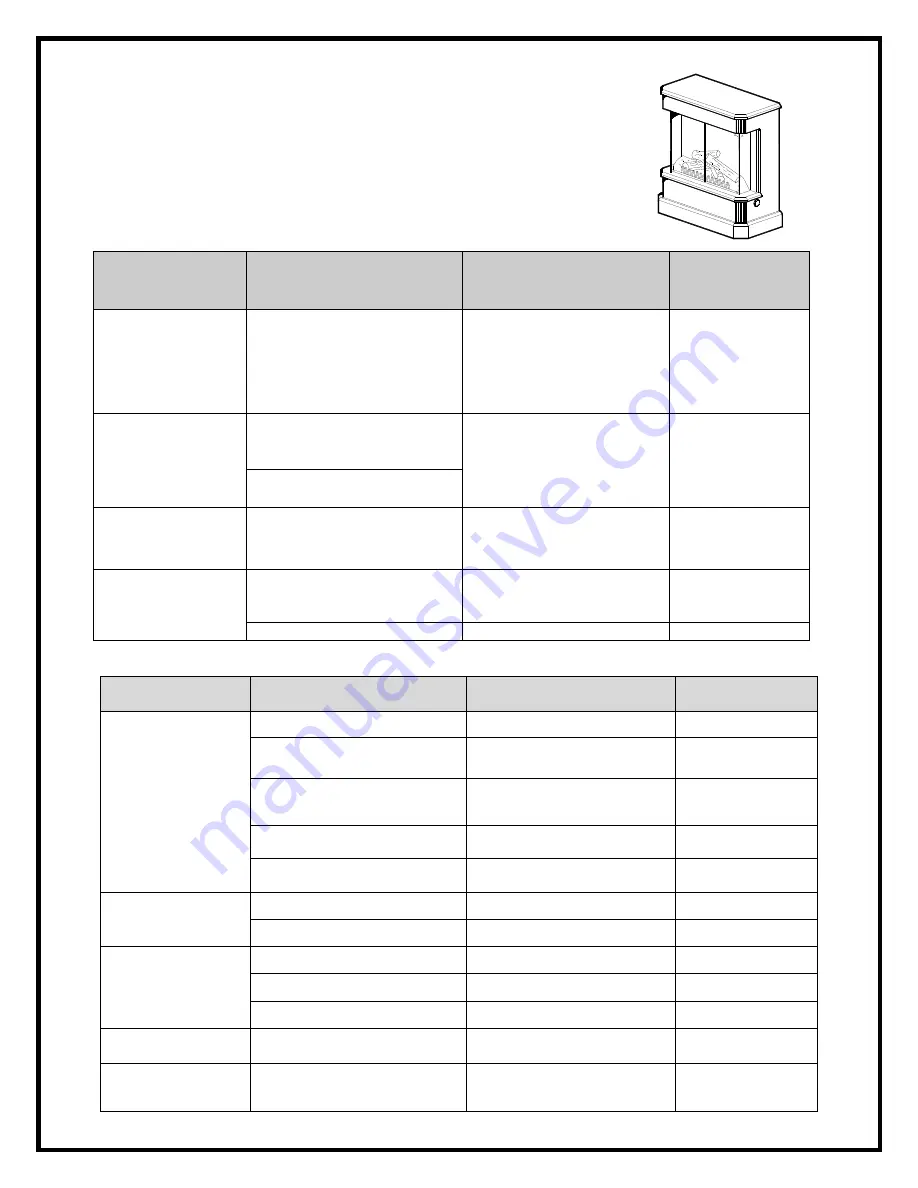
APPEARANCE 

Problem 

Cause 

Solution 

Service Manual 
Reference 

 
Stove does not turn 
on 

Improper operation 

Refer to User’s Guide 


Defective main On/Off switch 

Replace main On/Off switch 

Page 11 

Defective optional remote 
control 

Install new battery into the 
handheld transmitter 


Defective Remote Receiver 

Replace Remote Receiver 


Loose wiring 

Check wiring connections 

Page 7 

 
Flame frozen 

Defective flame motor 

Replace flame motor 

Page 10 

Loose wiring 

Check wiring connections 

Page 7 

 
Flame not bright or 
flame not visible 

Burnt light bulbs 

Replace light bulbs 

Page 8 

Loose wiring 

Check wiring connections 

Page 7 

Defective light harness 

Replace light harness 


Log set dim, ember 
bed not glowing 

Burnt light bulbs 

Replace light bulbs 

Page 8 

Flame Shutter 

Defective flame motor 

Replace flame motor 

Page 10 


16

Summary of Contents for 6900940159

Page 1: ...CONTEMPRA MODEL KDS6401E PARTS SERVICE MANUAL 7400060000R02 Click on the replacement part number to view price and availability www morelectricheating com ...

Page 2: ...AGRAM 8 LIGHT BULB REPLACEMENT 9 TO REPLACE MAIN ON OFF SWITCH 10 TO REPLACE FLAME MOTOR FLAME ROD 11 TO REPLACE HEATER ON OFF SWITCH 12 TO REPLACE HEATER THERMOSTAT 13 TO REPLACE POWER CORD 14 TO REPLACE THE HEATER ASSEMBLY 15 TROUBLESHOOTING GUIDE 16 GENERAL 16 APPEARANCE 16 HEATER 17 NOISE 18 ...

Page 3: ...ounter clockwise until you hear a click Leave in this position to maintain the room temperature at this setting For additional heat turn clockwise until you hear the click again and the heater will turn on To turn the heater off switch the HEATER ON OFF SWITCH to the OFF position NOTE When the heater is switched ON the heater fan will operate The heater element may or may not be on depending on th...

Page 4: ...e ON button to turn fireplace on push the OFF button to turn the fireplace off BATTERY REPLACEMENT To replace the battery slide battery cover open on the hand held transmitter Correctly install one 12 volt A23 battery in the battery holder Close the batter cover Remote Control Initialization This procedure is required every time there is a loss of power to the remote control in the fireplace I e p...

Page 5: ...ery into the transmitter FIGURE 3 4 Turn the stove main power switch to the on position prior to using the remote control 5 The remote control works up to 50 feet away 6 Push the ON button to turn stove on push the OFF button to turn the stove off NOTE To prevent the risk of fire the stove plug must be inserted fully into the receiver NOTE Stove MAIN on off switch must be in the ON position prior ...

Page 6: ...e if they are close to the end of their rated life Group replacement will reduce the number of times you need to open the unit to replace light bulbs BULB REQUIREMENTS Quantity of 2 clear chandelier or candelabra bulbs with an E 12 small socket base 60 watt rating Example GE 60BC of Philips 60 CTC GLASS CLEANING The glass is cleaned in the factory during the assembly operation During shipment inst...

Page 7: ...KDS6401E EXPLODED DIAGRAM 6 12 9 2 14 7 6 13 5 11 4 10 3 1 8 ...

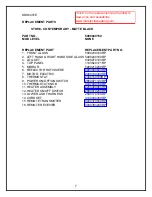
Page 8: ...900210200RP 6 REFLECTOR ROTISSIERE 5900080600RP 7 MOTOR ELECTRIC 2000140300RP 8 THERMOSTAT 2300150100RP 9 POWER ON OFF ON SWITCH 2800071100RP 10 THERMOSTAT KNOB 0437930159RP 11 HEATER ASSEMBLY 2200490900RP 12 HEATER ON OFF SWITCH 2800070200RP 13 LOWER LIGHT HARNESS 2500170100RP 14 CORDSET 4100040300RP 15 REMOTE TRANSMITTER 3000370500RP 16 REMOTE RECEIVER 3000380200RP Click on the replacement part ...

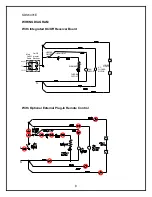
Page 9: ...h Integrated On Off Receiver Board Main On Off Switch On Off Integral Receiver N ELEMENT THERMOSTAT HEATER ON OFF CUTOUT THERMAL LOWER MOTOR FAN FLICKER A C MOTOR LIGHTS C C With Optional External Plug In Remote Control 8 C C L N ...

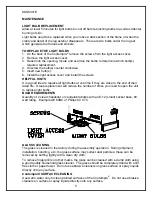
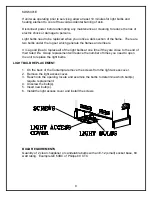
Page 10: ...l of the light bulbs at one time if they are close to the end of their rated life Group replacement will reduce the number of times you need to open the unit to replace the light bulbs LIGHT BULB REPLACEMENT 9 1 On the back of the Contempra remove the screws from the light access cover 2 Remove the light access cover 3 Reach into the opening locate and examine the bulbs to determine which bulb s r...

Page 11: ...EPLACE MAIN ON OFF SWITCH 1 Remove the stove pipe kit if equipped 2 Remove the four screws from the rear panel and remove 3 Locate the main on off switch mounted to the top panel and disconnect the wiring clips and connections noting their original locations 4 Depress the retainer clips on the rear of the switch and push the switch down and out of the top cover 5 Properly orientate the new switch ...

Page 12: ...th a short handled screw driver 4 Locate and remove the wiring connections and remove the flame rod and flame motor assembly NOTE When removing the flame motor some damage may occur to the flame rod If flame rod is damaged replace to insure proper operation 5 To remove the flame rod attach needle nose pliers to the spring on the motor shaft and pull while rotating in the opposite direction of the ...

Page 13: ...LACE HEATER ON OFF SWITCH 1 Remove the stove pipe kit if equipped 2 Remove the four screws from the rear panel and remove 3 Locate the heater on off switch mounted to the top panel and disconnect the wiring clips and connections noting their original locations 4 Depress the retainer clips on the rear of the switch and push the switch down and out of the top cover 5 Properly orientate the new switc...

Page 14: ... shock or damage to persons TO REPLACE HEATER THERMOSTAT 1 Remove the stove pipe kit if equipped 2 Remove the four screws from the rear panel and remove 3 Locate the heater thermostat mounted on the rear panel and disconnect the wiring clips and connections noting their original locations 4 Pull off the thermostat control knob to expose the mounting screws 5 Remove the mounting screws and remove t...

Page 15: ...screws from the rear panel and remove 3 Locate and remove the wiring connections for the power cord 4 With needle nose pliers grasp the power cord strain relief grommet from inside the bottom cover and push while twisting to remove 5 Pull the old power cord out through the bottom cover 6 Install the new power cord through the hole in the bottom cover and connect all of the wiring connections in th...

Page 16: ...e the four screws on the inner heater panel 4 Locate the eight cam locks on the side and front panels inside the upper corners of the stove and turn with a large slot screwdriver so the triangle on the cam lock is pointing up towards the top of the stove 5 Grasp the top at both sides and gently pull to release the top 6 Remove the heater mounting screws 7 Disconnect the wiring clips and connection...

Page 17: ...operation The power cord may get slightly warm to the touch when the heater is on Defective power cord Replace power cord Page 13 APPEARANCE Problem Cause Solution Service Manual Reference Stove does not turn on Improper operation Refer to User s Guide Defective main On Off switch Replace main On Off switch Page 11 Defective optional remote control Install new battery into the handheld transmitter...

Page 18: ... heater emits an odour for a brief period after the heater is initially turned on The heater is burning off any dust accumulated during manufacturing or operation Defective heater assembly Replace heater assembly Page 14 Loose wiring Trace wiring in unit Page 7 Heater fan turns on but heater lacks heat Improper operation See Operation Section Page 2 Defective thermostat Replace thermostat Page 12 ...

Page 19: ...ctive heater assembly Replace heater assembly Page 14 NOISE Problem Cause Solution Service Manual Reference Excessive noise with the heater on Dirty blower assembly Clean blower assembly Defective blower assembly Replace heater assembly Page 14 Grinding or excessive noise with the heater off Moving flame rod hitting or rubbing against internal components Flame rod replacement Page 10 Defective fla...

Reviews: