- 5 -
IMPORTANT: THESE INSTRUCTIONS SHOULD BE READ CAREFULLY AND RETAINED FOR FUTURE REFERENCE
UK
IMPORTANT SAFETY ADVICE
DO NOT COVER OR OBSTRUCT the air
inlet or outlet grille.
ENSURE THE APPLIANCE IS EARTHED.
Do not mount the appliance in areas where
excessive dust exists.
Always disconnect supply before working
on the product.
This product should be mounted safely to
solid wall or ceiling surfaces only.
Ensure the supply cables are of adequate
current carrying capacity and are protected
by a suitable fuse.
Ensure proper manual handling procedures
are observed at all times.
WARNING: Isolate electrical supply to ALL
modular linked units when carrying out
maintenance.
Dimplex Air Barrier - Modular Linking Kit
Model : CABM1
(suitable for use with all CAB & DAB Models)
Installation and Operating Instructions
The CAB Model requires:
1 x Modular joining cable
3 x M8 x 70mm Bolts
3 x M8 nuts
3 x M8 shake-proof washers
3 x M10 x 40mm Bolts
3 x M10 nuts
3 x M10 shake-proof washers
4 x Cable clips
The DAB Model requires:
1 x Modular joining cable
3 x M8 x 70mm Bolts
4 x M8 x 40mm Bolts
7 x M8 nuts
7 x M8 shake-proof washers
4 x Cable clips
The Instructions for the Modular Linking Kit should be read in
conjunction with the ‘Dimplex Air Barrier’ Instructions. All ‘Safety
Advice’ to be heeded before installing the appliances.
Note: As this Kit is applicable to both CAB and DAB models there may
be fasteners etc. left over depending on which model it is used on.
Procedure
1. Decide which appliance is to be the master module and which of the
appliances are to be the slaves. To open the appliance remove the
outlet grille, bottom panel and the inlet grille - see ‘CAB/DAB’ Installa-
tion Instructions.
2. In order to attach the modular units together, the
fi
xing holes (1-3) as
indicated in Fig. 1 must be drilled using an appropriate drill size (CAB
- 10.5mm dia & DAB - 8.5mm dia). The knock-out (x) for the modular
joining cable must also be removed. While supporting the endcap,
punch a series of small holes around the perimeter of the knock-out
from inside out, using a hammer and
fl
at bladed screw-driver.
Note : * in Fig. 1 refers to extra hole on DAB models only.
3. Bolt modules together as shown using the supplied
fi
xings - see Fig.
2a & 2b.
4. Fit 25mm x 50mm unistrut (or similar - not supplied) supporting
members across the top of all bolted units which exceed 2 metres in
length (see ‘a’ in Fig. 3) before mounting into position. Otherwise link
units when
fi
xed in position.
5. Connect the CAT5 cable from the controller (CABC5 for electric mod-
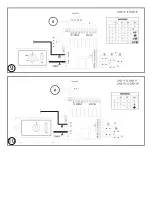
Wiring Diagram (see Fig. 9)
Electric Models - CAB ‘E’ & DAB ‘E’
A - Control Cable
B - Modular Joining Cable
C - Thermostat (Optional)
D - Door Switch (Optional)
E - Thermal Safety Cut-out Circuit
F - Elements
G - BMS Switches (Optional)
Note: If Switch Kit is used only connect to the Master Control board.
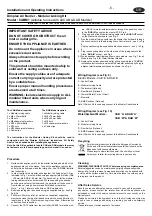
Wiring Diagram (see Fig. 10)
Water/Ambient Models -
CAB ‘A’ & DAB ‘A’
CAB
‘W’
&
DAB
‘W’
A - Control Cable
B - Modular Joining Cable
D - Door Switch (Optional)
G - BMS Switches (Optional)
Note: If Switch Kit is used only connect to the Master Control board.
Recycling
For electrical products sold within the European Community.
At the end of the electrical products useful life it should not be
disposed of with household waste.
Please recycle where facilities exist. Check with your Local
Authority or retailer for recycling advice in your country.
Cleaning
WARNING: DISCONNECT SUPPLY before carrying out maintenance.
External appearance can be maintained by wiping occasionally with a
damp cloth; for stain removal, a weak soap solution can be applied with
a cloth and the surface wiped dry. Care must be taken to avoid any mois-
ture ingress into the product.
After Sales Service
Should you require after sales service or should you need to purchase
any spares, please contact the retailer from whom the appliance was
purchased or contact the service number relevant to your country on the
warranty card.
Please do not return a faulty product to us in the
fi
rst instance as this may
result in loss or damage and delay in providing you with a satisfactory
service.
Please retain your receipt as proof of purchase.
els, CABC6 for water/ambient models), through the panel knock-out
to the “
BUS IN
” socket on the master PCB. Fig. 4.
6. Plug one end of the Modular joining cable into the
BUS OUT
socket
on the Master Control board - see Fig. 4.
7. Run the modular joining cable from the Master Control board through
the knock-out hole to the adjoining Slave Control board - see ‘x’ in Fig.
5.
Clip the cable using the supplied cable clips as shown - see ‘y’ in Fig.
5.
8. Plug in connecting block at the other end of the joining cable to the
Slave “
BUS IN
” socket - see Fig. 4.
9. Wire independent electrical supplies to each module - see Fig. 7 for all
Models, and Fig. 8 for Water/Ambient Models.
10. Replace the bottom panel and outlet grille assembly (see ‘CAB/DAB’
Installation Instructions) and install the modular assembly by
fi
xing to
adjacent wall brackets positioned as shown - see Fig. 6.
Summary of Contents for CABM1
Page 2: ...4 BUS OUT BUS IN 1 3 5 6 7 8...
Page 3: ...9 10...


