background image


13

WARNINg: 

 Disconnect 


 power before attempting any  

 maintenance or cleaning to 


 reduce the risk of fire, electric 


 shock or damage to persons.

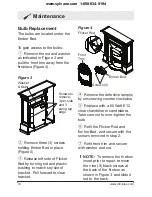
Allow at least five (5) minutes 

for the light bulbs to cool before 

touching them to avoid accidental 

burning of the skin.  The light 

bulbs need to be replaced when 

you notice a dark section of 

the flame or when the clarity 

and detail of the log ember bed 

exterior reduces.  There are two 


Operation

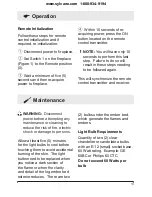
Remote Initialization

Follow these steps for remote 

control initialization and if 

required, re-initialization: 

① 

Disconnect power to fireplace.

  Set Switch 1 on the fireplace 

(Figure 1) to the Remote position 

(II).

  Wait a minimum of five (5) 

seconds and then re-acquire 

power to fireplace.

  Within 10 seconds of re-

acquiring power, press the ON 

button located on the remote 

control transmitter.

!

NOTE:

 You will have only 10 

seconds to perform this last 

step.  Failure to do so will 

result in these steps needing 

to be followed again.

This will synchronize the remote 

control transmitter and receiver.


Maintenance

(2) bulbs under the ember bed, 

which generate the flames and 

embers.

Light Bulb Requirements

Quantity of two (2) clear 

chandelier or candelabra bulbs 

with an E-12 (small) socket base, 

60 Watt rating.  Example: GE 

60BC or Philips 60 CTC.

Do not exceed 60 Watts per 

bulb

www.sylvane.com  1-800-934-9194

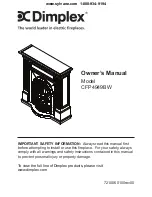
Summary of Contents for CFP49449BW

Page 1: ...irst before attempting to install or use this fireplace For your safety always comply with all warnings and safety instructions contained in this manual to prevent personal injury or property damage T...

Page 2: ...a qualified technician or service agency to repair this fireplace NOTE Procedures and techniques that are considered important enough to emphasize CAUTION Procedures and techniques which if not caref...

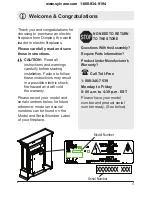
Page 3: ...ble electric shock fire hazard and will void the warranty Please record your model and serial numbers below for future reference model and serial numbers can be found on the Model and Serial Number La...

Page 4: ...s malfunctioned or if the fireplace has been dropped or damaged in any manner Return heater to an authorized service Important SAFETY Instructions facility for examination electrical or mechanical adj...

Page 5: ...contact a qualified electrician to install the proper outlet Do not change the plug in any way Avoid the use of an extension cord Extension cords may overheat and cause a risk of fire If you must use...

Page 6: ...r television reception which can be determined by turning the equipment off and on the user is encouraged to try to correct the interference by one or more of the following measures Reorient or reloca...

Page 7: ...placing the light bulbs under the Maintenance section of this manual The heater on your fireplace may emit a slight harmless odor when first used This odor is a normal condition caused by the initial...

Page 8: ...8 www dimplex com Fireplace Assembly www sylvane com 1 800 934 9194...

Page 9: ...9 Fireplace Assembly www sylvane com 1 800 934 9194...

Page 10: ...10 www dimplex com Fireplace Assembly www sylvane com 1 800 934 9194...

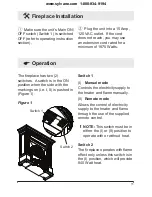
Page 11: ...side with the markings on i e I II is pushed in Figure 1 Switch 1 I Manual mode Controls the electricity supply to the heater and flame manually II Remote mode Allows the control of electricity suppl...

Page 12: ...Button Battery Cover Battery Operation Remote Operation The fireplace is supplied with an integral ON OFF remote control Figure 2 NOTE Ensure that the fireplace ON OFF Switch is set to the remote cont...

Page 13: ...r to fireplace Set Switch 1 on the fireplace Figure 1 to the Remote position II Wait a minimum of five 5 seconds and then re acquire power to fireplace Within 10 seconds of re acquiring power press th...

Page 14: ...bracket Figure 3 Washer Nut Screws to remove 3 per side and 3 along top edge Figure 4 Front Trim Ember Bed Screws 3 Flicker Rod Remove the defective lamp s by unscrewing counter clockwise Replace with...

Page 15: ...WARNING Always disconnect from the power supply before cleaning the fireplace For general cleaning use a soft clean duster never use abrasive cleaners The glass viewing screen should be cleaned caref...

Page 16: ...t and subject to the provisions of this warranty Dimplex warrants such products to be free from defects in material and workmanship for a period Warranty of 12 months from the date of the first purcha...

Page 17: ...hall be the purchaser s responsibility What Dimplex and its dealers and service agents are also not responsible for IN NO EVENT WILL Dimplex or ITS DIRECTORS OFFICERS OR AGENTS BE LIABLE TO the PURCHA...

Page 18: ...18 www dimplex com 2009 Dimplex North America Limited Dimplex North America Limited 1367 Industrial Road Cambridge ON Canada N1R 7G8 www sylvane com 1 800 934 9194...

Reviews: