3
Operation
Electric Stove Manual Control
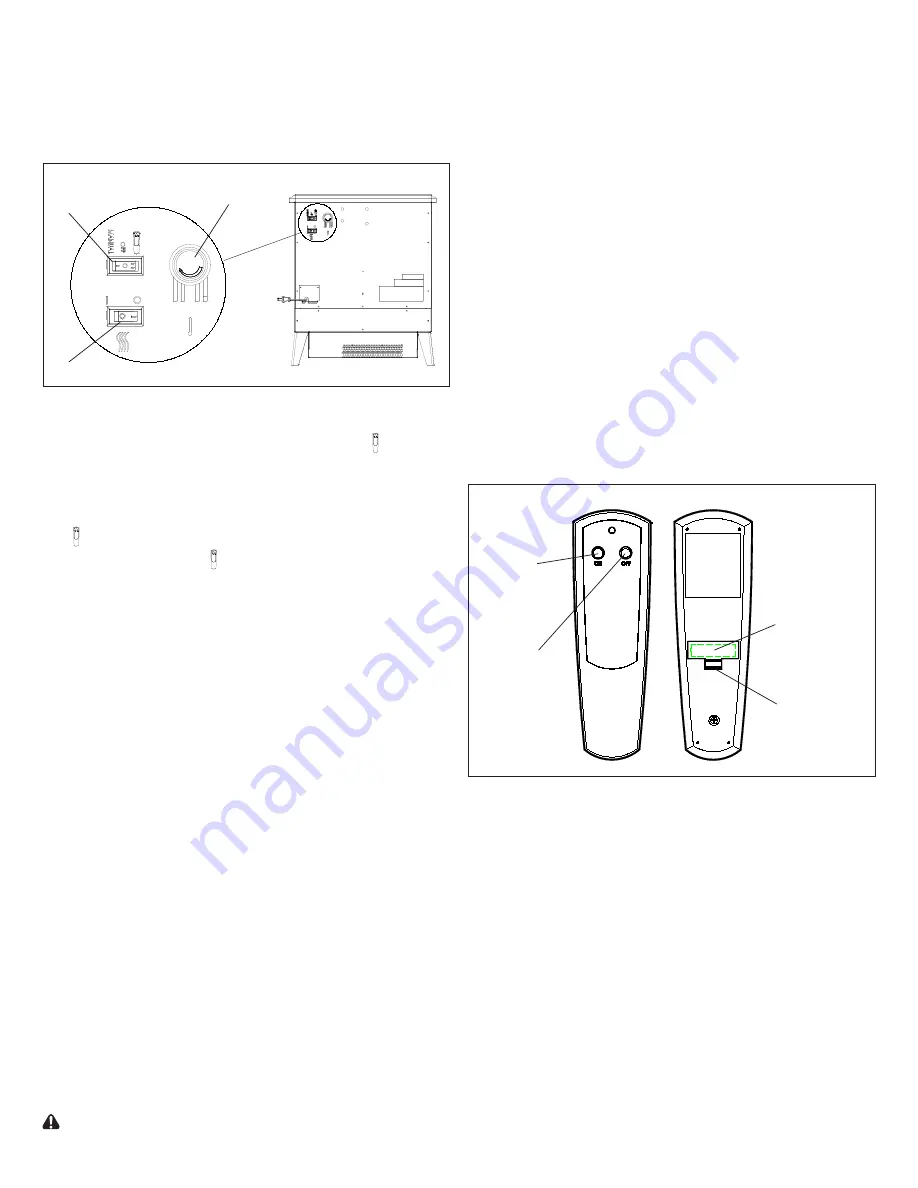
The manual controls for the stove are located in the upper
left hand corner on the rear of the stove (Figure 1).
A. 3 Position Switch
The switch has two (2) ON positions marked with and
“
Manual
”.
The “
Manual
” position is for manual operation. In this
position the built-in remote control is by-passed.
The position is for operating the unit with the provided
remote control. When in position the unit is operated with
the ON and OFF buttons of the remote control.
When the switch is in the center position the unit is off.
B. Heater ON/OFF Switch
The Heater ON/OFF Switch supplies power to the heater
fan and the heater element. When the switch is in the ON
position the heater operates if the thermostat calls for heat.
C. Heater Thermostat Control
To adjust the temperature to your individual requirements,
turn the thermostat control clockwise all the way to turn on
the heater. When the room reaches the desired temperature,
turn the thermostat knob counter clockwise until you hear a
click. Leave in this position to maintain the room temperature
at this setting. For additional heat, turn clockwise until you
hear the click again and the heater will turn on.
!
NOTE:
When the heater is switched ON, the heater fan
will operate. The heater element may or may not be on,
depending on the thermostat control setting (see “Heater
Thermostat Control”).
Resetting The Temperature Cutoff Switch
Should the heater overheat, an automatic cut out will turn the
heater off and it will not come back on without being reset. It
can be reset by switching the 3 Position Switch to OFF and
waiting five (5) minutes before switching the unit back on.
CAUTION:
If you need to continuously reset the heater,
unplug the unit and call Dimplex North America Limited at
1-888-346-7539 for technical support.
Remote Operation
The stove is supplied with an integrated ON/OFF remote
control.
!
NOTE:
Ensure that the stove’s 3 Position Switch is set to
the remote Control setting (right position - see Figure 1A).
To operate, push the ON button to turn stove on, push the
OFF button to turn the stove off.
Battery Replacement
(Figure 2)
To replace the battery:
1. Slide battery cover open on the remote control.
2. Correctly install one 12 Volt (A23) battery in the battery
holder.
3. Close the battery cover.
B
Figure 1
A
C
Figure 2
On
Button
Off
Button
Battery
Battery
Cover
Remote Initialization
Follow these steps to initialize or if necessary, re-initialize:
1. Disconnect power to the stove.
2. Ensure 3 Position Switch is in the Remote position (far
right).
3. Restore power to stove.
4. Within 10 seconds of restoring power to stove, press the
ON button of the Remote Control.
!
NOTE:
If you do not press the ON button of the remote
within 10 seconds, the process will need to be started
again.
Summary of Contents for CS33116A
Page 5: ...5 Wiring Diagram ...


