


11
switch to "O" and waiting 5 min-
utes before switching the unit
back on.
CAUTION:
If you need to
continuously reset the heater,
disconnect power and call
Dimplex customer service at
1-888-DIMPLEX
(1-888-346-7539).
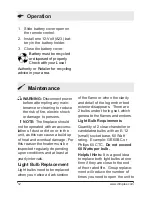
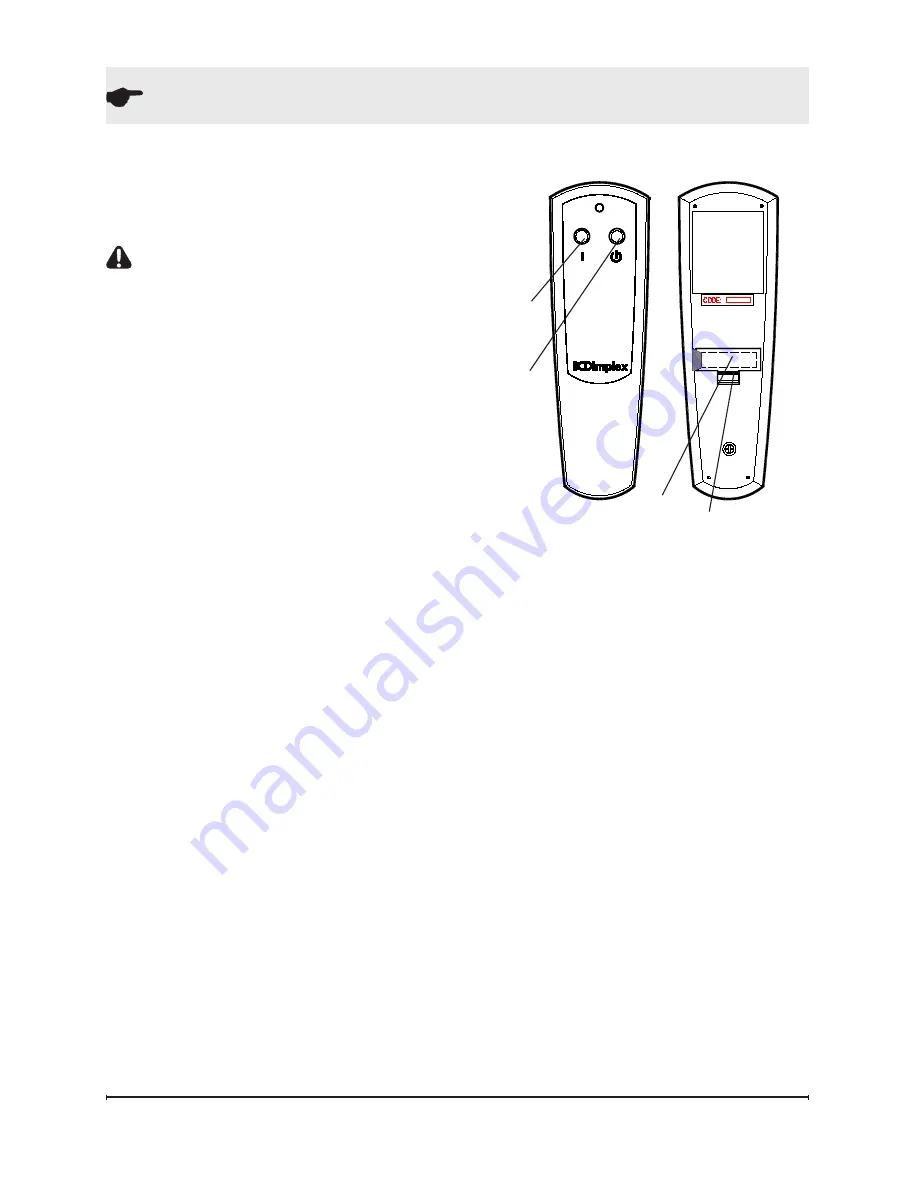
Remote Operation
The fireplace is supplied with an
integrated On/Off remote control
!
NOTE: Ensure that the 3-Po-
sition switch is set to the
remote control setting ("=").
To operate, push the ON button
to turn fireplace on, push the OFF
button to turn the fireplace off.
!
NOTE:
Before attempting any
operation with the remote control,
pull the plastic insulator strip out
from between the remote casing
and battery cover.
Remote Control Initializa-
tion/ Reprogramming
In the event that your remote
control ceases to operate your
fireplace, follow these steps to
re-initialize the remote control and
the remote control receiver in the
fireplace:
1. Place the 3-Position Switch
Figure 5
Operation
(Figure 4A) in the OFF (“O”)
position.
2. Wait a minimum of 5 seconds
and then place the 3-Position
switch in the remote control
(“=”) position.
3. Within
10 seconds of chang-
ing the switch position, press
the ON button located on the
remote control (Figure 5).
This will synchronize the remote
control and the fireplace receiver.
!
NOTE:
You will have only 10
seconds to perform this last
step. Failure to do so will result
in these steps needing to be
followed again.
Battery Replacement
(Figure 5)
To replace the battery:
ON
Button
Battery Cover
OFF
Button
Battery


