


7
Fireplace Installation
WARNING:
Ensure the power
cord is not installed so that it is
pinched or against a sharp edge
and ensure that the power cord is
stored or secured to avoid tripping
or snagging to reduce the risk
of fire, electric shock or injury to
persons.
WARNING:
Construction
and electrical outlet wiring must
comply with local building codes
and other applicable regulations
to reduce the risk of fire, electric
shock and injury to persons.
WARNING:
Do not attempt
to wire your own new outlets or
circuits. To reduce the risk of fire,
electric shock or injury to persons,
always use a licensed electrician.
WARNING:
To reduce the risk
of fire, do not store or use gaso-
line or other flammable vapors or
liquids in the vicinity of the heater.
CAUTION:
Clearance for air
circulation beneath the fire-
place insert is provided by 2
rubber feet.
Do not install the fireplace
insert directly on carpet or
similar surfaces which may
restrict air circulation.
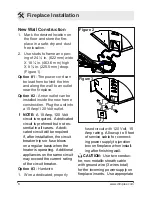
CAUTION:
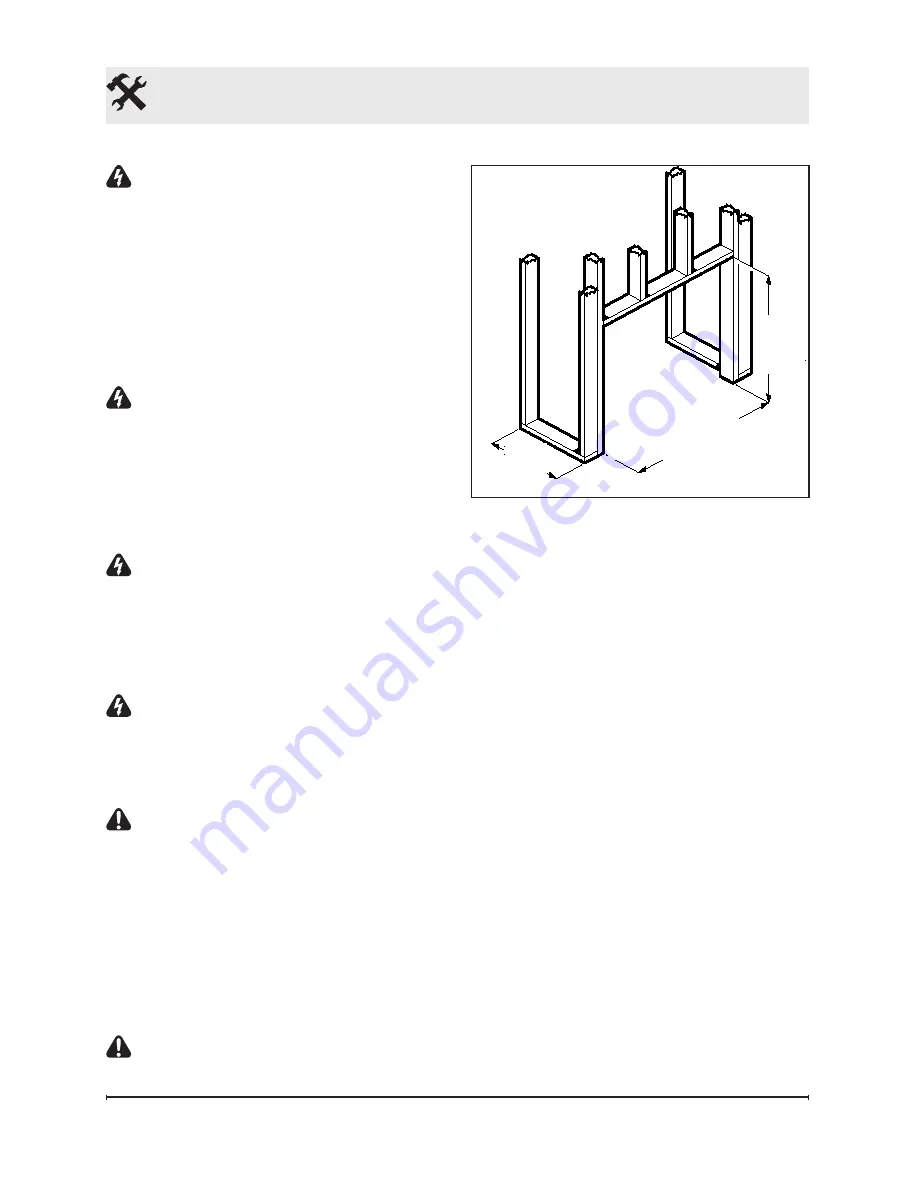
If installing the
Figure 1
24 ½”
(622 mm)
fireplace in a carpeted area, place
a one-piece, solid, flat surface
under the fireplace. Ensure that
both of the feet rest securely on
this surface.
!
NOTE:
The dimensions of the
fireplace are 26 in. (660.5 mm)
wide X 18 ⅞ in. (479.5 mm)
high X 9 ¼ in. (235 mm) deep.
The fireplace does not require
any additional venting.
Mantel Installation
Install the fireplace into the
mantel (refer to mantel assembly
instructions).
!
IMPORTANT:
If not using a
Dimplex mantel, the fireplace
must be installed in an enclosure
with the following
minimum
inter-
nal/opening dimensions - Figure
1.
8 ⅞”
(225.5 mm)
18 ¼”
(463.6 mm)


