


8
www.dimplex.com
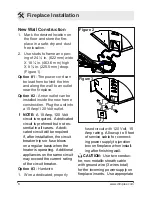
Fireplace Installation
New Wall Construction
1. Mark the desired location on
the floor and store the fire-
place in a safe, dry and dust
free location.
2. Use studs to frame an open-
ing of 24 ½ in. (622 mm) wide
X 18 ¼ in. (463.6 mm) high
X 8 ⅞ in. (225.5 mm) deep.
(Figure 1)
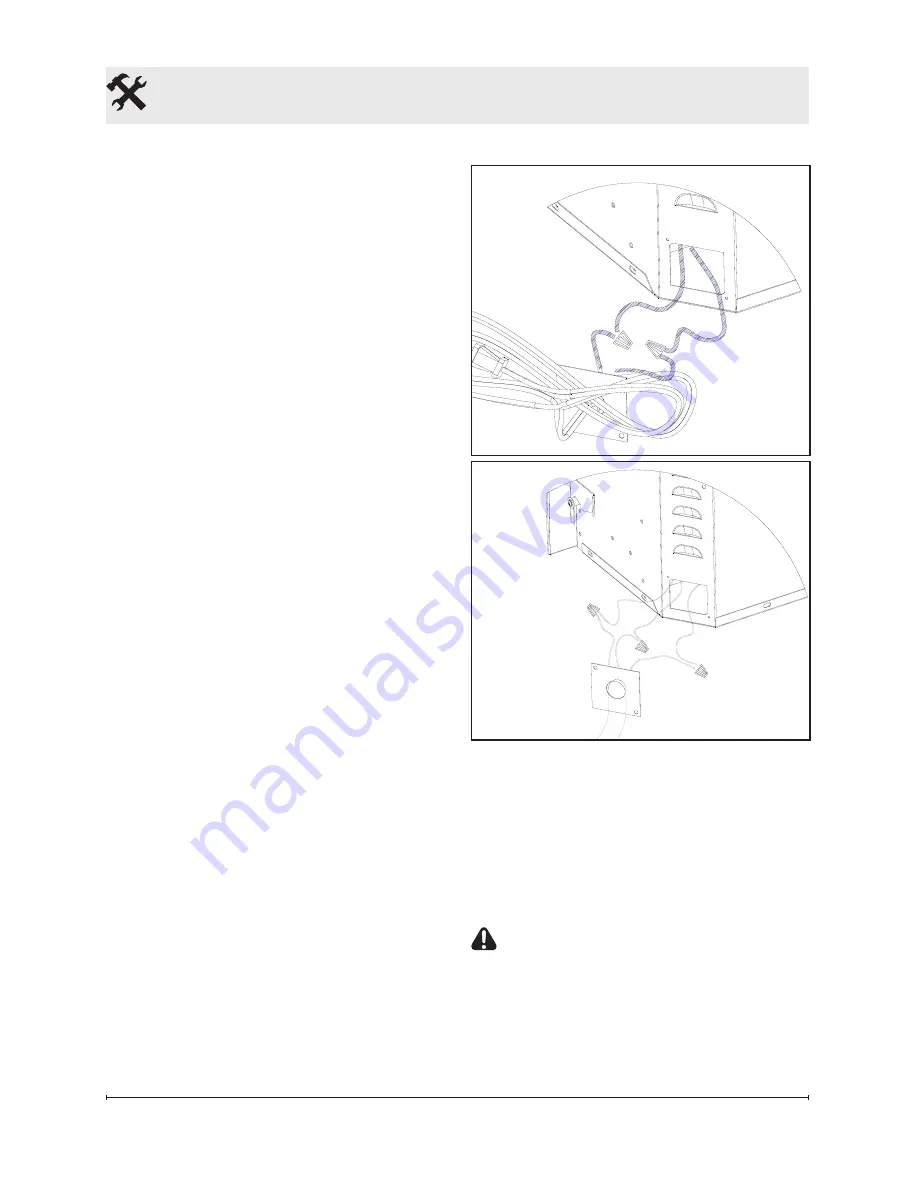
Option #1
- The power cord can
be lead from behind the trim
and along the wall to an outlet
near the fireplace.
Option #2
- A new outlet can be
installed inside the new frame
construction. Plug the unit into
a 15 Amp/120 Volt outlet.
!
NOTE:
A 15 Amp, 120 Volt
circuit is required. A dedicated
circuit is preferred but not es-
sential in all cases. A dedi-
cated circuit will be required
if, after installation, the circuit
breaker trips or fuse blows
on a regular basis when the
heater is operating. Additional
appliances on the same circuit
may exceed the current rating
of the circuit breaker.
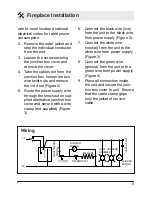
Option #3
- Hardwire
1. Wire a dedicated, properly
fused circuit with 120 Volt,
15
Amp rating. Allow up to 8 feet
of service cable for connect-
ing power supply to junction
box on fireplace when install-
ing after finishing wall.
CAUTION:
Use two conduc-
tor, non-metallic sheath cable
with ground wire (3 wires total)
for the incoming power supply on
fireplace inserts. Use appropriate
Figure 2
Figure 3


