9
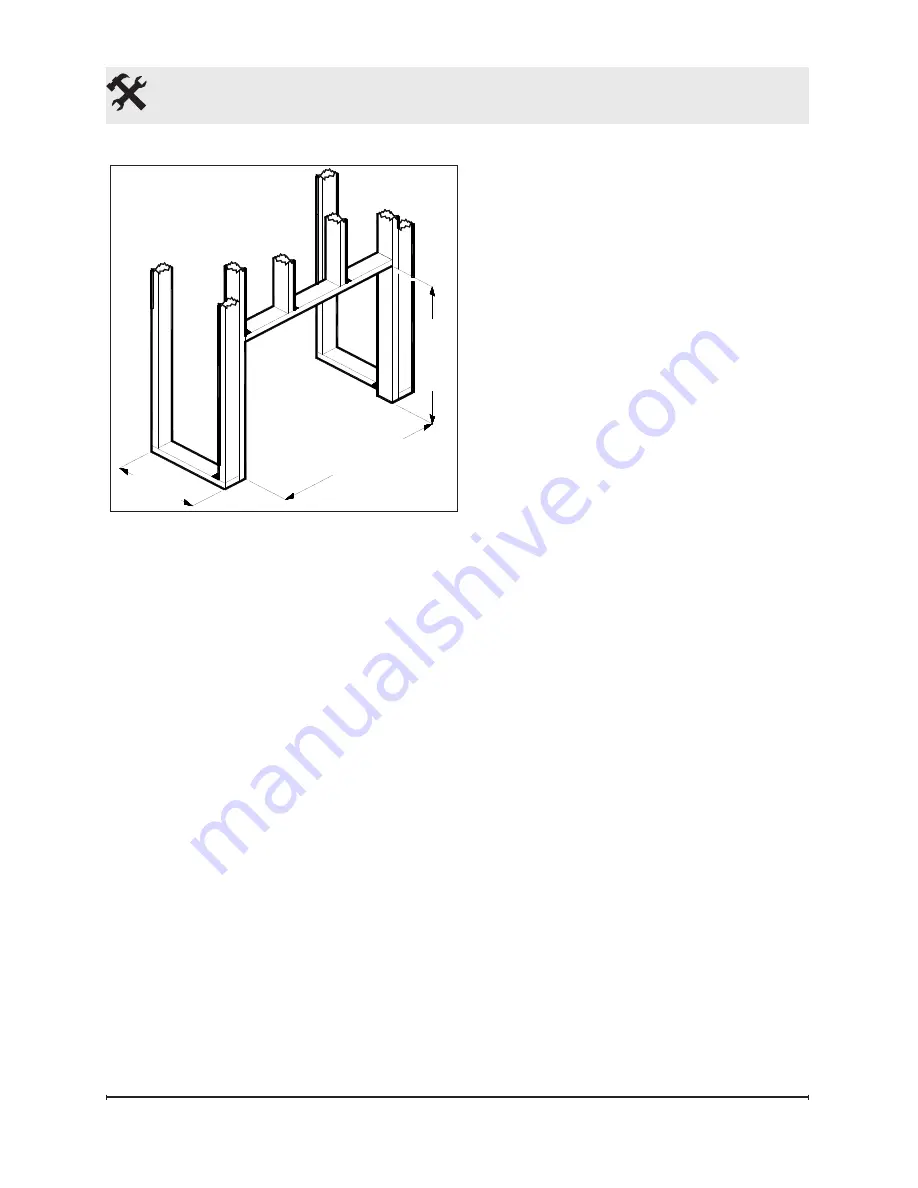
Fireplace Installation
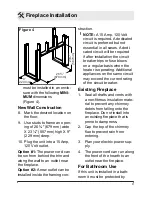
must be installed in an enclo
-
sure with the following
MINI-
MUM
dimensions
(Figure 4).
New Wall Construction
8. Mark the desired location on
the floor.
9.
Use studs to frame an open-
ing of 26 ¾" (679 mm) wide
X 23 ⅛" (587 mm) high X 9"
(229 mm) deep.
10. Plug the unit into a 15 Amp,
120 Volt outlet.
Option #1:
The power cord can
be run from behind the trim and
along the wall to an outlet near
the fireplace.
Option #2:
A new outlet can be
installed inside the framing con
-
26 ¾”
(679 mm)
23⅛”
(587mm)
9”
(229 mm)
Figure 4
struction.
!
NOTE:
A 15 Amp, 120 Volt
circuit is required. A dedicated
circuit is preferred but not
essential in all cases. A dedi
-
cated circuit will be required
if after installation the circuit
breaker trips or fuse blows
on a regular basis when the
heater is operating. Additional
appliances on the same circuit
may exceed the current rating
of the circuit breaker.
Existing Fireplace
1.
Seal all drafts and vents with
a non-fibrous insulation mate
-
rial to prevent any chimney
debris from falling onto the
fireplace. Do not install into
an existing fireplace that is
prone to dampness.
2. Cap the top of the chimney
flue to prevent rain from
entering.
3. Plan your electric power sup
-
ply.
4. The power cord can run along
the front of the hearth to an
outlet near the fireplace.
For Bathroom Use
If this unit is installed in a bath-
room it must be protected by


