background image


3


Welcome & Congratulations

Thank you and congratulations for choosing to purchase an electric 

heater from Dimplex, the world leader in electric heaters.

Please carefully read and save these instructions.


CAUTION: 

 Read all instructions and warnings carefully before 

starting  installation. Failure to follow these instructions may result  

in a possible electric shock, fire hazard and will void the warranty.
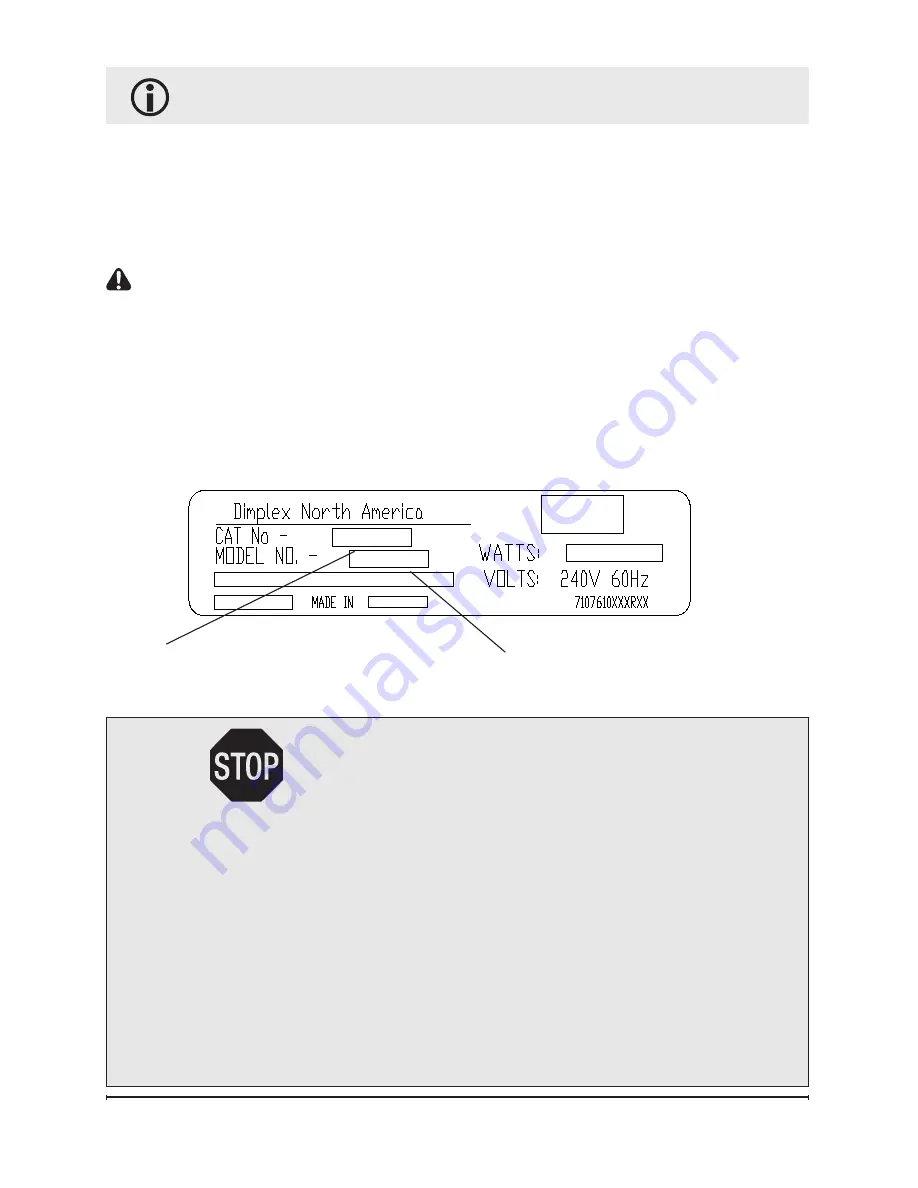
Please record your model and serial numbers below for future 

reference: model and serial numbers can be found on the Model and 

serial number Label of your heater.

NO NEED TO RETURN TO THE STORE

Questions with operation or assembly?  Require Parts Information?

Product under Manufacturer’s Warranty?

Contact us at:   

 www.dimplex.com/customer_support

                    For Troubleshooting and Technical support


OR


Toll-Free 1-888-DIMPLEX

 (1-888-346-7539)


      Monday to Friday 8:00 a.m. to 4:30 p.m. EsT


            Please have your model number and product serial  


            number ready. (see above)

Model Number 

Label

Serial Number

Summary of Contents for DGWH4031

Page 1: ...For your safety always comply with all warnings and safety instructions contained in this manual to prevent personal injury or property damage To view the full line of Dimplex products please visit www dimplex com For service questions please call Dimplex at 1 888 346 7539 For sales inquiries please call Sylvane at 1 800 934 9194 or visit sylvane com ...

Page 2: ...asize CAUTION Procedures and techniques which if not carefully followed will result in damage to the equipment Warning Procedures and techniques which if not carefully followed will expose the user to the risk of fire serious injury or death Welcome Congratulations 3 Important Instructions 4 Heater Installation 7 Operation 9 Maintenance and Cleaning 10 Warranty 10 Replacement Parts 11 ...

Page 3: ...d the warranty Please record your model and serial numbers below for future reference model and serial numbers can be found on the Model and Serial Number Label of your heater NO NEED TO RETURN TO THE STORE Questions with operation or assembly Require Parts Information Product Under Manufacturer s Warranty Contact us at www dimplex com customer_support For Troubleshooting and Technical Support OR ...

Page 4: ...ating and unattended Always unplug the heater when not in use Do not operate any unit with a damaged cord or plug or if the heater has malfunctioned or if Important Instructions the heater has been dropped or damaged in any manner Return heater to authorized service facility for examination electrical or mechanical adjustment or repair Do not use outdoors The heater is not intended for use in bath...

Page 5: ...mmended by the manufacturer may cause fire electric shock or injury to persons This heater is not intended for use with an extension cord Plug cord directly into appropriate wall receptacle This heater includes a visual alarm red light to warn that parts of the heater are overheating If the red light turns on immediately turn heater off and inspect for any objects on or adjacent to the heater that...

Page 6: ... shown on Figure 1 No adapter should be used with this unit The type outlet is a 240 Volt grounding outlet When properly installed it provides a ground connection through the cord to the heater to protect the operation from electric shock Figure 1 Plug and outlet configuration for 240 Volt 20 Amp circuit Ground Plug Outlet ...

Page 7: ...ceiling to top of heater Ensure the air discharge is parallel to or away from walls Installation with wall ceiling Hanger Bracket NOTE To prevent personal injury always use a licensed electrician to install new outlets or circuits Use of the hanger bracket allows the unit to be rotated approx 45 in each direction from centre and tilted in a range of 45 while suspended from a wall or ceiling NOTE T...

Page 8: ...age 3 bolt shaft and insert in hanger bracket opening and hold them in position Slide lock washer and thread 4 on T Handle onto carriage bolt turning to tighten Hanger Bracket Mounting Options Air In Air Out Hanger Bracket Carriage Bolt Spacer Lock Washer T Handle Figure 3 ...

Page 9: ...s desired temperature turn thermostat knob counterclockwise until you hear click Leave in this position to maintain room temperature at this setting For additional heat turn clockwise until you hear click again and heater will turn on To shut heater off turn thermostat knob counterclockwise all the way The yellow power indicator light will turn off NOTE Heater is equipped with a fan delay to dissi...

Page 10: ...e incurred for installation removal from service or transportation costs Any such defect should be brought to the attention of the Dealer where the product was purchased and is authorized to repair or replace within the terms of this warranty The Company s only obligation under this warranty will be at its sole option to repair or replace any part proving defective or to refund the purchase price ...

Page 11: ...G8 Replacement Parts Fan Blade 1900010022RP Motor Kit 2000020022RP Fan Delay 00033002RP Thermostat 13678001RP Cutout 0009112RP Knob Clear 02210011RP Hanger Bracket 1005900168RP For service questions please call Dimplex at 1 888 346 7539 For sales inquiries please call Sylvane at 1 800 934 9194 or visit sylvane com ...

Reviews: