background image


7

  WARNING:  

Keep combus-

tible materials, such as furniture, 

pillows, bedding, papers, clothes, 

and curtains at least 3 feet (0.9 

m) from the front of the heater 

and keep them away from the 

sides and rear

.


Stove Installation 

3.  Make sure the unit's Main 

On/Off switch is switched Off 

(refer to operating instruction 

section).

4.  Plug the unit into a 15 Amp, 

120 VAC outlet directly.  The 

heater is not intended for use 

with an extension cord.


Operation

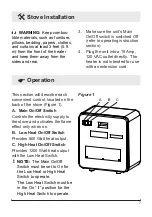
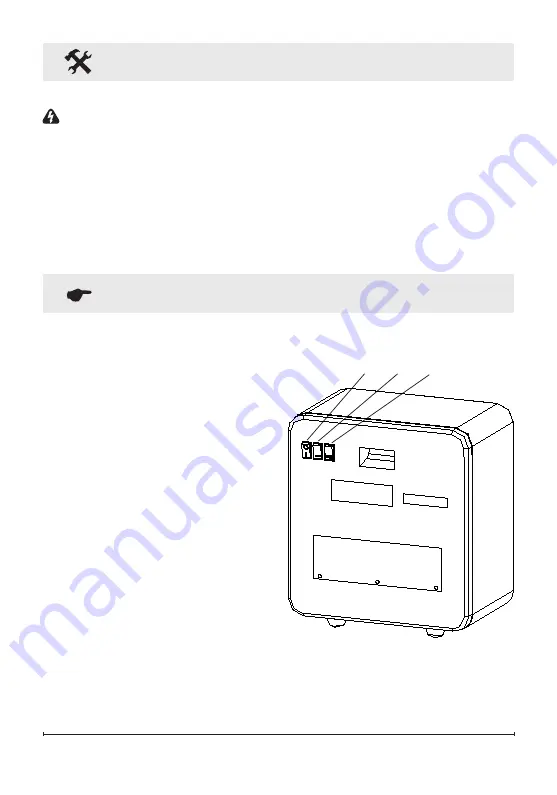
This section will describe each 

convenient control, located on the 

back of the stove (Figure 1).

A .  Main On/Off Switch

Controls the electricity supply to 

the stove and activates the flame 

effect only when on.

B .  Low Heat On/Off Switch

Provides 600 Watt heat output.

C .  High Heat On/Off Switch

Provides 1200 Watt heat output 

with the Low Heat Switch.

!

 NOTE:  

The Main On/Off 

Switch must be set to On for 

the Low Heat or High Heat 

Switch to operate.

  The Low Heat Switch must be 

in the On “ 

I

 ” position for the 

High Heat Switch to operate.

Figure 1

A

B

C

Summary of Contents for DMCS13R

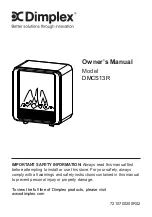
Page 1: ...ad this manual first before attempting to install or use this stove For your safety always comply with all warnings and safety instructions contained in this manual to prevent personal injury or prope...

Page 2: ...emphasize CAUTION Procedures and techniques which if not carefully followed will result in damage to the equipment WARNING Procedures and techniques which if not carefully followed will expose the use...

Page 3: ...r Manufacturer s Warranty Contact us at www dimplex com customer_support For Troubleshooting and Technical Support OR Toll Free 1 888 DIMPLEX 1 888 346 7539 Monday to Friday 8 00 a m to 4 30 p m EST I...

Page 4: ...Never locate this stove where it may fall into a bathtub or other water container IMPORTANT INSTRUCTIONS Do not run cord under carpeting Do not cover cord with throw rugs runners or the like Arrange c...

Page 5: ...not burn wood or other materials in the electric stove Do not strike the front glass Always use a certified electrician should new circuits or outlets be required Always use properly grounded fused an...

Page 6: ...ping or snagging to reduce the risk of fire electric shock or injury to persons Construction and electrical outlet wiring must comply with local building codes and other applicable regulations to redu...

Page 7: ...ntended for use with an extension cord Operation This section will describe each convenient control located on the back of the stove Figure 1 A Main On Off Switch Controls the electricity supply to th...

Page 8: ...ra bulb with a E 12 small socket base 60 Watt rat ing Example GE 60BC or Philips 60 CTC Do not exceed 60 Watts Replacement 1 Unplug the unit from power outlet 2 On the back of the stove remove the thr...

Page 9: ...the front glass panel can be cleaned with a damp cloth The front glass panel should be completely dried with a lint free cloth to prevent water spots To prevent scratching do not use abrasive cleaners...

Page 10: ...e free from defects in mate rial and workmanship for a period of 90 days from the date of the first purchase of such product The limited 90 day warranty period also applies to any implied warranties t...

Page 11: ...BASIS FOR ANY INDIRECT SPECIAL PUNITIVE EXEMPLARY CONSEQUEN TIAL OR INCIDENTAL LOSS COST OR DAMAGE ARISING OUT OF OR IN CONNECTION WITH THE SALE MAINTENANCE USE OR INABILITY TO USE THE PRODUCT EVEN I...

Reviews: