3
Remote Control
The stove is supplied with a radio frequency remote control.
This remote control has a range of approximately 50 feet
(15.25 m), it does not have to be pointed at the stove and
can pass through most obstacles (including walls). It is
supplied with one of hundreds of independent frequencies
to prevent interference with other units.
!
NOTE:
Before attempting any operation with the
remote, pull the plastic insulator strip out from between
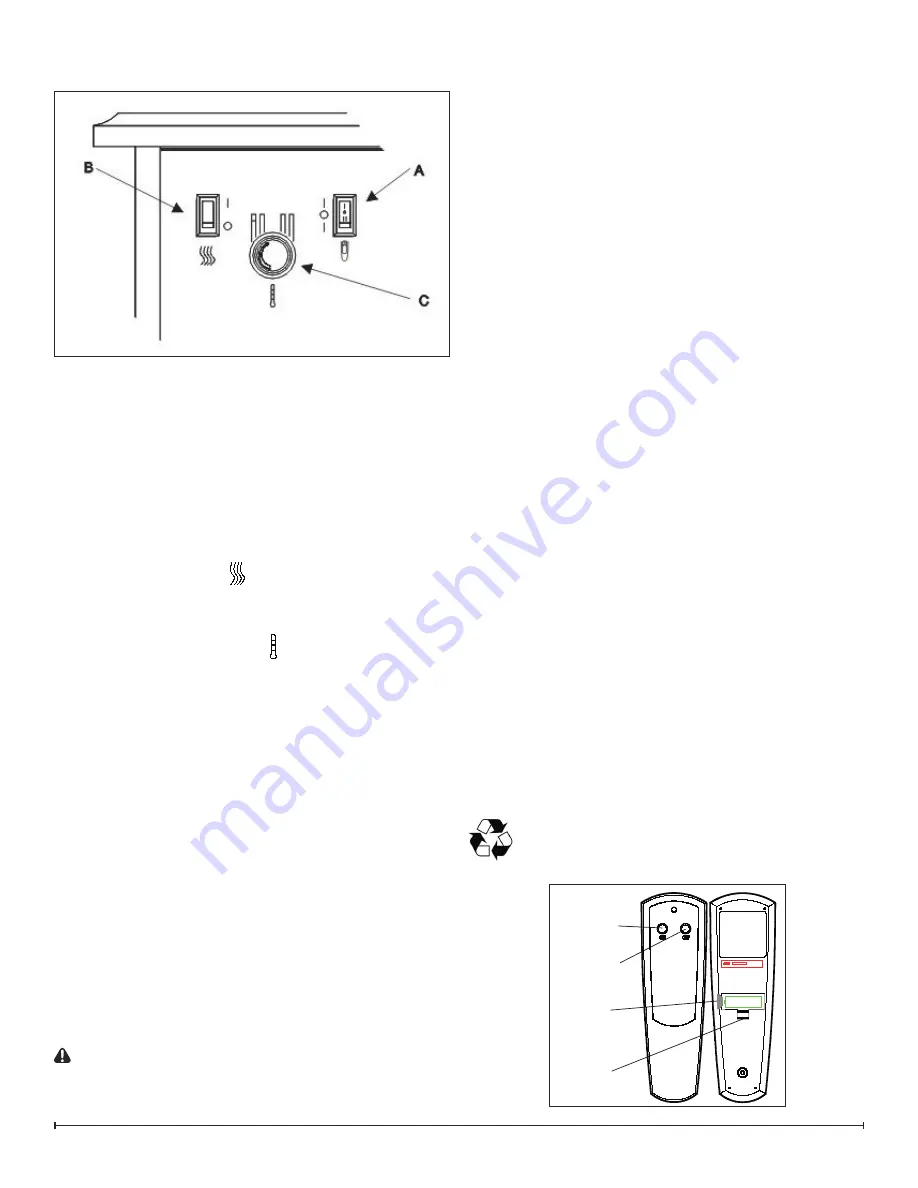
the remote casing and battery cover (Figure 2).
Remote Operation
The stove is supplied with an integrated on/off remote
control
!
NOTE:
Ensure that the stove Main ON/OFF Switch is
set to the remote control setting.
To operate, push the ON button to turn stove on, push the
OFF button to turn the stove off.
Remote Control Initialization/Reprogramming
If the hand held transmitter or receiver board has been
replaced, follow these steps to initialize the transmitter and
receiver:
Set the main power switch to OFF.
1.
Wait a minimum of five (5) seconds and set the 3
2.
Position Switch to the “=” position (Figure 1A).
Within
3.
10 seconds of re-acquiring power, press the ON
button located on the remote control transmitter.
!
NOTE:
You will have only 10 seconds to perform this
last step. Failure to do so will result in these steps needing
to be followed again.
This will synchronize the remote control transmitter and
receiver.
Battery Replacement
To replace the battery:
Slide battery cover open on the hand held transmitter
1.
(Figure 2).
Install one (1) 12-volt (A23) battery in the battery
2.
holder.
Close the battery cover
3.
Battery must be recycled or disposed of properly.
Check with your Local Authority or Retailer for
recycling advice in your area.
OPERATION
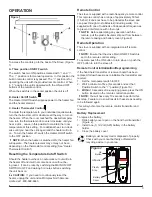
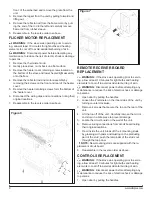
To access the controls go to the back of the Stove. (Figure
1)
A. Three position ON/OFF switch
The switch has two ON positions marked with “-“ and “=”.
The “-“ position is for manual operation. In this position the
built-in remote control is bypassed. The “=” position is for
operating the unit with the provided remote control. When
in “=” position the unit is operated with the ON and OFF
buttons of the remote control.
When the switch is in the center position the unit is off.
B. Heater On/Off Switch
The Heater On/Off Switch supplies power to the heater fan
and the heater element.
C. Heater Thermostat Control
To adjust the temperature to your individual requirements,
turn the thermostat control clockwise all the way to turn on
the heater. When the room reached the desired tempera-
ture, turn the thermostat knob counter clockwise until you
hear a click. Leave in this position to maintain the room
temperature at this setting. For additional heat, turn clock-
wise until you hear the click again and the heater will turn
on. To turn the heater off, switch the Heater On/Off switch
to the OFF position.
!
NOTE:
When the heater is switched ON, the heater fan
will operate. The heater element may or may not be on,
depending on the thermostat control setting (See “Heater
Thermostat Control”)
Resetting the Temperature Cutoff Switch
Should the heater overheat, an automatic cut out will turn
the heater off and it will not come back on without be-
ing reset. It can be reset by switching the MAIN ON/OFF
SWITCH to OFF and waiting 5 minutes before switching
the unit back on.
CAUTION:
If you need to continuously reset the
heater, unplug the unit and call Dimplex North America
Limited at 1-800-668-6663.
Figure 2
Off Button
On
Button
Battery
Cover
Plastic
Strip
Figure 1

