3
To disable:
Press and holding the
button on the unit for 5 seconds
will disable the heater, indicated by the temperature dis-
play flashing.
To enable:
With the temperature displayed (it will be flashing), press
and hold the
button on the unit for 5 seconds to reacti-
vate the heating controls.
D - Down Lighting On/Off
Turns the down lighting On and Off.
E -
Sleep Timer
This icon will light up with a blue light when using the Timed
Shut-OFF function. A time will be displayed on the main dis
-
play ranging from 10(minutes) to 6 (hours).
Resetting the Temperature Cutoff Switch
Should the heater overheat, an automatic cut out will turn
the heater off and it will not come back on without being
reset. It can be reset by unplugging the unit and waiting 5
minutes before plugging the unit back in.
CAUTION:
If you need to continuously reset the heater,
unplug the unit and call technical support at
1-888-346-7539.
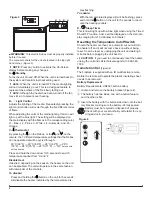
Remote Control
(Figure 2)
The fireplace is supplied with an IR multifunction remote.
Before the remote will operate the plastic insulating sheet
needs to be removed.
Battery Replacement
Battery Requirements: CR2025 button battery
①
Locate and remove the battery bracket (Figure 2).
②
The battery has two sides, one with a button feature,
and the other is flat.
③
Insert the battery with the button side down into the bat-
tery bracket, making sure the battery is firmly seated.
Battery must be recycled or disposed of properly.
Check with your Local Authority or Retailer for recy-
cling advice in your area.
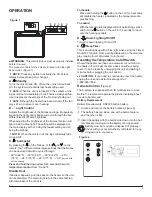
OPERATION
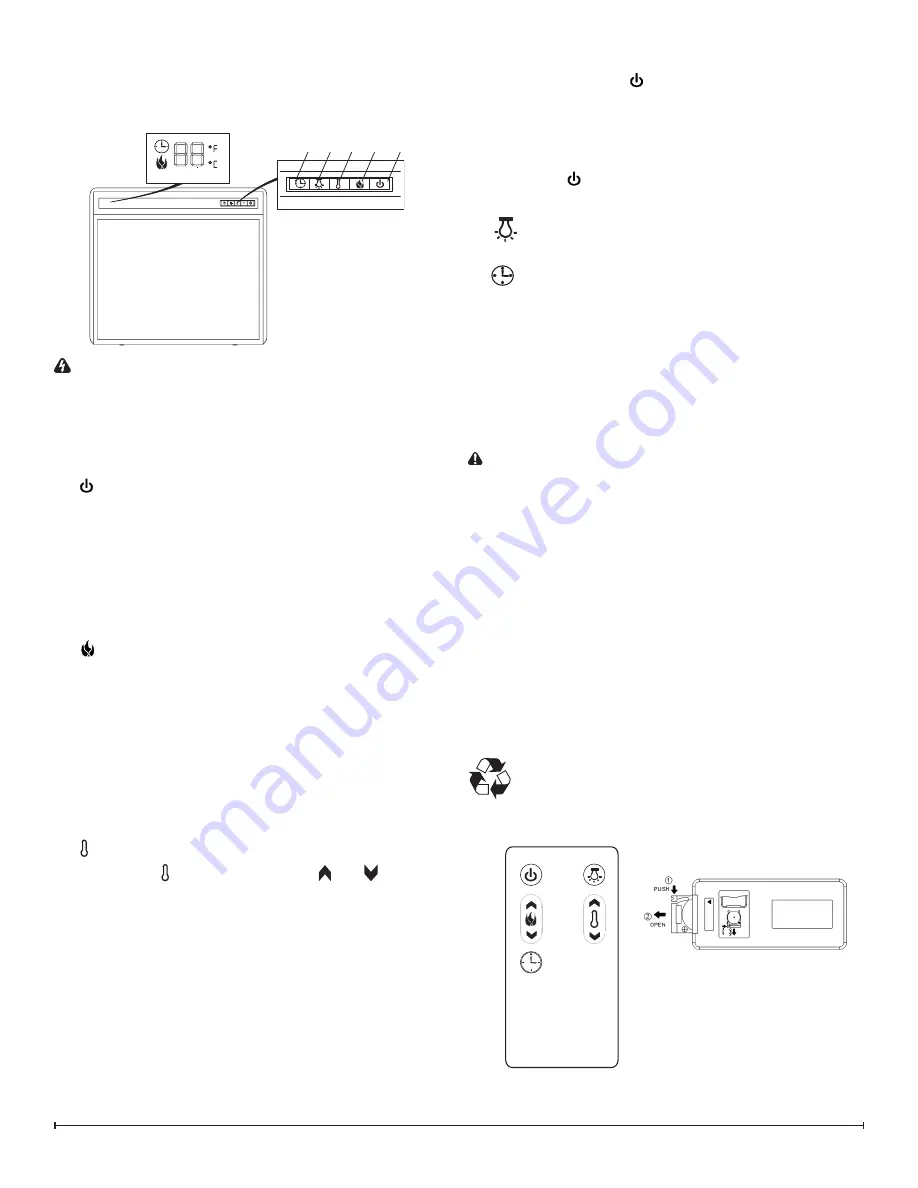
Figure 1
WARNING:
This electric firebox must be properly installed
before it is used.
The manual controls for the unit are located in the top right
hand corner. (Figure 1)
!
NOTE:
Press any button to activate the On-Screen
display before making any changes.
A - Standby
Turns the unit On and Off. When the unit is turned back
On, the system will recall its last heat setting used.
!
NOTE:
When the unit is turned OFF the embers of the
log set will not immediately go out. This is a designed fea-
ture to represent the embers of the fire slowly fading out
!
NOTE:
Although the heater has been turned off the fan
may still run to prevent over heating.
B - Light Control
Adjusts the brightness of the flames and logs. Repeatedly
pressing the light control button will cycle through the five
different levels of flame brightness.
When adjusting the brightness of the flames this icon will
light up with a blue light. The setting will be displayed on
the main display with L1 being the lowest setting and L5
being the highest.
!
NOTE:
When the unit is in L4 the logs will slowly fade
On and Off.
C - Thermostat
By pressing the
, on the firebox, or the
and , on the
remote, the 7 different temperature settings that the firebox
can be operated at will be cycled through.
60°C (99°F) → 30°C (86°F) → 28°C (82°F) → 26°C
(78°F) → 24°C (75°F) → 22°C (71°F) → “OF”
(for use with-
out the heater)
Press and hold the down arrow for 5 seconds to switch
temperature readout from °C and °F.
Disable Heat
If desired, depending on the season, the heater on the unit
can be disabled. The unit will operate in the same fashion,
with remainder of the controls.
A
B
C
D
E
Figure 2


