10
www.dimplex.com
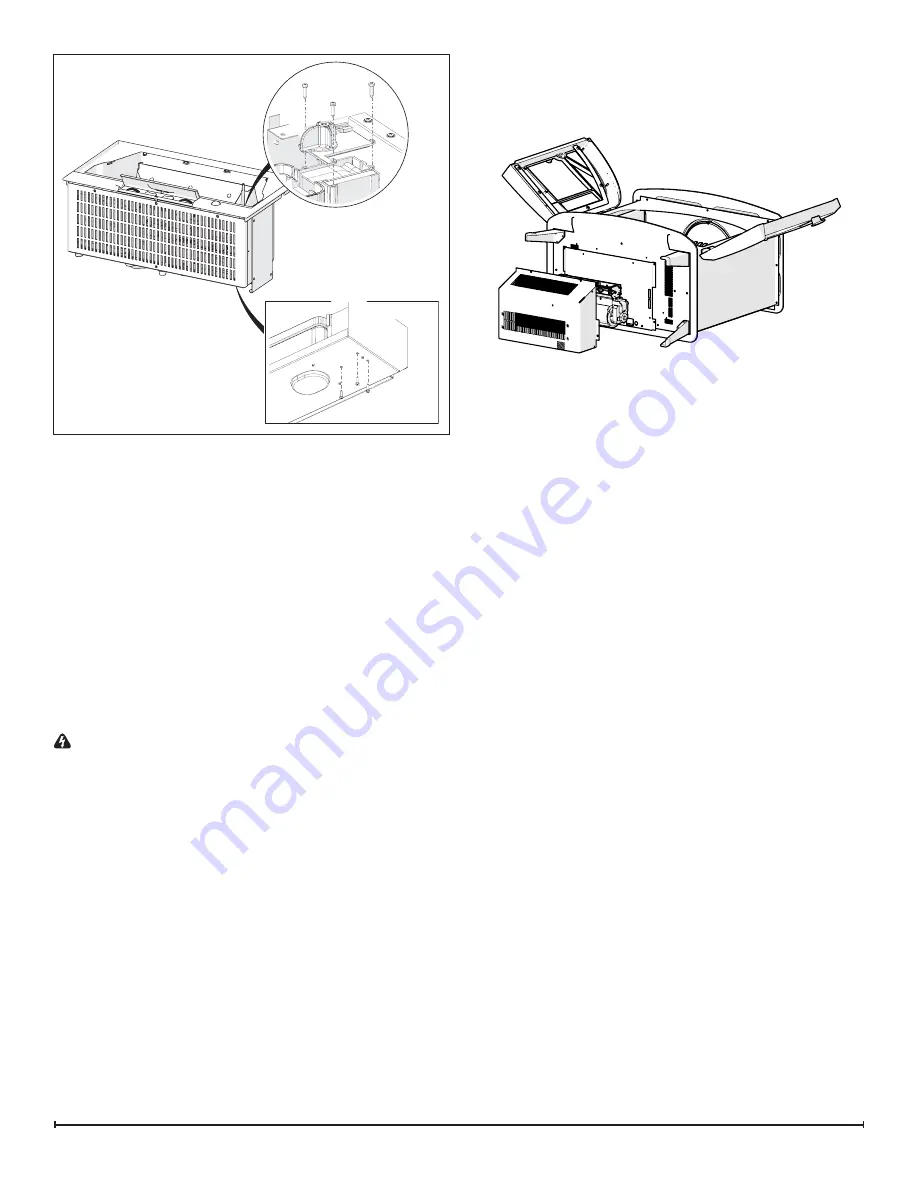
Figure 6
semble the remainder of the cassette in revers order
from the instructions above.
• If replacing the housing, remove the 3 screws attaching
the base to the cassette. (Figure 6)
8. Attach new fan housing base to the cassette.
9. Transfer the filter from the old housing to the new hous-
ing.
10. Reinstall the fan motor and reconnect the wire.
11. Re-assemble the remainder of the cassette in reverse
order from the instructions above.
HEATER ASSEMBLY REPLACEMENT
Tools Required:
Phillips head screwdriver
Flat head screwdriver
WARNING:
Disconnect power before attempting any
maintenance to reduce the risk of electric shock or damage
to persons.
!
NOTE:
Ensure that all of the components that
contain water have been emptied before performing any
maintenance.
1. Disconnect and remove the log set from the unit and
put it in a safe place.
2. Lay the unit on it’s back to access the heater assembly
area.
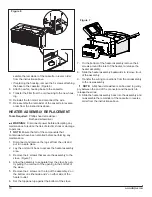
3. Remove the 4 screws that secure the assembly to the
stove. (Figure 7)
4. Allow the assembly to separate from the stove by gen-
tly pulling the cord out of the opening in the bottom of
the stove.
5. Remove the 2 screws on the top of the assembly, 2 on
the bottom on either side and 2 on either side of the
heater outlet.
6. Set the top panel up against the bottom of the stove.
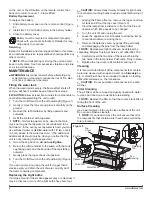
Figure 7
7. On the bottom of the heater assembly remove the 4
screws around the inlet of the heater, to release the
heater assembly.
8. Slide the heater assembly backwards to remove it out
of the assembly.
9. Transfer the wiring connections from the old assembly
to the new assembly.
!
NOTE:
A flat head screwdriver can be used to gently
pry between the end of the connector and the switch to
release the wires.
10. Slide the heater assembly back into the assembly and
re-assemble the remainder of the cassette in reverse
order from the instructions above.


